

By the end of this hands-on guide you’ll have replaced or installed a properly fitted, weatherproofed, and secure garage entry door with a reinforced frame, and know when to call a pro. Typical homeowner time: 6–12 hours for a single door replacement (DIY intermediate). Skill level assumed: intermediate DIY (carpentry + tools).
This guide focuses on the garage side entry door and frame — the smaller, pedestrian door that provides access to the garage interior — and treats it as separate but integrated from the main garage door. Read on for inspection, measurement, material choice, installation step-by-step, weatherproofing, security upgrades, troubleshooting and costs.
Understanding Garage Entry Doors and Side Doors
A well-chosen garage side entry door connects your home to the garage or provides external access to the garage without raising the main overhead door. These doors serve functional, security and thermal roles: they must seal against weather, fit into a structural frame, and integrate with the garage’s security plan. Typical placement is on a side elevation or the rear of the garage; they come in steel, fiberglass and wood variants, with or without insulation.
Common uses for a garage side door include daily access for family members, a service entrance, dog access, or a path for trash bins. Because these doors are smaller than the main overhead door, they often receive less attention yet are critical for energy retention and security—think of the side entry as a shield against the elements and the first line of defense for the garage interior.
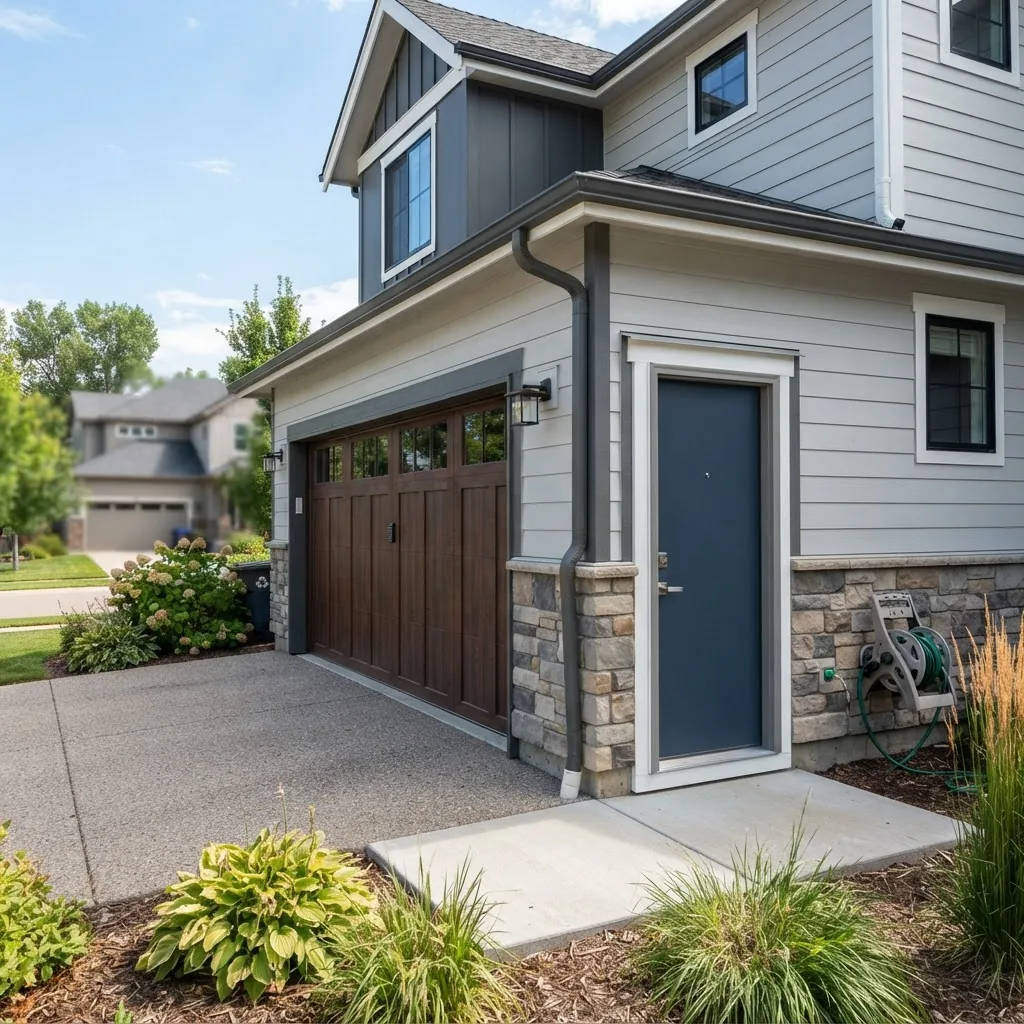
What is a Garage Side Entry Door?
A garage side door (also called a personnel door or service door) is a standard-height exterior door installed in the garage wall for pedestrian access. It differs from the main overhead garage door in size, construction, and purpose. Side entry doors are typically 32–36 inches wide and 78–80 inches tall, although custom sizes exist. They may include glazing (windows) for light, thresholds for water control, and insulated cores for thermal performance.
Definition components: jamb (the vertical frame pieces), head (top frame), threshold (bottom weather barrier), and stop (the trim that the door seals against). This guide uses those terms when walking through frame replacement and sealing steps.
Differences Between Garage Side Entry Doors and Main Garage Doors
| Feature | Garage Side Entry Door | Main Garage Door |
|---|---|---|
| Primary function | Pedestrian access, weather barrier, security | Vehicle access, insulation for larger opening |
| Size & clearance | Standard 32–36″ × 78–80″; typical 2″ swing clearance | 8’–18′ widths, requires track/roller clearance |
| Materials | Steel, fiberglass, wood — often solid or insulated | Sectional steel, insulated panels, wood composite options |
| Hardware | Standard door hardware: deadbolt, keyed lock, hinges | Tracks, springs, opener, rollers — more mechanical components |
| Installation complexity | Moderate — carpentry and shimming; fasteners to framing | High — spring tension and balance require pros for safety |
| Security considerations | Deadbolts, reinforced strike plates, frame reinforcement | Opener security, rolling code remotes, strong sectional panels |
Because the side entry door is simpler mechanically, homeowners can often handle replacement themselves — but the frame must be plumb, square and tied to structure to prevent wind and security failures.
Transition: With a clear sense of what separates the pedestrian entry from the main garage access, next we choose the right door and frame for replacement.
Choosing the Right Garage Side Entry Door and Frame Replacement
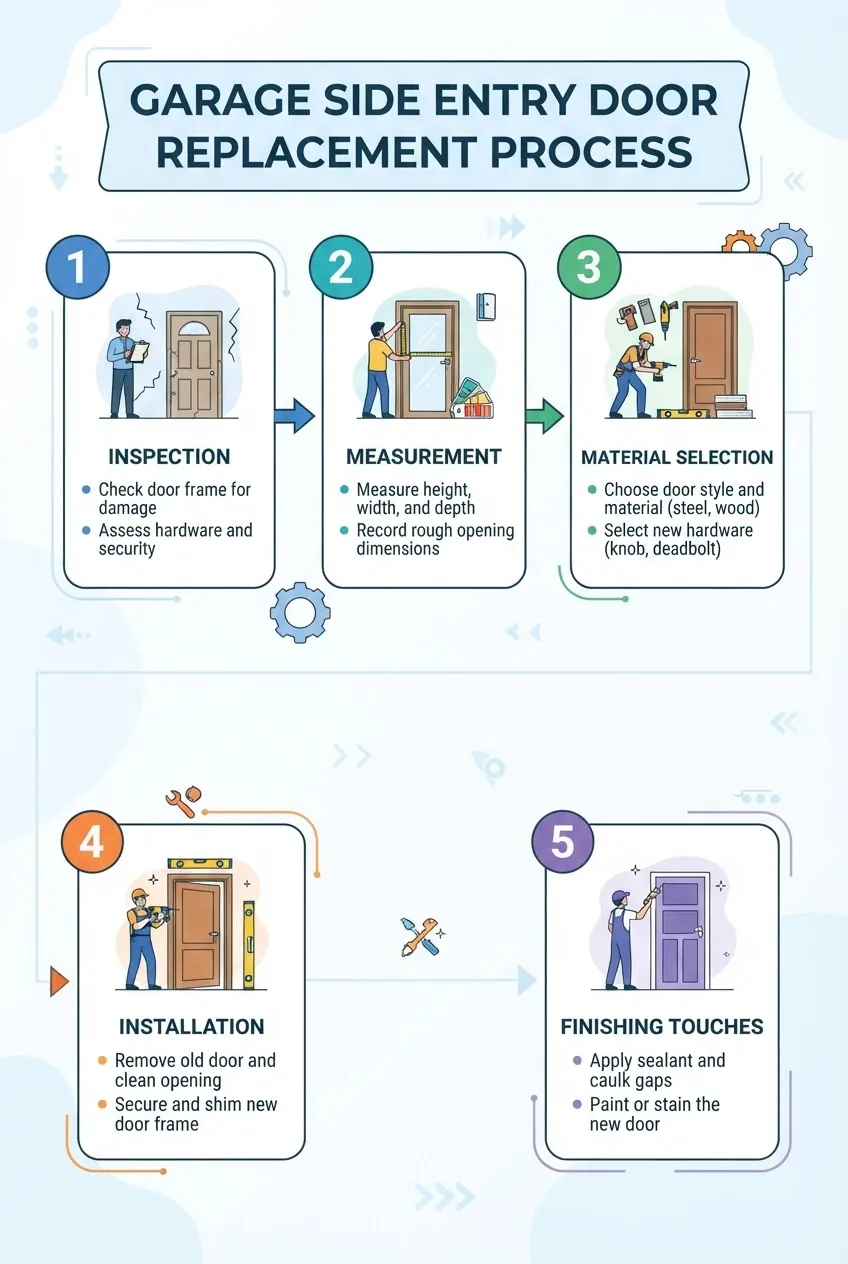
This section guides you through deciding whether to replace, choosing materials, measuring for an accurate fit, and preparing a budget. Use the links below for deeper research on sizes, materials, and ratings.
For common door sizing and style parallels consult 10×8 garage door sizing and styles and when selecting top-rated options review best-rated garage doors for residential use.
When to Replace Your Garage Side Entry Door and Frame
- Rot or decay in the jambs or threshold: If rot has eaten more than 20–25% of the jamb cross-section or you can push a screwdriver >1/4″ into the jamb, replace the frame and door.
- Warping or sticking despite adjustment: Doors that still stick after hinge/strike adjustments usually indicate a warped frame; replacement prevents recurring problems.
- Persistent water entry: Water pooling at the threshold after heavy rain signals failed flashing or insufficient threshold height; replace threshold and lower jambs when necessary.
- Security upgrades required: Older hollow-core factory doors without reinforced strike plates or deadbolt prep should be replaced if you plan to add modern locks.
- Insulation/energy loss: If the garage is conditioned or attached to living space and you feel drafts greater than 0.3 in H2O (hand test), choose an insulated replacement.
- 180° hinge or hardware failure: Visible cracked welds, stripped screw holes, or loose hinges after 2–3 seasonal adjustments justify full replacement rather than patch repair.
Signs such as mold, insect damage, or compromised structural header require immediate replacement and possibly framing repairs.
Selecting Materials and Styles for Replacement Doors
Material choice is a balance of durability, maintenance, cost and aesthetics. Below are the common exterior garage door materials and what to expect:
- Steel: Low maintenance, excellent security, and often the lowest installed cost. Steel doors can be insulated (polyurethane or polystyrene cores). According to a 2024 industry report, steel doors typically offer 30–50 years of service with proper maintenance.
- Fiberglass: Resists denting and moisture; good for coastal climates. Fiberglass performs well in freeze-thaw conditions and can mimic wood grain with less maintenance.
- Wood: High aesthetic value but requires seasonal sealing or painting; prone to warping in high-moisture climates. Wood is chosen primarily for curb appeal.
When matching style to your garage, consider the door’s face design: flush, paneled, or with windows. If your home uses flush-panel garage doors, see flush panel garage door design options for aesthetics you can mirror in the side entry. For performance comparisons across materials check garage door material options and performance.
Insulation trade-offs: insulated doors add R-value and reduce condensation but increase cost and weight. Read about benefits of insulated vs non-insulated garage doors before committing. If budget is a factor, compare long-term energy savings versus upfront cost using the insulated garage door replacement costs resource.
For contemporary design inspiration see modern garage door design trends.
Measuring for Garage Side Entry Door and Frame Replacement
Accurate measurement prevents costly returns. Use a 25-foot tape, level, and a notepad. Record three measurements for width and height: top, middle and bottom for width (A, B, C) and left, center, right for height (D, E, F).
- Measure rough opening width: Measure inside-to-inside of jamb at top, middle and bottom. If variance >1/8″ you must plane or shim; if >3/8″ it may require framing adjustment.
- Measure rough opening height: From sill to underside of header at three points. Record smallest value — door frames must fit the smallest accurate opening.
- Measure jamb thickness: Measure wall depth from interior finish to exterior sheathing at hinge side; this determines jamb extensions.
- Check squareness: Use a 6′ level or a 3-4-5 triangle to verify corner squareness; if corners differ by more than 1/4″ per side over the opening, plan on reframing or heavy shimming.
For framing details consult garage door framing and construction guidelines and standard garage door sizes and dimensions for sizing norms.
Transition: With measurements and materials chosen, move on to preparing the entrance and installing the new frame and door.
Garage Entry Door Installation Tips and Best Practices
Installation success hinges on prep, a plumb and square frame, correct shimming, fastener pattern, secure hardware, and weatherproofing. Below are step-by-step procedures drawn from pro practice and DIY-tested techniques.
Preparing the Garage Entrance for Installation
- Remove the old door and hardware: Unscrew hinges and strike plate; remove door from frame with at least two people if heavy. Label hinge screws and hardware for reference.
- Assess and remove rotted materials: Cut away damaged jambs with a circular saw set to the exact jamb thickness and clean back to solid framing — minimum 2″ of sound wood beyond rot.
- Check and repair the structural header: If header shows sagging or splits, brace with temporary supports and replace or sister the header per local code. Consult the International Code Council (ICC) for header placement and load-bearing requirements.
- Prep the substrate and sill: Install plywood or OSB backing where jambs will fasten; flash the bottom of the rough opening with self-adhesive flashing tape across the subfloor and up the jambs 6″. Ensure the concrete slab bevel is no greater than 1/2″ over the width of the opening for an effective threshold seal.
Caution: Building codes vary locally. Before modifying load-bearing members or headers verify local code referencing at https://www.iccsafe.org/ or your municipal building department. If you encounter structural uncertainty, hire a licensed contractor.
Installing the Garage Side Entry Door and Frame
The installation below assumes a pre-hung door (door already hung in new jamb). If using a slab door, set up a new jamb first. Follow these detailed steps.
-
Set the pre-hung unit into the rough opening
With two people, lift the pre-hung door into the opening and rest on a temporary 3/4″ shim under the sill. Confirm the sill is level using a 4′ level. Leave a uniform reveal: 1/8″ gap at top and 1/8″–3/16″ at sides for paintable clearance.
-
Plumb and level the jamb using shims
Place a 6′ level against the hinge jamb and shim behind each hinge location until the jamb is perfectly plumb (bubbles centered). Shim the strike jamb so the door closes without binding and the gap at the head is even. Tighten the hinge-side jamb first by driving 3″ screws through jamb into framing at hinge locations; use structural screws at the middle and top hinge—one screw per hinge location through the shim into the framing.
Tool walkthrough — using shims: slide 1/8″ cedar or plastic shims behind jamb at hinge points; rotate shim until level is centered. Trim shim tails flush with a utility knife after securing. Using a torpedo level for the head ensures the door won’t drift when opening.
-
Fasten and check square
Install three screws per hinge through jamb into framing (long enough to hit at least 1.5″ into stud; typically #12 x 3″). Use drive screws at 30–40 ft-lbs to avoid stripping. After first set of screws, close the door and check reveal around the door: top and side gaps should be 1/8″–3/16″. If gaps exceed spec, adjust shims and repeat.
-
Secure the strike side and install deadbolt prep
With the door closed, mark strike plate location and chisel a recess 3/16″ deep for the strike plate. Use a 2–3/8″ or 2–3/4″ backset as specified for your lock. Install a Grade 2 or better deadbolt; for enhanced security use a reinforced strike plate with 3″ screws that penetrate into the framing studs.
Security note: For external safety guidelines consult the Consumer Product Safety Commission (CPSC) for door hardware and threshold recommendations.
-
Install threshold and apply flashing
Set a rated aluminum or composite threshold with a 1/8″ high ramp to shed water. Apply exterior-grade sealant (100% silicone or polyurethane) under the sill and at jamb-to-sill joints. Fasten threshold per manufacturer spacing—typically screws every 6–8″. Install self-adhesive flashing along the sill up the jambs 4–6″ and staple/fasten the jamb extension to the substrate.
-
Mount hardware, adjust latch and test operation
Install handleset and deadbolt, confirming latch engages smoothly. Test the door 50 open/close cycles by hand to seat weatherstripping and check for binding. For keyed lock integration with garage security sensors, ensure wiring is correctly routed per opener manufacturer if linking with main garage systems.
-
Trim and finish
Trim shim tails flush and caulk reveal on interior/exterior with paintable exterior-grade caulk. Paint or stain per material recommendations—steel doors typically require primer and two coats of exterior enamel; wood requires primer and full seal or spar varnish for coastal exposure.
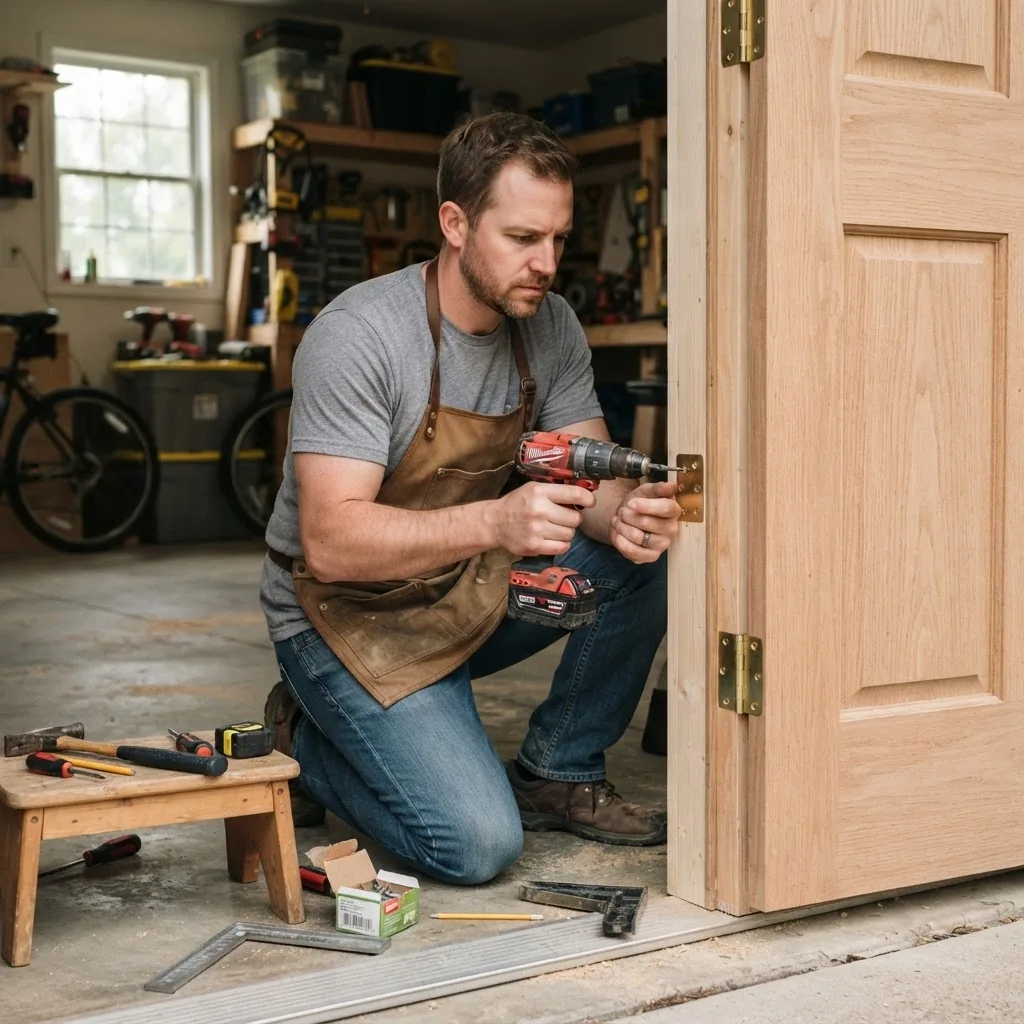
Pro tip: When driving screws into the jamb be cautious of over-torquing; strip-resistant structural screws with a 3/8″ hex head give better clamping without head failure. Always verify hardware manufacturers’ torque specs.
Weatherproofing and Sealing the Garage Entry Door
Proper weatherproofing keeps water and drafts out. Use a combination of weatherstripping, threshold selection, flashing and paint/sealants.
- Weatherstripping: Use closed-cell foam or compression bulb weatherstripping rated for exterior use across the head and strike jamb. Install to produce a 1/8″–3/16″ compression when the door closes.
- Threshold: Choose an ADA-compliant aluminum threshold with a neoprene gasket for best seal. If a raised sill is necessary to prevent water, ensure interior clearance for walking and bin movement.
- Sealing products: Use a high-quality exterior caulk such as polyurethane or 100% silicone; avoid acrylic caulks on joints subject to movement.
Product recommendations: Storm door thresholds by Pemko or National Guard thresholds for exterior use; for weatherstripping, Larson or Frost King compression bulbs perform well in high-traffic doors.
Transition: Once installed and sealed, follow a routine maintenance schedule and ensure security components are robust.
Maintenance, Security, and Troubleshooting for Garage Entry Doors
Maintaining the door extends life; security upgrades harden access; and troubleshooting prevents small issues from escalating. Below are checklists and practice-proven fixes.
Routine Maintenance for Longevity
- Quarterly: Lubricate hinges with a light lithium or silicone spray, check the deadbolt and strike plate alignment, and wash the door exterior with mild detergent.
- Semi-annually: Inspect weatherstripping for compression loss; replace if gaps exceed 1/8″. Check threshold fasteners and reseal caulk joints showing cracks wider than 1/16″.
- Annually: Repaint or re-seal wood doors, inspect jambs for rot or insect damage, and test all locks and entry sensors. Tighten screws and replace any stripped fasteners immediately.
Checklist instructions: Torque hinge screws to 30–40 ft-lbs, replace deadbolt batteries every 12 months if electronic, and verify that exterior vents or louvers are clear.
Enhancing Security for Garage Side Entry Doors
A secure garage side door should include a Grade 2 or better deadbolt, reinforced strike plate, and a solid-core or steel door. Consider the following:
- Upgrade to a 1-inch throw deadbolt and use a 3″ stainless steel screw to fasten the strike plate into the stud, not just the jamb.
- Install a reinforced jamb kit (steel channel) if the jamb is thin or damaged; this transfers the load into framing when force is applied.
- Consider a keyed or smart lock with an external tamper sensor and a door position sensor that reports to a security panel. For safety standards and consumer advice refer to the CPSC.
For professional-grade security, consult home builder recommendations at NAHB.
Troubleshooting Common Issues after Installation
Q: Door binding or uneven gaps? — Check that the frame is still plumb; tighten hinge screws and add thin shims at the hinge side to correct out-of-square conditions. If binding persists more than 1/8″, remove hinge screws and reposition shims.
Q: Drafts along head or jamb? — Confirm weatherstripping compression; replace worn bulb stripping and re-shim jamb to assure a 1/8″–3/16″ compression. For threshold leaks, raise threshold by 1/8″–1/4″ if slab allows or install a threshold extender.
Q: Sticking in high humidity? — Humidity-induced swelling in wood doors can be solved by sanding 1–2 mm from the edge (painted surfaces should be repainted) or by upgrading to a fiberglass door if humidity is chronic.
Q: Frame warping or visible bow? — If jamb bow exceeds 1/4″ over the vertical, the frame should be replaced and the rough opening reframed; shimming only masks the underlying structural issue.
Transition: Below are practitioner-experienced mistakes and a final cost and decision guide.
Cost Considerations and Final Tips for Garage Entry Door Replacement
Costs vary by material, hardware, frame repairs, and labor. According to a 2023 home improvement consumer report, homeowners reported average installed costs of $750–$2,500 for a single exterior side-entry door replacement (materials + labor). Budget factors below will help you estimate.
| Cost Factor | Typical Range | Notes |
|---|---|---|
| Door slab (material) | $150–$800 | Steel low-cost; wood high-end; insulated fiberglass mid/high |
| Pre-hung unit | $300–$1,200 | Includes jamb; faster install |
| Frame repair / reframing | $200–$1,200 | Depends on rot and structural needs |
| Hardware (locks, threshold) | $75–$500 | Grade-2 deadbolt to smart lock pricing |
| Labor (professional) | $200–$1,000 | Varies by region and complexity |
DIY vs Professional: If the rough opening is square and you’re comfortable with shimming, pre-hung installation and hardware, a competent DIYer can complete the project in a day. Hire a professional if: header repair, load-bearing changes, complex flashing against siding, or integration with alarm/opener systems is required.
For deeper brand and installer price comparisons consult the Garage Door Prices Guide for Brands and Installation Cost.
Budget tips: choose a pre-hung steel door for low cost and good security; add an insulated core only if the garage is conditioned or attached to living space. According to a 2024 industry report, adding insulation increases installed cost by an average of 20–40% but can reduce seasonal energy loss by 10–30% depending on climate (report type: industry thermal performance study).
Final installation checklist: confirm plumb/square, verify R-value if required, test deadbolt throw, and record hardware torque specs. Keep receipts and measurements for warranty claims.
Common mistakes and how to avoid them
I once installed a pre-hung door without checking the rough opening for rot; the unit settled and binding started within 3 months. Lesson: always remove old jambs back to sound framing and flash the sill before setting any new frame.
Another time I under-shim the hinge side and tightened screws only to strip the jamb—now I use structural screws and a level-guided shim protocol (shim at each hinge, check plumb, then secure).
Quick verification checklist
- Door opens/closes smoothly after 50 cycles.
- Reveal around door is uniform 1/8″–3/16″.
- Deadbolt throw is full 1″ into reinforced strike plate with 3″ screws.
- Threshold seated and flashing extends at least 4″ up jambs.
- Weatherstripping compresses 1/8″–3/16″ when closed.
- All fasteners tightened to spec; shim tails trimmed and caulked.
When to call a professional
- Visible structural issues with header, studs, or foundation settlement.
- Complex siding or brick tying where flashing must be integrated.
- When integrating electronic locks with home automation or alarm systems.
- If you lack tools to safely reframe or move heavy pre-hung units.
Case example (detailed): I replaced a steel pre-hung side entry on a suburban garage with 2″ of rot at the bottom jamb. Steps taken: removed old unit, cut out rotted jamb back 3″, sistered a 2×6 behind the jamb opening, set a pre-hung insulated steel door, shimmed at hinge locations using nylon shims, fastened with #12 x 3″ structural screws, installed an aluminum threshold with gasket, applied flashing tape and backer rod at joints, and installed a Grade 2 deadbolt. The entire project took 10 hours with one helper; total cost: $1,150 (materials + hardware). This reflects common pro practices vs DIY shortcuts: no corner-cutting on flashing or jamb reinforcement.
Transition: Below are concise final takeaways and a call to action.
Conclusion — Choose a door and frame that match local climate and security needs, measure three times and shim carefully, use reinforced hardware with long screws, and prioritize waterproofing at the sill. If structural repairs or integrated security systems are needed, hire a licensed professional. Ready for your next step? Gather measurements, choose a material, and if you need pricing comparisons check the Garage Door Prices Guide for Brands and Installation Cost to plan your budget.


