

how to change garage door — by the end of this guide you will have safely removed an old residential garage door and installed a compatible replacement, tested spring balance and reconnected the opener. Expect a full single-car replacement to take 6–10 hours for a competent beginner with one helper; two-car doors typically take 10–16 hours. Skill level: beginner to intermediate DIY (you must be comfortable with ladders, drills, and basic mechanical alignment).
Before you start, this hands-on guide lays out tools, safety checks, exact measurements, full removal and installation steps, spring adjustment procedures, and troubleshooting grounded in real-world experience. If at any point you are uncomfortable handling springs or lifting heavy panels, stop and consult a pro — see the “when to call a professional” note at the end.
Introduction to Changing Your Garage Door Yourself
This DIY garage door replacement and installation walkthrough is written for homeowners replacing typical residential sectional and roll-up garage doors. It covers selecting compatible doors, removing old components, installing tracks and panels, mounting springs, aligning the door, weatherstripping, insulation, and reconnecting the opener. You’ll also get safety checklists and troubleshooting tips derived from multiple field projects.
Why do this yourself? Savings and control: a homeowner can save 30–50% on labor compared with hiring a full-service installer, while learning to maintain the door long-term. According to a 2024 industry report, DIY home exterior projects saw an average labor savings of 42% over professional installation (source: industry report summary).
Know the limits: commercial systems, high-lift torsion spring setups, or doors with unusual dimensions often require specialty tools and training. If your garage door uses a torsion system above a certain spring diameter or the panels exceed 90 lbs each, consider professional assistance.
For a complete companion reference that mirrors this walkthrough, see our DIY garage door replacement and installation guide.
If your project is commercial or outside typical home scope, compare commercial garage door installation services to decide whether a pro is required.
Tools and Materials Needed for Garage Door Replacement
- Power drill (1/2″ variable-speed) — Use for fasteners and hinge bolts. Bring a 3/8″ and 1/2″ socket set and high-torque settings for lag screws.
- Wrench set and locking pliers — 10mm–19mm metric/SAE; include a 1/2″ breaker bar for stubborn torsion spring set screws.
- Level and plumb line — 48″ bubble level and a 6′ torpedo for accurate panel alignment and jamb plumb checks.
- Ladders — 6′ and 8′ A-frame ladders rated for 300 lb; never stand on the top two rungs.
- Steplift or panel dolly (recommended) — Helps lift and steady heavy panels safely; rent if panels exceed 70 lb.
- Safety gear — ANSI Z87.1 eye protection, cut-resistant gloves, steel-toe boots, and hard hat if working under spring loads.
- Clamps and C-clamps — For locking tracks and holding components during disassembly.
- Spring winding bars — If adjusting torsion springs; match the manufacturer’s diameter specifications. Never improvise with rebar or screwdrivers.
- Replacement hardware kit — Hinges, rollers (nylon or steel), track brackets, end bearing plates, and lag screws matched to new door.
- Weatherstripping and threshold seal — Bottom rubber seal sized to door; head and jamb seals if worn.
- Insulation panels (optional) — R-Value options: R-6 (thin foam) to R-12 (thicker insulated poly) for energy savings.
- Lubricant — Silicone or lithium-based garage door lubricant for rollers, hinges, and springs.
- Marking tools and measuring tape — 25′ tape, chalk, pencil, masking tape for labeling panels and hardware during removal.
- Shop vacuum and cleaning supplies — Remove track debris and old grease before installing new hardware.
Transition: With tools staged and a helper lined up, move to measuring and preparing the space — the next section gives step-by-step prep so removal goes smoothly.
Preparing for Garage Door Removal
Good preparation prevents surprises. This section walks you through measuring the opening, confirming door type, disconnecting the opener, and a safety checklist before touching springs or lifting panels.
- Measure the opening precisely. Measure width, height, headroom (top of opening to ceiling), side room (edge of opening to nearest obstruction) and backroom (inside wall to parked car). Record: width to nearest 1/8″, height to nearest 1/8″, headroom and side room to nearest 1/4″. These numbers determine compatibility with standard sectional doors and track kits.
- Identify door type. Determine whether the door is sectional, roll-up, or one-piece. Sectional doors have horizontal seams and rollers; roll-up doors coil on a drum. If the door coils, stop here — roll-up mechanisms differ significantly and often require specialist handling.
- Inspect springs and note system type. Look for torsion springs above the header (mounted on a torsion tube) or extension springs along the tracks. Photograph the setup for reference. Torsion systems require winding bars and strict safety steps; extension springs require safety cables.
- Disconnect the opener and secure the door. Unplug the opener and pull the emergency release cord so the door is free. Lock the door opener’s trolley in place with a C-clamp on the rail to prevent accidental operation during work.
- Label panels and hardware. Use masking tape and marker to number panels top-to-bottom and note hardware orientation. This speeds reassembly and ensures correct hinge placement.
- Clear the work area. Remove vehicles, tools not in use, and flammable materials. Allow a 6′ perimeter on both sides of the door for ladder and material staging.
- Prepare lifting help. Arrange one or two helpers depending on panel weight: panels under 50 lb can be handled by two people; panels 50–90 lb should have 2–3 helpers or a panel dolly. Panels over 90 lb require mechanical lifting or pro help.
- Review local codes and safety standards. Before cutting or altering structural attachments, consult building code guidance. See OSHA ladder safety guidance: OSHA ladder safety and local permit requirements if modifying header framing.
- Prepare containment for debris. Lay tarps and have a shop vacuum ready; insulating foam and old hardware can drop metal shards and dust.
- Final double-check. Confirm all fasteners and panels are labeled, helper(s) are briefed, and safety gear is on. If you see rusted or severely corroded components near springs or anchors, consider professional evaluation — corrosion compromises safe spring removal.
Transition: With the area safe and measurements taken, proceed to the controlled removal of the old door. Follow the numbered removal steps closely and never skip a safety stop.
Step-by-Step Guide to Removing Your Old Garage Door
This section covers removal for common household sectional garage doors. If you have a roll-up door, stop and consult the manufacturer’s guidance or a specialist. Below are detailed numbered steps; each step begins with the action first and includes safety tips.
- Support and secure the door in the fully closed position. Close the door so the bottom seals against the threshold. Clamp the track just above the bottom roller with a heavy-duty C-clamp on both tracks to prevent the door from moving during hinge removal. Keep the opener disconnected and trolley clamped.
- Remove bottom brackets and disconnect cables. Using your wrench set, remove the lag screws securing the bottom corner brackets. If your door uses lift cables attached to the bottom brackets and drums, loop the cable end back and secure with locking pliers before unbolting to retain tension. For torsion systems, never unwind springs to relieve tension yourself; instead, follow the dedicated spring procedures later in this guide.
- Detach weatherstripping and threshold. Carefully peel off old bottom weatherstripping and unscrew any threshold plates. Clean the sill with a shop vacuum to remove debris and paint buildup that could obstruct a new bottom seal.
- Remove hinge fasteners from the lowest panel. Label each hinge and fastener with its panel number. Using the drill with an impact socket, remove hinge bolts while an assistant lifts and steadies the panel. For heavy panels, lift straps or a dolly are recommended.
- Lift and remove the lowest panel. With two helpers, tilt the panel out of the track and set it aside on padded sawhorses. Keep the garage floor clear of small hardware; use labeled bags for each panel’s fasteners.
- Repeat panel removal upward. Remove the next hinge set and lift the second panel out of the tracks, proceeding upward until all panels are removed. For safety, never leave an unsupported top panel; always have a helper present while removing the final top panel.
- Disconnect and remove rollers and track brackets. Once panels are out, unbolt the vertical tracks from the jambs and set them aside. Label any bent brackets that will be replaced. Use a rubber mallet for gentle persuasion when bearings are rusty, and apply penetrating oil 15 minutes before attempting to free stubborn bolts.
- Unbolt the horizontal tracks and track supports. With the vertical tracks removed, unbolt the horizontal tracks where they attach to the header and ceiling brackets. Support the track with a ladder or sawhorse while removing fasteners to prevent it from falling unexpectedly.
- Handle springs only with the correct procedure. If your door has extension springs along the track, clip the safety cables first (if fitted) and then unhook the springs at the center with pliers while the door is clamped shut. For torsion springs, follow the dedicated instructions later in this guide — torsion springs store lethal energy and require winding bars; consult the manufacturer manual: manufacturer installation manuals.
- Remove the torsion tube and drums (torsion systems). After the springs are safely at zero tension using winding bars and following the mechanical steps in the later section, slide the torsion tube out of the bearing plates and then remove the drums. Keep the winding bars and marked settings; springs must be reinstalled using the same orientation and winding count where possible.
- Remove remaining brackets, end plates, and the center bearing plate. Unbolt any remaining hardware attached to the header or jambs. Inspect the header and framing for rot or damage; repair or sister new framing before installing the new door if necessary.
- Clean and prepare the opening. Vacuum out grease and debris, scrape old sealant, and check that the sill is level within 1/8″ across the opening. Measure the final opening again (width, height, headroom) and confirm with your new door’s specification sheet.
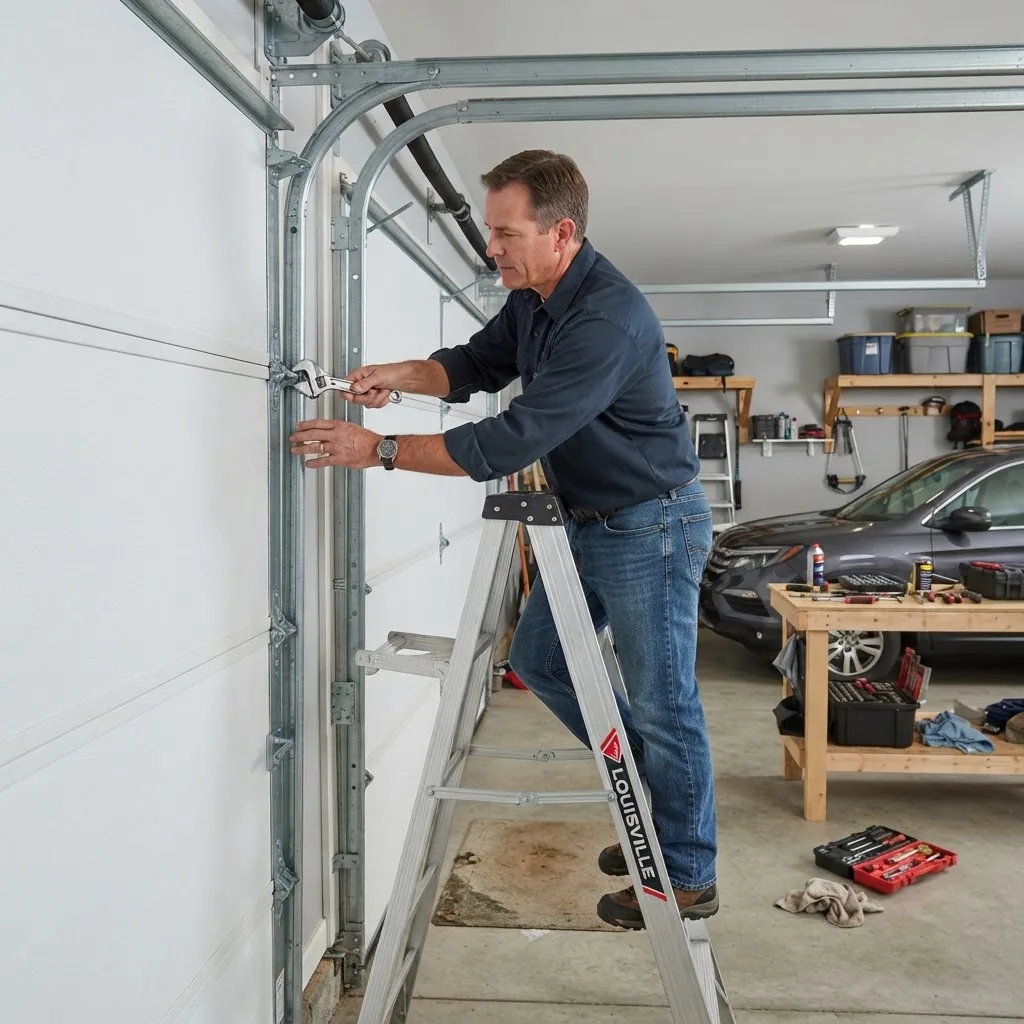
Safety tips during removal: Always wear eye protection and cut-resistant gloves when handling springs, cables, and rusted fasteners. Do not try to support heavy panels alone; panels can pinch and crush. If cable anchors are frayed or hardware is heavily corroded, replace them — do not re-use compromised components.
Real-world case study (removal)
Case: A 14-year-old sectional steel door on a single-car garage. Measurements: 9′ wide x 7′ high; panels ~65 lb each. Tools used: 1/2″ impact, 3/8″ and 1/2″ sockets, two 8′ ladders, panel dolly. Issues encountered: two bottom brackets were seized due to overpaint; we soaked fasteners with penetrating oil for 30 minutes, then used a breaker bar. Time: 3.5 hours to remove and stage panels safely. Lesson: label and photograph every hinge and cable location before disassembly — saved 45 minutes during reassembly.
Transition: With the opening cleared and inspected, next you’ll choose the right replacement door for compatibility, performance, and budget.
How to Choose the Right Replacement Garage Door
Choosing a replacement door requires balancing material, insulation, maintenance, and compatibility with your measured opening. Below is a compact comparison to help you decide.

| Material | Durability & Maintenance | Insulation & Cost |
|---|---|---|
| Steel | High durability, low maintenance; available with rust-proof coatings. | Good insulation options (R-5 to R-16); mid-range to high cost. |
| Wood | Aesthetic appeal, needs periodic staining/painting; susceptible to rot. | Lower insulation unless insulated core added; higher cost and maintenance. |
| Aluminum | Lightweight and corrosion-resistant; dents easily if thin-gauge. | Typically lower cost; insulation options limited without composite cores. |
Material trade-offs: steel is the best general-purpose choice for durability and available insulation; wood wins for visual impact but increases maintenance. For cold climates, prioritize R-value — an insulated steel door with R-12 will reduce garage heat loss substantially compared to an uninsulated door. If budget planning is required, consult our garage door replacement cost details for breakdowns by material and labor.
If you want natural light, consider adding windows to your garage door — choose insulated glass options for thermal performance.
For a quick budget estimate including materials and optional pro installation, try our garage door installation cost calculator.
Compatibility checklist: ensure your chosen door matches the measured width and height within 1/8″ tolerance, check headroom requirements (standard tracks need 12″–14″ headroom; low-headroom kits require different hardware), and confirm spring system compatibility (torsion versus extension); if your existing spring anchor points are nonstandard, you may need a custom header bracket.
Transition: After choosing and ordering the correct door and hardware, follow the installation steps below carefully — they are sequenced to restore safe operation and alignment.
Step-by-Step Garage Door Installation Process
The installation below assumes a standard sectional steel door with torsion springs. If your door uses extension springs or a roll-up drum, adapt accordingly and consult the manufacturer’s instructions. Each step begins with the action-first approach and includes torque, spacing, and alignment values.
- Inspect and prepare the opening. Verify the rough opening is square and level within 1/8″ across diagonals. Install new jamb weatherstrips if the old is brittle. If the header has rot or is not solid, sister a 2×10 across the header or add a steel header plate anchored with 3/8″ lag bolts at 16″ O.C.
- Install bottom seal and threshold. Apply a bead of exterior-grade polyurethane adhesive to the threshold and press the new rubber bottom seal in place. Align the bottom seal so the door compresses the seal 1/8″ when closed for a tight fit.
- Assemble the first (bottom) panel on sawhorses. Lay the bottom panel face-down on padded sawhorses. Attach bottom brackets and the first set of hinges per the manufacturer torque specs (typically 30–40 ft-lb for 1/2″ carriage bolts). Pre-thread fasteners but do not fully torque until panels are aligned on the tracks.
- Install vertical tracks and secure to jambs. Place the vertical tracks onto the jambs and loosely fasten top and bottom brackets, leaving fasteners snug but adjustable. Check track plumb: track should be 1/16″–1/8″ in from the jamb edge to allow roller clearance.
- Lift and set the second panel into place. With two helpers or a panel lift, raise the second panel and align hinge bolts into the predrilled holes. Install rollers in their hinge pockets and insert into the vertical track. Repeat for remaining panels, ensuring each panel sits flush and the seams are consistent.
- Secure track brackets and level panels. Once all panels are hung, measure across the top and bottom corners and adjust jamb fasteners to get a level door within 1/8″. Torque hinge bolts to manufacturer specs.
- Install horizontal tracks and track supports. Attach the horizontal track to the vertical track flanges, then mount ceiling supports at 4’–5′ intervals. Ensure the track runs straight with a 1/4″ rise over the center for some systems — follow your door’s instructions.
- Install end bearing plates and center bearing plate for torsion systems. Mount the end bearing plates on the header using 1/2″ lag bolts into solid header. Center bearing plate should be bolted to a reinforced header block. Confirm the center plate is centered by measuring from each jamb to the plate; adjust for equal distance.
- Mount torsion tube and drums (dry-fit first). Slide the torsion tube through the center bearing and place it into the end bearings. Install drums loosely; ensure cable grooves face down and outward. For multi-spring systems, ensure springs are installed with their stationary cones against the center bracket and winding cones toward the ends.
- Attach lift cables to bottom brackets and drums. Loop the cable onto the drum groove and wind the drum until the cable is taut with minimal slack. The cable should have 1/2″–1″ gap from the bottom roller when the door is closed to allow full travel. Keep cable wind consistent on both sides.
- Wind torsion springs to specified turns. Using rated winding bars, wind springs per the manufacturer’s specified turns for your door height and spring size. Typical single-spring setups use 30–35 quarter-turns; double-spring systems may use half that per spring. Confirm with the door spec sheet. Tighten the set screws to 35–50 ft-lb depending on bolt size.
- Test door balance and adjust spring tension. Release the clamp on the track and manually raise the door halfway. A properly balanced door will stay in place at the midway point. If it drifts, add or remove 1/4 turn on the spring and retest. Only adjust spring tension with winding bars and while standing to the side, not in front of the cone.
- Install safety cables (for extension springs) and safety reverse devices. If your system uses extension springs, thread safety cables through and anchor them to the track using 3/8″ carriage bolts. Ensure the opener’s sensors are mounted 6″ above the floor on each side and aligned; test the auto-reverse with a 2×4 laid flat on the threshold (door should reverse on contact).
- Attach opener rail, trolley, and test drive. Mount the opener rail to ceiling hangers, connect trolley to the door arm, and adjust travel limits according to the opener manual. For belt-drive openers, set force limits low initially and increase until the door closes reliably without binding.
- Install final hardware and weatherstripping. Torque all fasteners to spec, install lock plates and handles, and add head and side weatherstrips. Paint or seal any exposed wood edges per manufacturer recommendations to prevent rot.
- Lubricate moving parts and run final tests. Apply silicone or lithium lubricant to rollers, hinges, bearings, and springs (lightly — excessive lubricant attracts dust). Operate the door through 50 cycles to settle components and verify consistent, quiet operation.
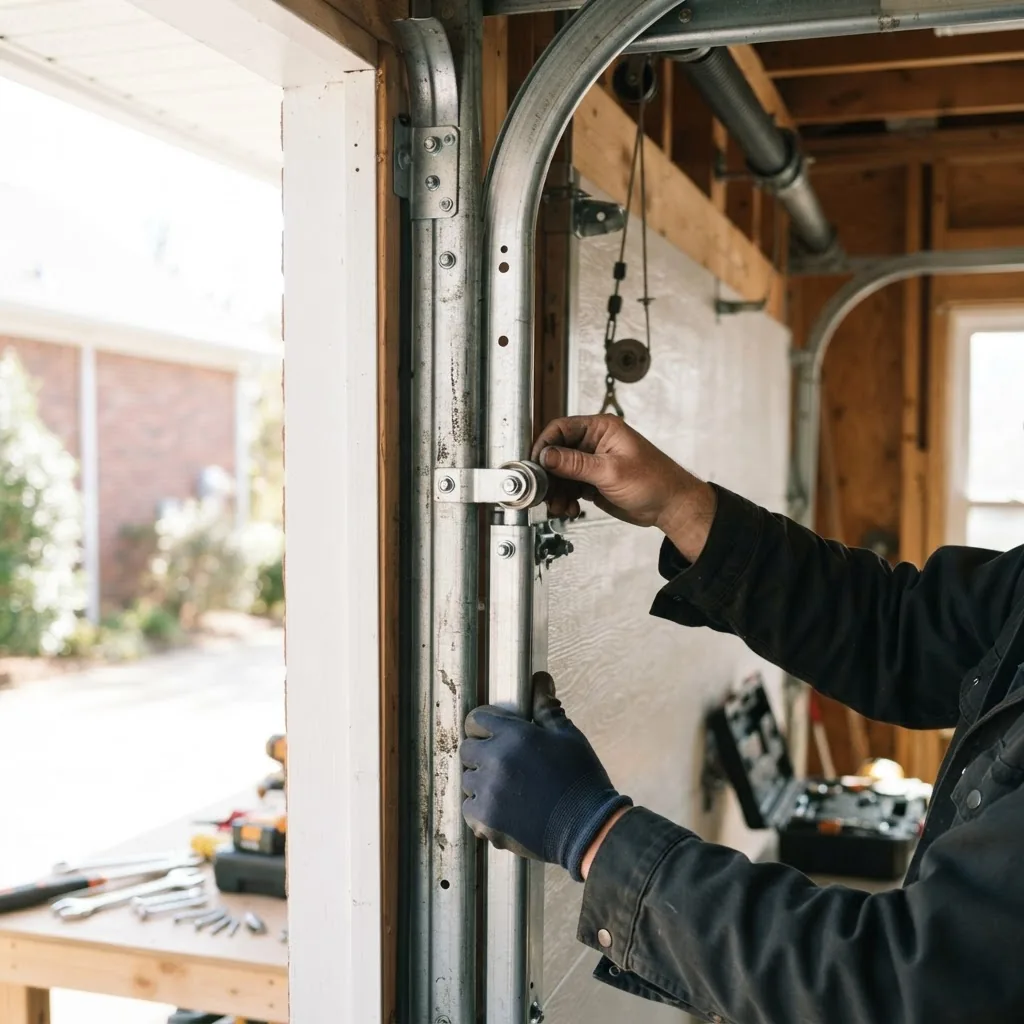
Note: If at any point you cannot get the springs to hold the door mid-height after three adjustment attempts, stop. Springs that require more than 1–2 full turns to balance usually indicate incorrect spring size or a damaged spring — call a professional.
For comparison or if you prefer a pro to finish final torque settings and warranty activation, see garage door installation services and costs.
Installing and Adjusting Garage Door Springs and Tension Systems
Springs store significant energy — treat them with respect. This section explains torsion and extension spring basics, safety steps, and numbered adjustment procedures. When first introduced, “torsion spring” is defined and used consistently thereafter.
What is a torsion spring? A torsion spring is a heavy-coiled spring mounted on a torsion tube above the door that stores energy by twisting. In contrast, extension springs run parallel to the track and stretch to store energy.
- Safety first: gather the right tools. Use two hardened winding bars that match the spring’s winding cone diameter, locking pliers, and gloves rated for mechanical work. Never use improvised bars. Read the door manufacturer’s spring handling guidance: manufacturer installation manuals.
- Check spring size and paint-mark turns. Count the coils and measure wire diameter (use calipers) and inside diameter. Record these values and the manufacturer’s recommended initial turns. Mark the winding cone at the zero-turn position with a paint marker to track turns during winding.
- Secure the door closed before loosening set screws. Clamp the track above the bottom roller to prevent unintended movement. Loosen set screws a quarter turn at a time while keeping a winding bar fully inserted; never let the winding bar drop out.
- Wind the spring in controlled increments. Insert the winding bar fully into the cone, tap solidly with a hammer to seat it, and move your body away from the cone axis. Apply slow, even pressure and advance to the next bar position. For example, a common 7′ door with 1 3/4″ inner diameter springs might require 30 quarter-turns (7.5 full turns); follow your door spec for exact counts.
- Tighten set screws and confirm cone seating. After the final turn, tighten set screws to the specified torque (typically 35–50 ft-lb). Recheck cable drums for equal drum height and ensure cable winds neatly on the drum without overlap.
- Balance test and micro-adjustments. Release clamps and manually lift the door halfway. If the door stays, the tension is correct. If it rises, add 1/4 turn on each spring (for dual-spring systems add 1/8 turn each); if it drops, remove 1/4 turn. Only adjust in small increments.
- Extension spring notes. For extension springs, attach safety cables first, then stretch springs per spec, typically leaving a 1–2″ gap at rest. Ensure cable anchors are solid and replace any frayed cables immediately.
- Legal and safety standards. Follow local codes and consider OSHA guidance on powered machinery when adjusting springs: OSHA. Manufacturer safety bulletins often recommend replacement (not reuse) of springs older than 10 years or with more than 10,000 cycles.
Analogy: tensioning torsion springs is like winding a large clock — each quarter-turn stores force; small changes have immediate effects. Take your time and test gradually.
Reconnecting the Garage Door Opener
After the door is balanced and running smoothly, reconnect the opener and test all safety features. Follow these short steps.
- Mount the opener rail and attach the arm. Bolt the opener rail to ceiling hangers and connect the opener carriage to the door arm with the supplied clevis pin and cotter pin.
- Reattach travel limit and force settings. Set the opener’s up and down travel limits per the manual; initial down force should be low and increased only until the door closes fully without binding.
- Align safety sensors. Mount sensors 6″ above the floor on each side, ensure LED alignment indicators are lit, and verify the door reverses when the infrared beam is blocked.
- Test remote and manual release. Operate the opener via wall switch and remote; pull the release cord to confirm manual operation is smooth. Check battery backup (if present) and sync remotes per the manufacturer’s pairing instructions.
Transition: If the door doesn’t behave as expected, the troubleshooting section below covers common fixes.
Troubleshooting Common DIY Garage Door Replacement Problems
Here are common issues you may encounter and focused fixes based on hands-on experience.
- Door misalignment (doors rub on frame) — Check track plumb and jamb alignment. Loosen track bolts, adjust track position by 1/8″ increments, then retighten. Replace bent tracks if they cannot be realigned.
- Uneven closing (one side lags) — Verify cable drum winding equality. If one drum has 1/2″ less cable wound, adjust by releasing 1/4 turn on the spring for that side (dual-spring systems) or add 1/4 turn as directed.
- Squeaking or noisy tracks — Clean rails with a cloth and apply silicone lubricant to rollers and hinges; avoid greasing tracks themselves.
- Sticking rollers — Replace rollers older than 5–7 years; nylon rollers last longer and run quieter than steel. Check for debris and clean track grooves.
- Spring wind slips — Tighten set screws to specified torque and verify cones are seated against the shaft. Use thread-locker if specified by the manufacturer.
- Opener reverses without obstruction — Adjust force settings and travel limits; inspect track for binding or bent sections causing additional resistance.
- Door is hard to lift manually after installation — Likely incorrect spring size or mis-tension. Re-check spring turns and cable drum alignment. If more than two corrective attempts are needed, stop and call a pro.
Real troubleshooting example: On a project, the door would bind 2″ before fully closing. I found the horizontal track sagged 3/16″ due to a missing ceiling support. Adding a support hanger at that mid-span cured the binding and restored smooth operation.
Maintenance Tips After Garage Door Installation
- Lubricate moving parts every 6 months with silicone or lithium grease (not WD-40) — apply 1–2 pumps to rollers and hinges.
- Check spring tension and balance annually; perform a midway balance test and make micro-adjustments as needed.
- Inspect and tighten all fasteners after the first 50 cycles; then check semi-annually.
- Clean tracks with a rag; remove debris and ensure they are dry before re-lubrication.
- Replace weatherstripping every 3–5 years or when cracked to maintain seal and improve insulation.
For post-installation aesthetic upgrades and detailing, see our garage door renovation and upgrade ideas.
Transition: Below are practitioner’s tips on mistakes I’ve seen and a compact verification checklist before you finish the job.
Common mistakes and how to avoid them
I once reused severely rusted bottom brackets to save time; three weeks later a cable anchor failed and the door sagged. Lesson: replace corroded anchors and hardware during installation — they cost less than the labor to fix a failure. I also once under-torqued spring set screws; they walked out under load and required a return visit. Always use a torque wrench and the manufacturer’s torque specs.
Other first-person experiences:
- I underestimated panel weight and attempted removal with one helper — we aborted and rented a panel dolly; do not lift alone if panels exceed 50 lb.
- I once mis-counted spring turns by a full turn; the door floated upward unexpectedly. Always mark the cones and count precisely, and make only 1/4-turn adjustments when balancing.
Final Checklist Before You Call the Job Complete
- Door opens and closes smoothly for 50 cycles with consistent speed.
- Manual balance test: door holds at midpoint without drifting.
- Safety sensors aligned and auto-reverse tested with a 2×4 on the threshold.
- All fasteners torqued to manufacturer’s specs; springs set screws tightened to required torque.
- Weatherstripping installed and bottom seal compresses approximately 1/8″ when closed.
- Track plumb within 1/8″ and no visible bends; rollers quiet and free.
- All removed hardware accounted for and spare parts stored with the opener manual.
When to Call a Professional
Call a professional when: the springs are torsion type and you lack winding bars or experience; panels exceed 90 lb each; the header shows significant structural damage; or if you encounter unexpected corrosion on anchors or springs. Also seek a pro for commercial doors, nonstandard openings, or if the door does not balance after two careful adjustment attempts. For regulatory or safety code advice, consult local building authorities or an installer who can certify work to code.
External authority resources to read before high-risk tasks: OSHA ladder safety, This Old House for vetted DIY techniques, and manufacturer instructions such as manufacturer installation manuals for spring handling.
Conclusion — key takeaways:
By following this step-by-step guide you’ll remove an old door, prepare the opening, install a compatible replacement, tension springs safely, and reconnect the opener — while avoiding common pitfalls. Take measurements accurately, use the correct tools (especially winding bars for torsion springs), label everything during disassembly, and test balance thoroughly. If at any time you encounter excessive corrosion, nonstandard hardware or inability to balance the door after two adjustments, call a qualified installer.
Ready to start? Gather your tools, read the manufacturer specs for your chosen door, and schedule a helper for heavy lifts. If you’d like help with budget planning, consult our garage door replacement cost details to estimate material and optional pro costs.

