Are you a fan of soothing spa sessions but unable to leave the comfort of your own home? Or you may like the idea of having a sauna retreat on your property. Whatever the reason, adding a sauna to your home can be a significant upgrade. Just imagine returning from a long day at work and stepping into your own oasis of relaxation.
However, buying a pre-built sauna can be expensive. But there’s good news—you can build a DIY sauna that saves you money and allows you to customize it to fit your unique needs and preferences. With just a few essential tools and materials, you’ll be on your way to creating a sanctuary that provides all the relaxation and rejuvenation you desire.
Consider these six steps to create your soothing retreat that rivals the luxurious spa experience. Ready to say goodbye to expensive spa memberships and hello to a personalized oasis at home? Let’s get started.
1. Planning Your Sauna
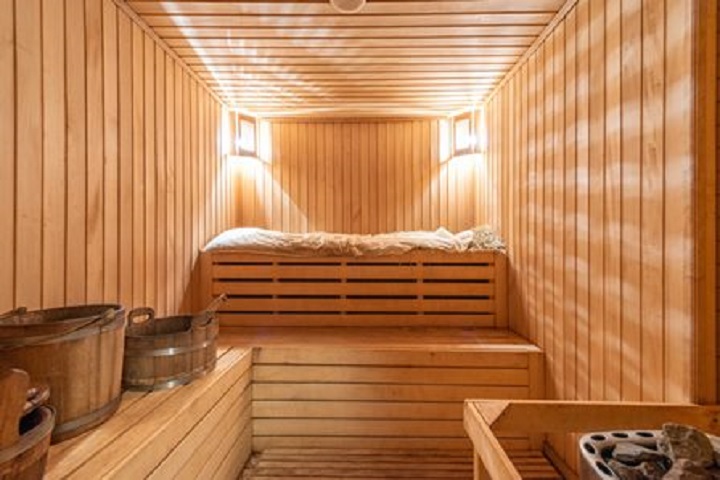
Building your DIY sauna can be an exciting and rewarding project. To get started, the first step is to plan your sauna. One crucial consideration is the type of wood you’ll use for the interior. A popular choice is cedar. With cedar hot tubs, you can enjoy the added benefits of its natural resiliency and mold/mildew resistance. Another option is pine, which is more affordable but may require sealing to prevent moisture damage.
Once you’ve decided on the wood type, the next step is determining the size and location of the sauna within your home. Generally, most saunas are between 4 to 8 feet in width and 6 to 8 feet in length, with a ceiling height of at least 7 feet. For the interior, you can use 1×4 or 1×6 tongue and groove cedar panels at least 8 feet long for the walls and ceiling.
Moreover, choose a well-ventilated space that can comfortably accommodate the dimensions of your sauna. This may involve evaluating electrical and plumbing requirements, as well as the overall accessibility of the area.
It’s also essential to select a location that is easily accessible in case of emergencies. For example, if the sauna is in a basement, ensure there’s a clear path to the stairs and that the stairs are sturdy and well-maintained.
2. Preparing The Space
The next step in building your DIY sauna is to prepare the space. This includes ensuring that the room you choose is free of any moisture, mold, or mildew. Clean all surfaces and make sure the room is well-ventilated. This promotes proper air circulation and improves your sauna’s performance.
When the room is set, install the necessary electrical and plumbing requirements, such as mounting a GFCI outlet for safety and a drain within the room for proper drainage.
If you’re unsure how to do this, it’s best to seek the help of a certified electrician or plumber for safety.
3. Framing The Sauna
After preparing the space, the next step is to frame your sauna. This entails creating a framework using your chosen wood type, including the walls, ceiling, and doors.
Measuring and marking your boards before cutting them into sizes is essential to ensure they fit together precisely. For the frame, you may use 2×4 or 2×6 untreated lumber. Then, space the framing at 16 inches in the center, and leave a 6-foot-tall opening for the door. Take note that it still depends on your preferred sauna size and design, so adjust the measurements accordingly.
Also, add insulation between the framing to help keep heat inside the sauna. Good options include fiberglass or mineral wool insulation. These materials improve the energy efficiency of your sauna.
4. Installing The Heating Source
The heating source is the heart of your DIY sauna. You have several options to choose from, including infrared and traditional saunas. In traditional saunas, heated rocks or a stove heat the space, whereas infrared saunas use infrared lamps to heat the body directly.
For a traditional sauna, you can choose a suitable heating source and chimney for installation. It’s recommended to use an electric sauna heater as it’s easy to install and provides excellent temperature control.
If you opt for an infrared sauna, selecting the correct type of infrared lamp is best. Ceramic bulbs are a popular choice due to their longevity and ability to emit a wavelength of light that penetrates the skin.
5. Finishing The Interior
Creating a serene and relaxing environment is essential for the interior of your DIY sauna. After installing the heating source, it’s time to complete the interior. This involves adding benches, furniture, and accessories like towel racks and lighting.
Additionally, insulate the framing to retain heat inside the sauna. Enhance the natural ambiance by incorporating elements of nature, like indoor plants or natural stone.
6. Testing And Using Your Sauna
Finally, you can test and use your DIY sauna once you have completed the above steps. Follow the manufacturer’s instructions to ensure your sauna operates safely and efficiently.
Before using your sauna, it’s crucial to check the room temperature and humidity levels for comfort. It’s recommended to start with lower temperatures and gradually increase them as you adjust to the heat.
Final Thoughts On DIY Saunas
Building a DIY sauna isn’t only a rewarding experience and a cost-effective way to create a sanctuary in your home. Following the above guide can help create a relaxing and rejuvenating environment that promotes wellness.
With patience, determination, and attention to detail, you can create a sauna you’ll enjoy for years. Enjoy your DIY project!