

What you’ll achieve: By the end you will have diagnosed worn or stripped garage door opener gear, selected a compatible replacement kit, and completed a safe, tested gear swap. Total time: 90–240 minutes depending on model and familiarity; skill level: intermediate DIY (basic hand tools, a multimeter, and comfort with light disassembly).
Before you start
- Prerequisites: basic mechanical aptitude, ladder experience, and an assistant for testing the door.
- Materials: replacement gear kit matched to your opener model, thread locker (medium strength), 10–20 mL of recommended lubricant (see maintenance), and shop rags.
- Documentation: have your opener model and serial number; print or download the OEM service manual for torque specs.
Understanding Garage Door Opener Gears
The garage door opener gear is the small but critical mechanical interface that translates the opener motor’s rotation into the motion that moves the door. Most residential openers use a combination of a worm gear (a helical screw on the motor) driving a driven gear or drive sprocket. The worm provides high reduction and self-locking characteristics—think of it as the gearbox that prevents the door from back-driving the motor.
Gear systems vary by drive type: chain and belt drives typically use a drive sprocket and a small internal gear set; screw drives use a threaded shaft plus a traveling nut assembly; and direct-drive or jackshaft models have unique gear housings. When I explain gear function to homeowners I compare it to a bicycle: the motor is the pedals, the worm gear is the small front chainring, and the driven gear is the larger rear cog—small changes at the worm produce controlled, larger movement at the door.
For a clear parts map while you read, consult the opener’s parts diagram. garage door opener components diagram
How it works (short): motor torque → worm screw rotation → driven gear teeth engage → rotational motion converts to linear door travel through trolley/chain/belt. Key failure points: the driven gear material (nylon commonly used), the worm’s condition, and bearings/bushings. OEM design decisions (NYLON vs metal gears) balance noise, cost, and durability.
Signs Your Garage Door Opener Gear Needs Replacement
Watch for these telltale signs—if two or more appear, plan a gear inspection immediately.
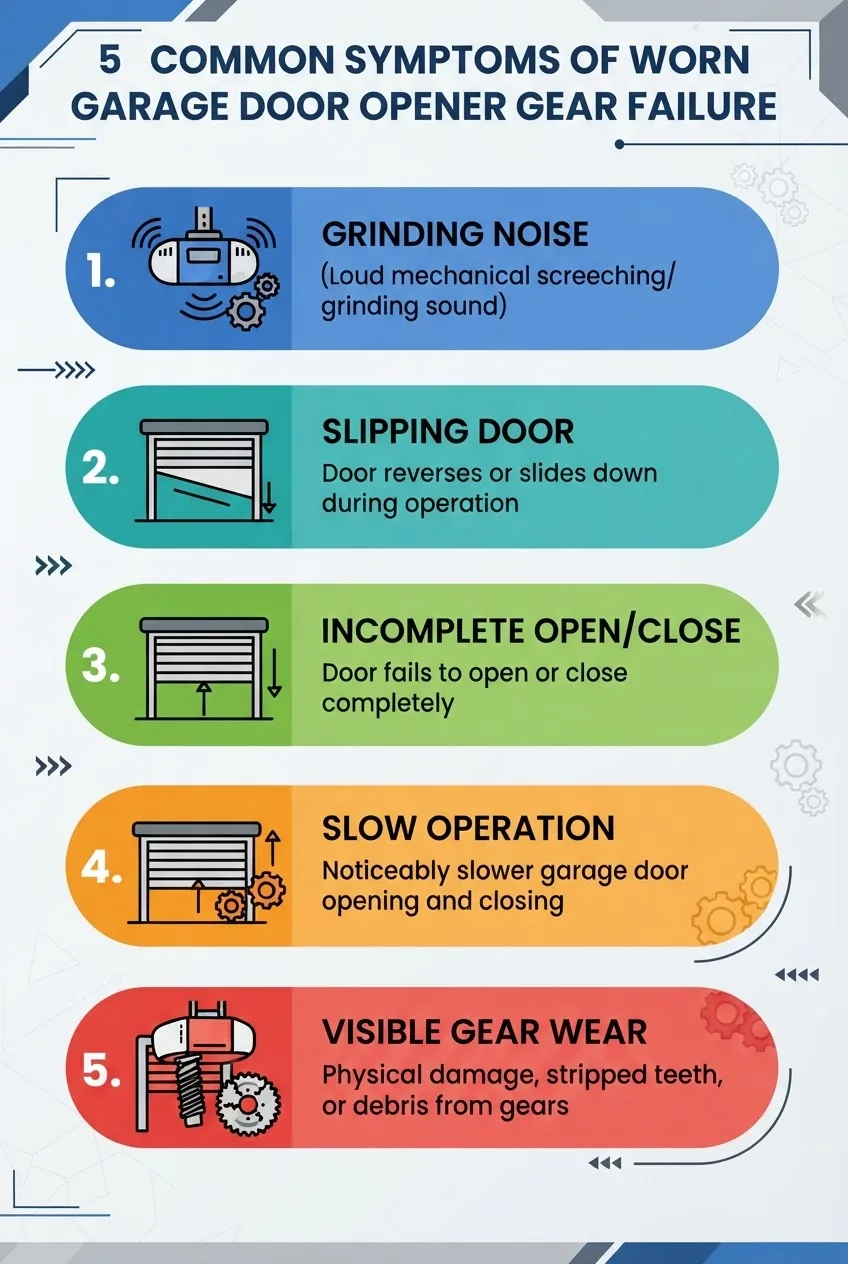
- Grinding or clunking noises: A consistent grinding under load usually means teeth are damaged or nylon has deformed. If noise increases only under load, suspect torque transfer loss rather than bearings.
- Slipping door or incomplete cycles: If the opener runs but the door doesn’t travel fully, the drive sprocket or gear may be stripped—this is common with worn nylon gears.
- Slow or uneven operation: Reduced speed on one direction or slow starts suggest increased friction in the gear mesh or damaged worm threads.
- Repeated thermal shutdowns: The motor overheating and tripping thermal protection after a few cycles points to mechanical binding such as a misaligned gear or debris in the housing.
- Visible wear or missing teeth: Remove the housing cover for inspection—if teeth look rounded, chipped, or the nylon is crushed, replace the gear immediately.
- Excessive chain/belt play: If you tighten the chain/belt and play returns quickly, the internal drive gear could be deforming under load.
- Intermittent electrical noise or motor humming without movement: Humming with minimal shaft rotation often indicates gear jamming or the drive sprocket slipping on the motor shaft.
If gear failure coincides with considerations for manual operation or alternate lift systems, review manual lift system alternatives before committing to a complex repair.
Types of Garage Door Opener Gear Replacement Kits
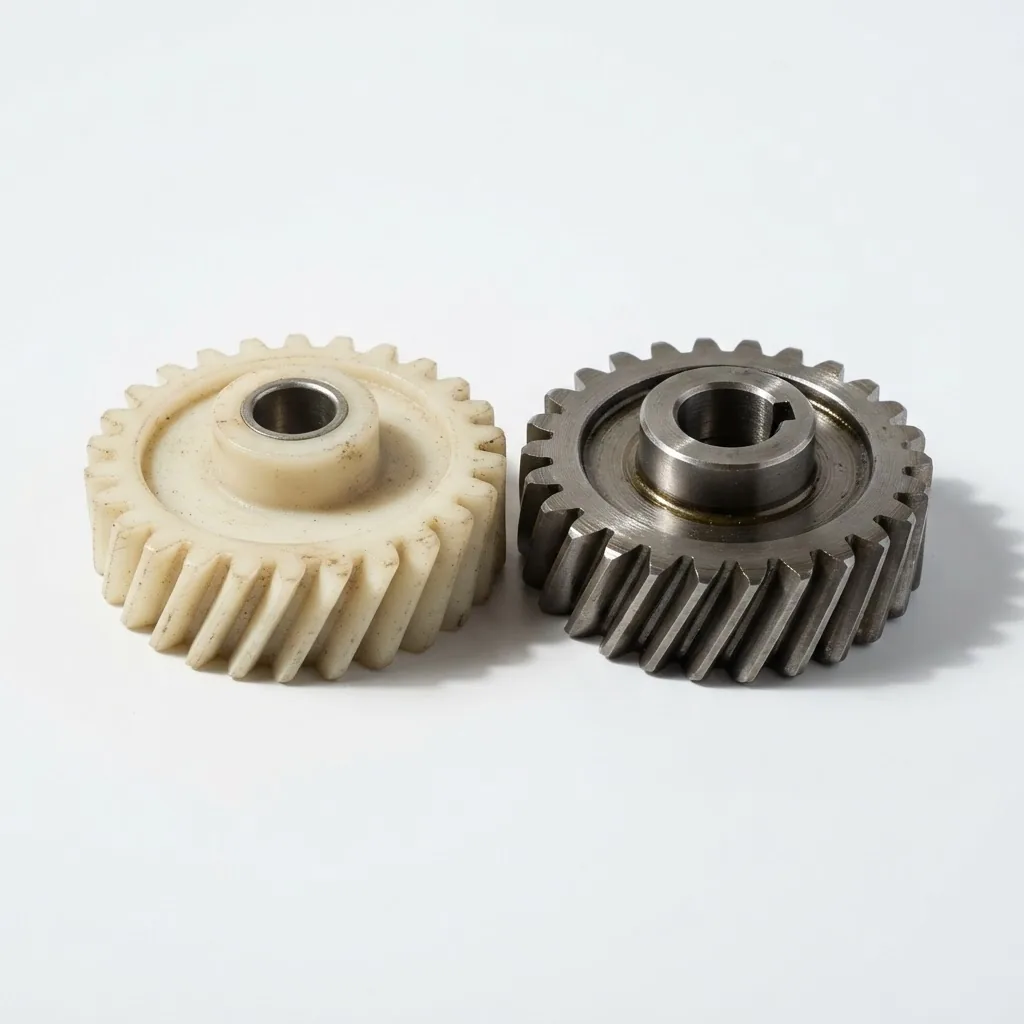
Replacement kits vary by material, manufacturer (OEM vs aftermarket), and compatibility. Below is a practical comparison to help you choose.
| Kit Type | Use Case | Pros | Cons |
|---|---|---|---|
| OEM Nylon Gear Kit | Direct replacement for older Chamberlain/LiftMaster models | Exact fit, quiet, low cost | Shorter lifespan under high-cycle use; sensitive to heat |
| Aftermarket Reinforced Nylon | Higher-cycle households seeking quiet operation | Improved wear resistance, retains low noise | Slightly higher price; verify spline fit |
| Metal Gear Kit (Steel/Brass) | High-cycle commercial/residential or older openers | Durable, longer life, tolerates heat | Noisier; possible accelerated wear on worm screw |
| Universal Gear Kit | Multiple model compatibility; emergency fixes | Versatile, often includes hardware and instructions | May require minor modifications; check spline sizes |
| Complete Gear Housing Assembly | If bearings, shaft, or housing are damaged | Eliminates multiple failure points; straightforward swap | Higher cost; heavier assembly |
Compatibility considerations: match the spline diameter, number of teeth, and bore size to your motor shaft. Manufacturers use model groups (e.g., LiftMaster 8550/8365 series) — when in doubt, go OEM. For LiftMaster-specific guidance, consult the brand instructions. install LiftMaster garage door opener
Step-by-Step Garage Door Opener Gear Replacement Guide
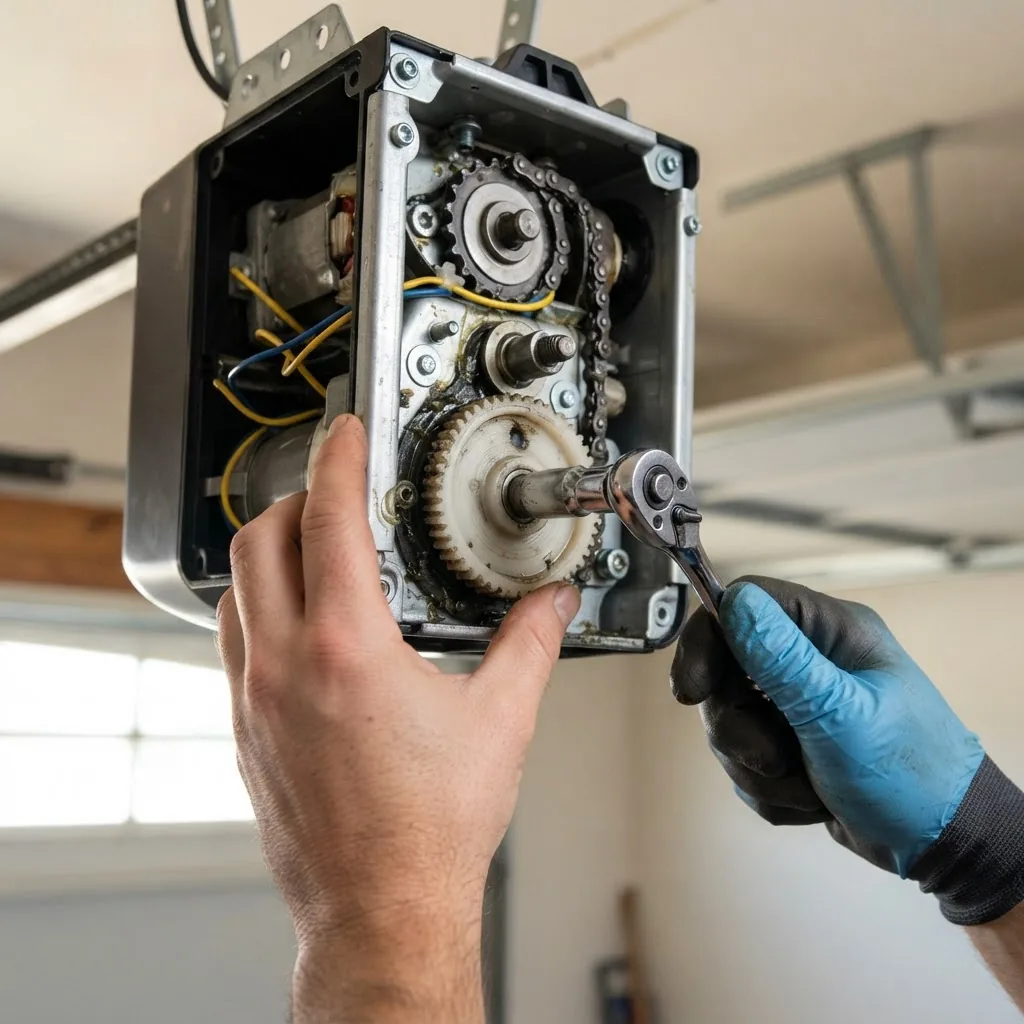
This section is the hands-on core. Follow each numbered step exactly; where a subtask is safety-critical it is listed under that step. For final reinstallation or automatic limits and travel adjustments, see the full installation guide. garage door opener installation and auto setup
-
Disconnect power and secure the door
- Unplug the opener or shut off the dedicated circuit breaker.
- Close the garage door completely and engage a clamp on one track about 2–3 feet from the floor to prevent accidental opening. Use a C-clamp on the rail or a locking device rated for 300+ lbs.
- Release the emergency release if the door is connected to an opener and then re-engage after clamping to ensure the trolley is parked and the carriage is immobilized.
-
Gather tools and confirm parts
Essential tools and common model-appropriate sizes:
- Socket set: 7/16″, 1/2″, 9/16″ sockets typically cover motor mount and sprocket nuts on Chamberlain/LiftMaster; have a 10mm and 13mm metric set for other openers.
- Torx T20/T25 and Phillips #2 screwdriver for cover screws.
- Needle-nose pliers, snap-ring pliers (for retaining rings), and a 1/4″ hex driver for some kits.
- Multimeter to verify power is off and for motor stall diagnostics.
- Torque wrench with in-lb scale (to 120 in-lb) for reinstalling retaining nuts; typical range for nylon gear retaining nuts is 30–70 in-lb, but confirm with OEM manual.
Verify your replacement kit content: driven gear, retaining hardware, washers, retaining ring/C-clip, and seal/gasket if supplied. If the kit lacks a bearing or bushing and your model originally had one, source it before proceeding.
-
Remove the opener cover and inspect
- Remove cover screws with appropriate driver. Keep screws organized so they return to the same holes.
- Visually inspect the worm gear area for debris, metal shavings, or melted nylon—document with photos.
- If you see metal fragments or a damaged worm, stop and consider ordering a full housing assembly.
-
Test motor rotation and load
- With power still disconnected, engage the motor manually by turning the shaft with a 7/16″ socket on the motor output (if accessible). Note smooth rotation and presence of play.
- Measure shaft rotation torque by hand—if it feels gritty or binds quickly, that is a sign of severe gear or bearing damage.
-
Remove drive sprocket or retaining nut
- Locate the drive sprocket nut or retaining clip that secures the gear. Use a socket (common: 7/16″ or 1/2″) and back up the shaft with an assistant if needed to prevent turning the motor.
- Note: many openers use a C-clip that slides off a reduced shaft. Use snap-ring pliers to remove without damaging the groove.
- Keep fasteners in a labeled container.
-
Extract the old gear and related components
- Gently pry the gear off the shaft. For nylon gears that have melted slightly onto the shaft, apply penetrating oil for 10–15 minutes, then use a gear puller with soft jaws.
- Inspect the motor shaft/worm for scoring. Small surface discoloration is acceptable; deep grooves require professional service or replacement housing.
-
Clean the gear housing and inspect bearings
- Use shop vac and lint-free rags to clear shavings. Wipe surfaces with isopropyl alcohol (90%+) to remove oil and grit.
- Spin any exposed bearings by hand—if you feel grit or hear roughness, replace bearings. Some kits include bushings; change them now.
-
Fit the new gear and check spline alignment
- Dry-fit the new gear onto the shaft to confirm spline match and seating. The gear should slide on by hand with only slight resistance and no wobble.
- If the gear requires a press fit, use a bench vise with soft jaws to press squarely. Avoid hammering the gear to prevent cracking, especially with reinforced nylon.
-
Secure retaining hardware to torque spec
- Apply medium-strength thread locker to the retaining nut threads if the OEM permits. Reference your opener’s service manual for threadlocker use—many recommend it to prevent loosening. install LiftMaster garage door opener
- Tighten the retaining nut to the recommended torque. Typical guidance from service documentation: nylon gear retaining nut torque is often specified in the range of 30–70 in-lb; steel gear installations sometimes require 50–100 in-lb. Confirm the exact value in the OEM manual before final torque. For LiftMaster owners, see the manufacturer support pages for specific in-lb values. LiftMaster service manuals
-
Manually cycle and observe for binding
- Before replacing the cover or restoring power, manually rotate the motor shaft two dozen revolutions to confirm smooth engagement; listen for unexpected scraping or clicks.
- If binding occurs, remove the gear and confirm bushing/bearing seating and the absence of debris.
-
Reassemble, reconnect power, and calibrate
- Reinstall the cover and all safety sensors that were unplugged. Restore power to the unit.
- Run two test cycles with the door partially open and the assistant nearby to observe travel and disengage immediately if unusual motion occurs.
- Adjust travel and force settings per your opener’s manual to the values recommended for your door weight. For fine-tuning automated limits, consult the installation guide. garage door opener installation and auto setup
-
Final lubrication and test under load
- Apply 1–2 grams of approved gear lubricant (synthetic gear grease or manufacturer-specified product) to the new gear teeth—avoid over-lubrication that attracts dust.
- Operate the door for 10 full cycles and then check for heat at the motor and gear area. Expect mild warmth—excessive heat or repeated motor trips to thermal protection indicates a problem requiring professional service.
Note on warranty: DIY gear replacement can void manufacturer warranties on some models—check your warranty terms before proceeding. According to a 2023 manufacturer warranty bulletin, unauthorized repairs may affect coverage for adjacent components.
Tools and Safety Equipment Required for Gear Replacement
Below are tools and safety items I use on every job, with specific model or size notes where relevant.
- Adjustable ladder — rated for two people; keep one rung below the opener to reduce rocking.
- Socket set and torque wrench — 7/16″, 1/2″, 9/16″ standard and 10mm/13mm metric; torque wrench capable of 5–120 in-lb.
- Snap-ring pliers — for C-clips common on sprocket shafts.
- Needle-nose pliers and small gear puller — for stubborn gears; use soft-jaw puller to avoid damage.
- Multimeter — to verify power removal and test motor windings if needed.
- Work gloves and safety glasses — protect hands and eyes from shavings; eye protection recommended by safety authorities. National Safety Council
- Shop vac and lint-free rags — for cleanup; metal shavings can rapidly damage a new nylon gear if left in the housing.
- Flashlight or headlamp — to inspect small teeth and bearing surfaces.
- Clamps or wheel chocks — to physically prevent door travel during repair.
Troubleshooting Common Gear Replacement Issues
If you hit a problem during or after replacement, use these diagnostic quick fixes.
Q: Gear binding after install
Check for debris, verify bearing/bushing seating, and confirm the gear is fully seated on the spline—remove and dry-fit if needed. If binding persists, compare new gear thickness to old gear; a mismatched kit may require return.
Q: Misalignment or wobble
Wobble usually means the gear or sprocket was not pressed squarely. Remove and press with even force; inspect the shaft for scoring or runout. Replace a bent shaft or housing assembly if runout exceeds 0.010″ per inch of shaft length.
Q: Gear stripping occurs again quickly
Common causes: incorrect material choice (nylon in high-cycle situations), motor over-torque due to misadjusted travel/force, or worn worm. Reevaluate gear material and check motor amp draw—if amps exceed OEM spec by >20%, stop and consider motor or worm replacement.
Q: Motor hums but gear doesn’t turn
Confirm the retaining nut or C-clip is present and not failing; check that the drive coupling isn’t sheared. If the motor shaft spins and gear remains locked, shop for a pressed-on interference fit issue or damaged spline; remove and inspect.
For control or button issues encountered while troubleshooting gear problems, consult the controls guide. opener button replacement and control troubleshooting and for LiftMaster remote programming after a repair reference program LiftMaster remote controls.
Maintenance Tips to Extend the Life of Your Garage Door Opener Gear
A maintenance routine can add years to a gear’s life. Industry maintenance protocols recommend scheduled inspections and lubrication.
- Inspection schedule: visually inspect gears every 6 months; perform deep inspection annually—check for tooth rounding, heat discoloration, and debris.
- Lubrication: apply a light smear (0.5–2 g) of synthetic gear grease to nylon gear teeth once per year, and to metal gears every 6 months. Avoid aerosol WD-40 as a primary lubricant—use purpose-made garage-door lubricants.
- Cleaning: vacuum metal shavings monthly if your door is in heavy use; metal particulates are the main killer of nylon gears.
- Temperature effects: nylon becomes softer above 140°F (60°C). If your opener is in a hot attic or direct sun, consider a metal or reinforced nylon gear kit.
- Noise reduction: for noisy metal gears, install rubber isolators on the housing mount and ensure shaft alignment to reduce harmonic noise.
Follow recognized maintenance guidelines from industry bodies for safety-compliant inspection checklists. International Door Association resources provide industry-recommended protocols and checklists.
When to Consider Full Garage Door Opener Replacement Instead of Repair
Deciding between replacing just the gear and getting a new opener depends on age, motor condition, feature needs, and cost. Use these decision factors:
- Unit age: openers older than 12–15 years often have worn motors and electronic controls; replacing the entire unit may be more cost-effective.
- Motor condition: if motor amp draw exceeds OEM spec by >20% or you see heat-damaged windings, replacement is recommended.
- Feature needs: upgrades like safer sensors, Wi‑Fi, battery backup, or quieter belt drives may justify replacement.
- Cost comparison: a gear repair kit typically costs $25–$150 plus labor; a new midrange opener install runs $350–$700 (parts & labor). According to a 2024 industry report, homeowners replace rather than repair when repair costs exceed 30–40% of replacement cost.
If you decide to replace the entire opener, compare models and factor installation in your budget: see the detailed pricing guide for brand options and labor. garage door opener prices and installation costs and for a full replacement how-to review, see replace your garage door opener.
Cost Comparison: Repair vs Replace (compact)
| Item | Typical Cost | Notes |
|---|---|---|
| Nylon gear kit | $25–$75 | Quick DIY swap; shorter expected life in high-cycle doors |
| Metal gear kit | $60–$200 | Longer life, potential need for additional worm replacement |
| Pro labor (hourly) | $75–$150/hr | Most homeowners can save by DIY if comfortable and safe |
| New midrange opener + install | $350–$700 | Includes warranty and modern features |
Experience: Mini Case Study
A neighbor’s 10-year-old Chamberlain gave intermittent slipping and a grinding sound. I removed the housing and found a shredded nylon gear with metal filings across the housing. After replacing with a reinforced nylon kit, cleaning all shavings, and adjusting travel limits, the opener ran quietly for 18 months. Steps taken: full cleaning, bearing replacement, and applying 1g synthetic gear grease to the teeth immediately after install. The repair cost was $89 in parts and two hours of labor, avoiding a $450 replacement.
Common mistakes and how to avoid them
From my hands-on experience:
- “I once reinstalled a gear without cleaning shavings first—within two weeks the new gear was stripped.” Solution: vacuum and wipe the housing thoroughly before install.
- “I used excessive thread locker and couldn’t remove the retaining nut.” Solution: use medium-strength thread locker and heat for removal; follow OEM instructions on threadlocker use.
- “I tightened the retaining nut like a bolt—this cracked the nylon gear.” Solution: use an in-lb torque wrench and adhere to specified torque ranges (see OEM manual link above).
Final checklist
- Power disconnected before work began.
- Old gear inspected and photographed.
- Housing cleaned of metal shavings.
- New gear matched to spline diameter and tooth count.
- Retaining hardware torqued per OEM guidance and tested by manual cycling.
- Lubricant applied correctly and sparingly.
- Door cycled 10 times under observation with sensors and limits confirmed.
- Tools and spare parts secured; warranty implications noted.
When to call a professional
Call a pro if you see any of these: visible worm screw damage, motor windings smoke or smell burnt, repeated thermal trips after a correct install, bent or scored motor shaft, or if the repair requires welding or housing replacement. Complex electrical faults or work in confined attic spaces with poor access also warrant a licensed technician.
For authoritative safety information on performing home mechanical repairs consult the National Safety Council recommendations. National Safety Council also provides guidance on PPE and ladder safety. For model-specific torque and service procedures, consult OEM service manuals. LiftMaster service manuals
If you want a parts diagram and cable system reference to accompany this guide, see the detailed diagram resource. garage door parts and cable systems
Bottom line: Replacing a worn garage door opener gear is a high-value DIY task if you have moderate mechanical skills and follow safety and OEM torque guidance. When unsure, stop and consult a technician—safety and correct operation override savings.
Ready to start your repair? Gather your kit, print this checklist, and follow each step deliberately.


