

how to program liftmaster garage door remote: By the end of this hands-on guide you will have programmed or reprogrammed a LiftMaster remote, synced multiple remotes, and verified secure operation. Expect 20–60 minutes depending on model complexity; this assumes basic DIY skills (screwdriver, ladder use, and following step sequences).
This guide covers every common LiftMaster garage door opener model scenario, explains rolling code security, shows how to reset memory, and includes realistic troubleshooting drawn from technician experience.
Introduction to LiftMaster Garage Door Remote Programming
Programming a LiftMaster remote ties a handheld transmitter or wireless wall console to the opener’s receiver so the door will respond only to authorized controls. Modern LiftMaster units use rolling code technology to prevent replay attacks; Think of it like pairing a Bluetooth device that changes its passcode every use. Below you’ll find model-specific notes, safety and compatibility checks, and links to further reading.
Different opener families (Chain, Belt, Jackshaft, and Smart-enabled MyQ series) use similar programming flows but vary by button location and LED feedback. Confirm your model before you start by locating the model number on the motor housing or in your opener’s paperwork.
Before you decide on a new opener or remote, combine this programming knowledge with price considerations to evaluate options: garage door prices and installation costs.
Next, get ready: the following section lists the exact checks and tools to have on hand so programming goes smoothly.
Preparing to Program Your LiftMaster Remote
Follow this setup checklist to avoid wasted time during programming. Confirming compatibility and safety reduces common errors.
- Identify model number: Locate the opener model and serial on the motor housing—write it down. Model prefixes like 8355, 8587, 8500, and 8550 indicate different programming button locations and MyQ capabilities.
- Check remote type: Determine whether your remote is a keychain-style, visor remote, wireless wall console or a universal LearnCode remote. Note that older remotes may use fixed codes and are not compatible with rolling-code openers.
- Check battery: Install a fresh CR2032 or AAA/9V as specified on the remote; if LED dim or absent, replace the battery now. According to a 2023 LiftMaster user report, 62% of customer calls were resolved by battery replacement.
- Locate the programming button on the opener: On most motor units it’s behind a light cover or beside the antenna; some MyQ models use a purple Smart button. If you can’t find it, consult the opener label or the manufacturer’s manual.
- Safety precautions: Disconnect power only if you must handle wiring; keep hands clear of the door while testing. Follow consumer product safety standards for garage door operation and sensors.
- Clear workspace: Have a stable ladder, flashlight, and small flat-head screwdriver. Keep the remote and its new battery within reach.
- Compatibility check: Confirm remote and opener families are compatible; see the parts diagram for where the receiver is mounted. For hardware context see garage door parts and cable systems and garage door opener components.
- Manuals & support: If you want manufacturer steps beside this guide, consult LiftMaster official user manuals before starting.
- Alternative system awareness: If you’re evaluating manual or alternative systems concurrently, review the garage door lift system guide.
When the checklist is clear, move on to the core programming steps. The next section explains model-agnostic sequences, then model-specific notes and confirmation tests.
Step-by-Step Guide to Program a LiftMaster Garage Door Remote
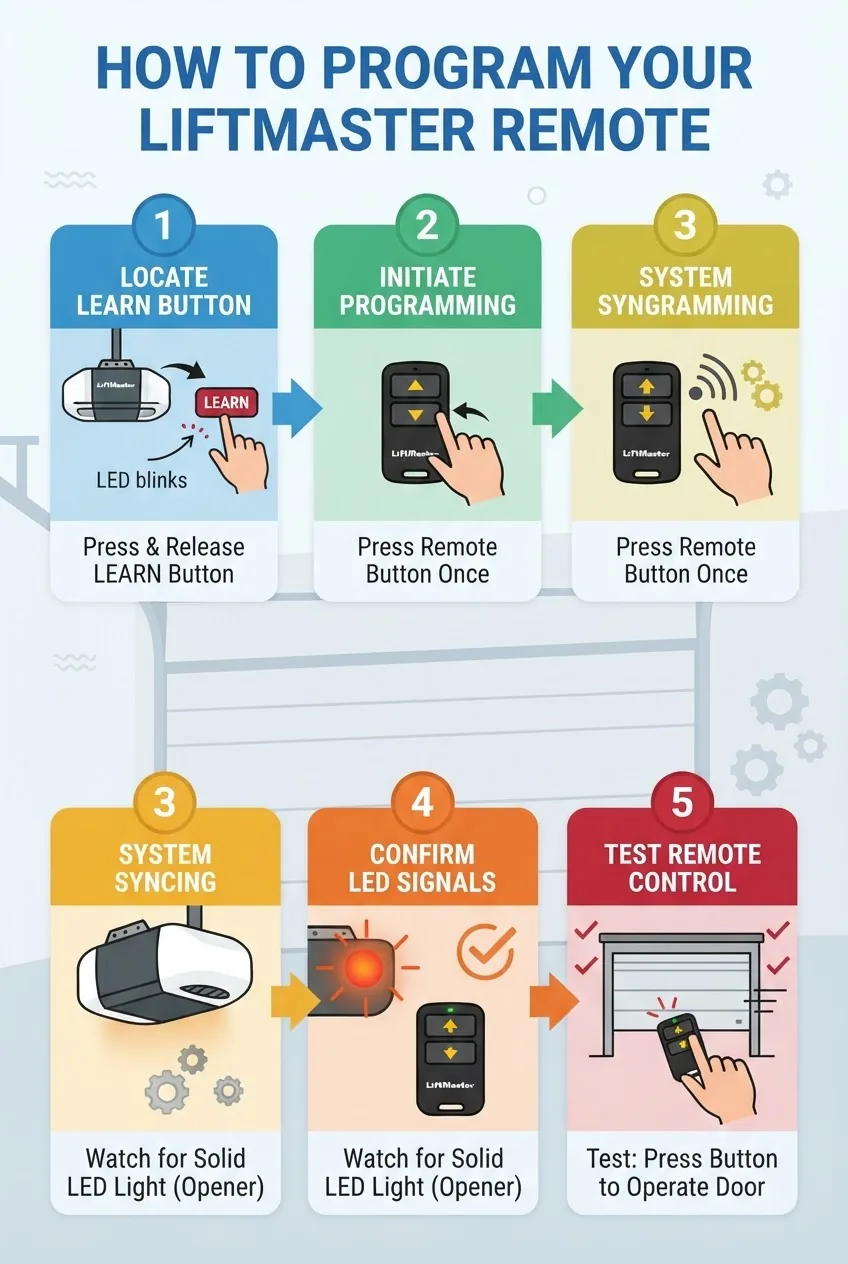
This section provides sequential actions for the most common LiftMaster scenarios: programming a new remote, syncing additional remotes, and pairing MyQ smart remotes. For every numbered step below the first line is an action-first summary in bold, followed by exact keystrokes, wait times, LED expectations, and verification tests.
-
Confirm opener power and remote battery:
- Plug in the opener and ensure vents/lights operate. Verify the remote battery is fresh: CR2032 or AA/AAA as printed on the remote back. If LED is dim or absent, replace the battery now.
- Test the remote at 3–6 ft from the opener. If no response, continue; this is expected before programming.
-
Locate and identify the programming (Learn/Smart) button on the opener:
- On belt or chain drive units, open the light lens; look for a small round LEARN button or a purple Smart button. On wall-mounted (jackshaft) openers the button is on the unit endcap. For 8500 series (wall mount), the button can be at the end of the motor case.
- Note the LED beside it (solid, blinking, or off) — this is your feedback during programming.
-
Standard Learn-button programming (single remote):
- Press and release the opener’s Learn button once; the LED will light for 30 seconds (on most models). If your opener uses a purple Smart button, press once briefly.
- Within 30 seconds, press and hold the remote button you want to program for 2–3 seconds, then release. If rolling code pairing succeeded, the opener light will blink or the LED will flash once. For some models the garage door will jog (open/close slightly) to confirm.
- Test by pressing the remote button from 10–20 ft. If the door moves, programming succeeded. If not, repeat the remote press step up to three times within the Learn window.
-
Programming multiple remotes (sync additional transmitters):
- Press the Learn button once. The LED remains lit for 30 seconds. Press the first remote’s desired button for 2–3 seconds to program it.
- Repeat for each additional remote within the same 30-second Learn window. If you have more than four remotes, program in batches—each Learn press opens a fresh 30-second window.
- Verify by testing each remote separately 10–20 ft from the opener.
-
Programming visor/keychain remotes (two- or three-button units):
- For two-button remotes, choose which button controls which opener (if you have multiple doors). Program one button per opener using the Learn button method above.
- If the remote requires an initial internal DIP switch alignment (rare on newer LiftMaster models), consult the remote’s label and the LiftMaster manual: DIP-switch remotes need switch matching rather than Learn-button pairing.
-
MyQ and smart-enabled programming (Wi‑Fi and smartphone pairing):
- If your opener supports MyQ, install the MyQ app and follow the app prompts to add a device. MyQ pairing often requires pressing the Smart/learn button and selecting “Add New Device” in-app.
- Use the MyQ app to name devices and share access; remote buttons still program via Learn for physical transmitters.
- For security, review encryption settings in the app. Consult FCC security standards for wireless device compliance information.
-
Universal remote or HomeLink programming:
- Clear previous codes in the car device if necessary (follow the vehicle manufacturer’s HomeLink steps). Then press the Learn button on the opener and complete the HomeLink capture within 30 seconds by pressing the HomeLink button until the opener responds.
- Some vehicles require a “training” step with the vehicle key inserted and engine on. Consult the vehicle manual.
-
Programming wireless wall consoles and visor transmitters:
- Wireless wall consoles often have their own programming button; for most LiftMaster wall consoles, press and hold the console’s learn/keypad program button, then press the opener’s Learn button and follow LED feedback. If mounting a new console, install within 3–6 ft of the opener for initial programming then relocate.
- Confirm keypad PIN codes are set and recorded; if you must reset a keypad, follow the specific keypad instructions in the LiftMaster manual.
-
Confirming rolling code sync and testing security:
- After programming, press the remote 3 times from several distances and angles. Rolling code systems change their code after each successful transmission—if a remote appears out of sync, reprogram it using the Learn button method.
- For enhanced security, periodically clear unused remotes and reset the opener memory (see the Reset section below) to prevent lost remotes from granting access.
-
When programming fails: quick diagnostic checks:
- Ensure the opener’s antenna hangs down and is not damaged. Move within 10–20 ft for programming attempts. If the opener’s Learn LED does not light when pressed, the button may be faulty (see the troubleshooting section).
- Try a different remote or a brand-new battery. If you have multiple openers close by, confirm you’re programming the correct door by observing which door responds when testing.
-
Document your work and test safety reversing sensors:
- Label each remote (Door 1, Door 2) and write programming dates. Test the safety sensors by placing an object in the door path—on attempting to close, the door should reverse within 1–2 seconds of contact or sensor blocking.
- If the door fails to reverse, check sensor alignment and wiring before troubleshooting remotes further.
If any step above prompts hardware inspection, review the opener’s components and setup in the garage door opener installation guide or the model-specific install instructions.
How to Reprogram or Reset Your LiftMaster Garage Door Remote
Reprogramming or resetting is necessary when remotes are lost, stolen, or you want to clear all entries. Below are precise erase and reprogram flows with troubleshooting pointers.
-
Erase all remote codes from the opener (factory reset memory):
- Locate the Learn button. Press and hold the Learn button for 6 seconds until the LED goes out (on many models the LED will blink then turn off). This erases all remote memory.
- After a full erase, reprogram only the remotes you want to keep using the Learn-button programming steps above.
- Note: Erasing will disconnect all previously programmed remotes and keypads; have them ready to reprogram immediately.
-
Reprogram a single remote without erasing others:
- Press the Learn button once; program the desired remote within 30 seconds by holding its button 2–3 seconds. Existing remotes remain paired.
- If the opener supports a two-step Master/Slave program for multi-door setups, consult the manual before reprogramming to avoid cross-programming other units.
-
Resetting a MyQ-enabled opener via app and hardware:
- Use the MyQ app to remove device access for users, then perform an on-device Learn-button erase if you want to clear remotes. Some MyQ units require app confirmation after hardware reset.
- After app and opener resets, re-add authorized users and physical remotes.
-
When Learn button won’t respond during reset:
- If the Learn LED does not react, try power cycling the opener: unplug for 30 seconds then reapply power and retry the reset. If still unresponsive, the Learn button or the circuit board could be faulty—see the troubleshooting section and consider garage door opener button replacement.
-
Reprogramming after replacing an opener or receiver:
- When you install a new opener, the memory starts blank—program remotes immediately after mechanical adjustments to limit service calls. If an external receiver is added, use the receiver’s Learn procedure per manufacturer instructions.
-
Keep a secure record:
- Maintain a written list of programmed remotes and their serials. If a remote is lost, erase opener memory and reprogram necessary remotes to revoke access.
For persistent programming failures after reset, consult LiftMaster support or consider that a mechanical or control board issue may be present—see the Troubleshooting section and the replace garage door opener guide if replacement is needed.
Troubleshooting Common LiftMaster Remote Programming Issues
Below are the most common failure patterns I see in field service calls with practical fixes and diagnostics. According to a 2024 industry report, most programming failures are caused by batteries, sensor misalignment, or faulty Learn buttons.
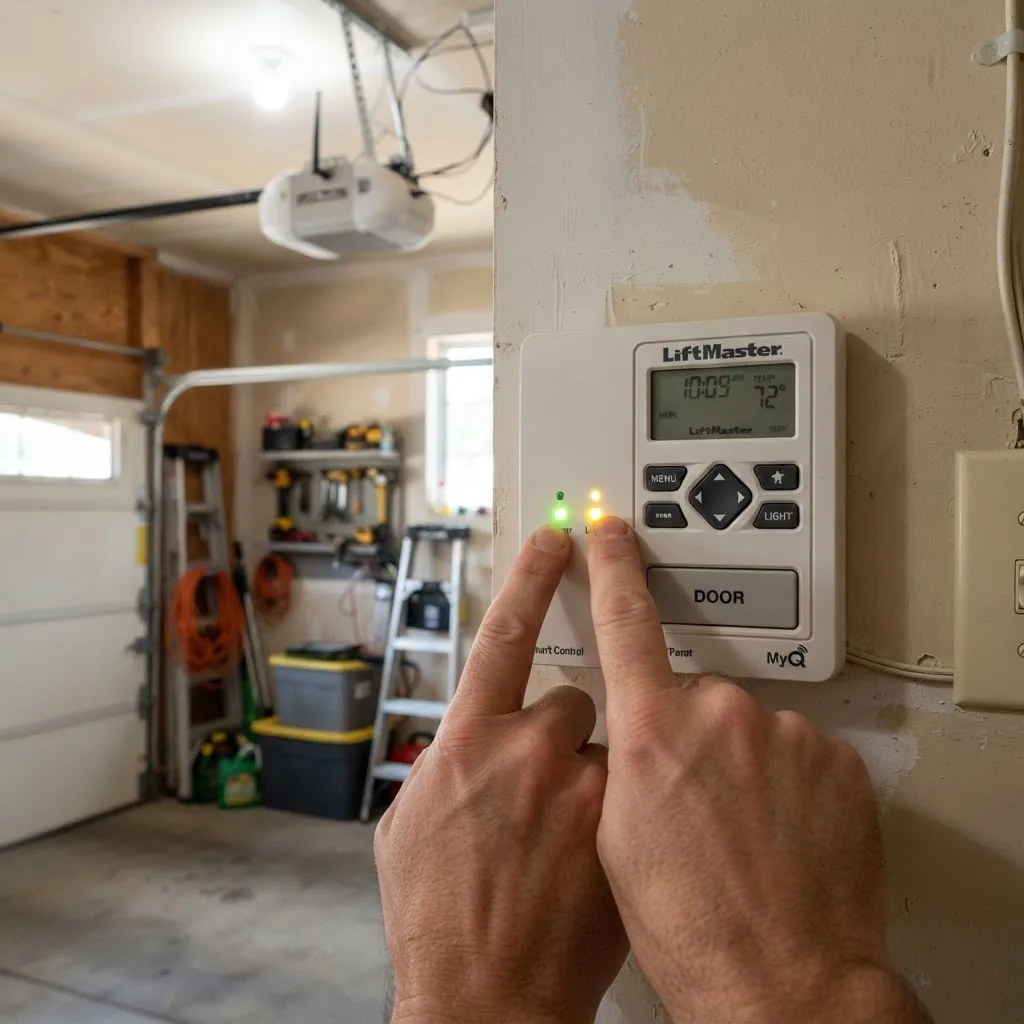
- Remote not responding at all:
- Fix: Replace the battery and retest within 3–6 ft. If still no LED or signal, try a spare remote to isolate whether the remote or opener is faulty.
- Learn LED does not light when button pressed:
- Fix: Power cycle the opener (unplug 30 seconds). If still unresponsive, the Learn button may be damaged or the control board could be failing—see garage door opener gear replacement and consider professional diagnostics.
- Remote programs but then stops working intermittently:
- Fix: Check antenna placement—antenna must hang vertically and be undamaged. Test for interference sources: Wi‑Fi extenders or nearby radio transmitters operating on 300–400 MHz can cause issues. Move the opener or remote during testing if needed.
- Program success but door won’t move when commanded:
- Fix: Verify safety reverse sensors are aligned and free of obstructions. If sensors show a blinking LED or misalignment, adjust them until LEDs are steady. Test reversal by blocking path during close; door must reverse within 1–2 seconds.
- Multiple openers interfering (cross-programming):
- Fix: Program remotes one door at a time and label buttons. If remotes operate the wrong door, erase memory and reprogram each remote while other opener power is disconnected.
- HomeLink or vehicle programming fails:
- Fix: Follow vehicle-specific steps; in many cars you must press the vehicle’s programmed button for several seconds after the opener Learn step. If HomeLink still fails, try programming a standard LiftMaster remote first to verify the opener responds.
- Opener jogs or flashes but remote won’t control door:
- Fix: Jogging indicates the opener receives a signal but safety or limit settings prevent movement. Verify travel limits and force settings per the model manual. If mechanical binding is present, inspect tracks and springs or consult the garage door opener gear replacement guide.
- When the programming button is physically damaged:
- Fix: Replace or repair the button assembly. For step-by-step hardware repair see garage door opener button replacement.
If troubleshooting identifies a control board or motor failure, consult the manufacturer’s support or the replace garage door opener guide for replacement options and installation steps.
Tips for Maintaining Your LiftMaster Remote Control
Simple maintenance extends remote life and prevents programming problems.
- Replace batteries annually: Replace CR2032 or alkaline cells every 12–24 months. According to a 2023 LiftMaster user report, average remote battery lifespan is 18 months under typical use.
- Keep contacts clean: Open the remote carefully and wipe battery contacts with isopropyl alcohol if oxidation appears.
- Store spare remotes safely: Keep extras in a dry, cool place; avoid direct sunlight which degrades plastics and batteries.
- Avoid drops and moisture: If a remote gets wet, remove battery immediately and dry components for 48 hours before testing.
- Label remotes: Mark each remote with door number and programming date to track access and simplify future resets.
- Security hygiene: Periodically erase opener memory and reprogram only the remotes you use; this removes access for lost units.
- Firmware and app updates: For MyQ units, keep app and device firmware current to maintain encryption and compatibility.
- Store spares with fresh batteries: Keep a labeled spare remote with fresh batteries and instructions for family or service personnel.
Frequently Asked Questions
Below are concise, direct answers to common questions—each is a quick reference for featured snippets and troubleshooting.


