

Garage door cover panels let you transform a tired door into a design statement without full replacement. By the end of this guide you’ll know which decorative option fits your home, how to measure and install cover panels, and whether to DIY or hire a pro — estimated time: 3–8 hours for a single-car door; skill level: intermediate DIY (basic carpentry and power-tool experience).
Before you start
- Permits & local codes checked (if required for exterior alterations)
- Tools: tape measure, circular saw or jigsaw, power drill, countersink, 1/8″ and 3/16″ drill bits, level, caulking gun
- Hardware: 1.5″ stainless trim-head screws, 1″ stainless screws for overlays, exterior construction adhesive (polyurethane-based), backer strips (1×2 pressure-treated), exterior-grade sealant
- Materials: chosen panel covers (wood, composite, metal, or fiberglass), primer/paint or clear finish, mounting trim
- Personal protective equipment: eye protection, hearing protection, gloves, ladder rated for at least 250 lb
Follow this hands-on sequence to pick, prep, fit and finish decorative covers; each numbered step below starts with an action-first phrase and includes concrete quantities, settings and timings.
- Measure and document the door — Take three width and height measurements (top, middle, bottom) and record any hardware locations (handles, windows) and hinging/track clearances. Allow a 1/8″ clearance on all sides for thermal movement. Time: 20–30 minutes.
- Choose materials and a style — Select material by weight and weather exposure: wood for warm aesthetics (plan for annual finish), composite for low maintenance, metal for modern looks, fiberglass for lightweight durability. See “Materials Used for Custom Garage Door Covers” below for a comparative table. Time: 30–60 minutes for research.
- Sketch panel layout and cut list — Draw a scaled elevation and mark panel modules (e.g., four 24″ x 18″ raised panels). Create a cut list with 1/8″ reveal gaps between covers and existing door seams. Time: 30–45 minutes.
- Prepare the door surface — Clean with trisodium phosphate or mild detergent; remove chalk, grease, flaking paint. For metal doors, de-rust with a wire brush and prime with metal primer. Allow 24 hours drying for primer per manufacturer directions.
- Pre-fit cover panels — Dry-fit each panel with 1/8″ spacers and shim where necessary; mark fastening points 6–8″ in from corners and every 12″ along edges. Time: 40–60 minutes.
- Mount backer strips (if needed) — Screw 1×2 pressure-treated backer strips horizontally across vertical studs inside the door face at fastening lines using 1.5″ screws through the door into the strip. Use 1.5″ screws with neoprene washers for weather seal. This adds 3/8″ depth — account for it in your clearances. Time: 30–45 minutes.
- Install panels with adhesive and screws — Apply a 3/8″ bead of polyurethane construction adhesive in an S-run across the back of the panel; set in place, fasten with 1.5″ stainless trim-head screws at previously marked points. Countersink screws 1–2 mm and fill with matching exterior filler. Work in 2–3 panel sections; allow adhesive to cure 24–48 hours before heavy use. Time per panel: 10–20 minutes.
- Seal, caulk and finish — Use exterior-grade polyurethane caulk around edges (1/4″ bead). Sand any filler and apply two coats of exterior paint or clear coat per manufacturer (allow 4–6 hours between coats). Use 120-grit then 220-grit sanding for smooth finish. Total finish time: 6–12 hours including drying.
- Test door balance and operation — Open and close the door slowly 10–20 cycles to check panel clearance, binding, and spring/track strain. If the door feels heavier or the opener strains, remove panels and call a technician, or adjust spring tension per your door’s specification (recommended pro). Time: 15–30 minutes.
Transition: With core steps defined, the sections below expand on ideas, materials, selection criteria, installation options, customization techniques, maintenance, costs and resources so you can apply the steps with confidence.
Introduction to Garage Door Cover Panels
A decorative upgrade using garage door cover panels is a cost-effective way to refresh curb appeal, hide dented or mismatched panels, or add architectural detail without replacing the full door. Cover panels are thin overlays — typically 1/4″ to 3/4″ thick — attached to the existing door face using adhesives, screws into backer strips, or mechanical clips. They serve three practical purposes: visual upgrade, light protection, and minor insulation improvement when layered with closed-cell foam. Homeowners choose covers to match shutters, siding or trim, creating a coordinated exterior palette.
Design-wise, covers let you switch from plain sectional panels to carriage-house looks, recessed grids, or modern flat panels. They’re also a quick solution when one or two factory panels are cosmetically damaged but structurally sound — you can hide imperfections rather than replace the entire door.
Mini case study: A homeowner in Portland covered a dented steel door with 3/8″ cedar planks cut into faux-board-and-batten panels, trimmed to 1/8″ reveal gaps; the install took two weekend days and a clear coat finish, dramatically improving curb appeal. Challenges: matching expansion gaps for rainy climate.
Transition: Next, find a range of creative approaches that show how covers can shift your door’s personality.
Popular Garage Door Cover Panels Design Ideas
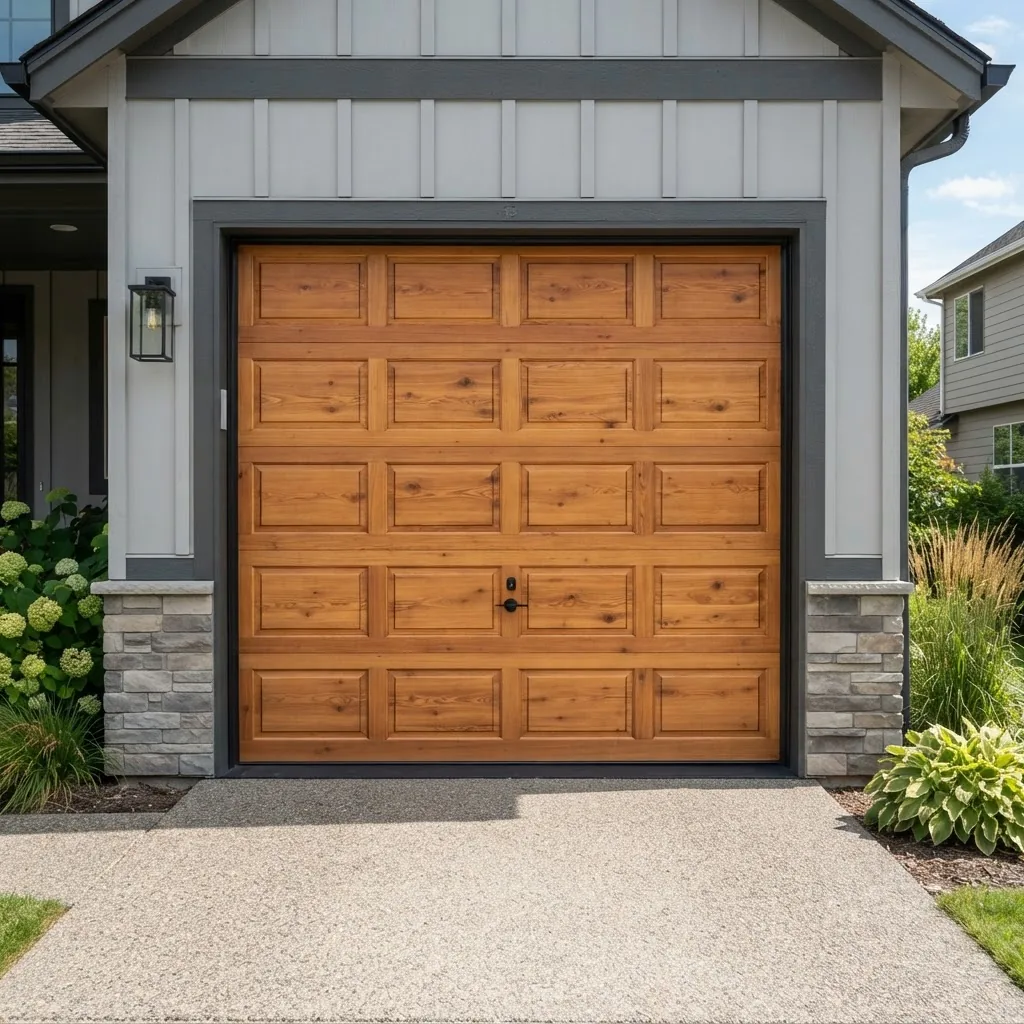
- Faux Carriage House — Simulated cross-brace and recessed-detail overlays that mimic swing-out barn doors; typically MDF or composite with arched top accents for a historic look.
- Raised Panel Inserts — Classic raised rectangles that add shadow and depth; work well in wood, fiberglass or painted composite and pair with traditional hardware (strap hinges, handles).
- Recessed Grid Panels — Shallow recessed squares or rectangles for a mid-century or craftsman feel; good for modern bungalows or ranch homes. For deeper recessed looks, use 3/8″ to 1/2″ panels with a 1/8″ reveal. See recessed panel garage door styles for more on recessed layouts.
- Full-Width Planking — Horizontal or vertical planks of real or faux wood (1/4″ to 3/8″ thickness) for a modern farmhouse; space planks with 1/8″ reveal to allow expansion.
- Modern Minimalist — Flush metal or composite covers with clean lines and hidden fasteners for contemporary homes; use brushed aluminum or powder-coated steel for a sleek finish.
- Mixed-Material Accents — Combine metal trim with wood-look panels or add narrow glass lite inserts (sealed) for a boutique look.
- Windowed Overlays — Insert sealed, double-pane acrylic windows into panel covers to add light; ensure the glazing has a UV rating for long-term clarity.
- Decorative Shutters and Hardware — Non-functional shutters and faux strap hinges create a carriage-house aesthetic without structural changes.
- Textured Faux Wood — Composite panels embossed with wood grain offer the look of cedar with lower maintenance; choose high-density composites rated for exterior use.
- Painted Murals or Stenciled Patterns — Use exterior-grade paints and stencils to create a unique feature panel; seal with a clear coat for protection.
Transition: Once you’ve chosen a look, material selection drives durability, weight and maintenance — explored in detail next.
Materials Used for Custom Garage Door Covers
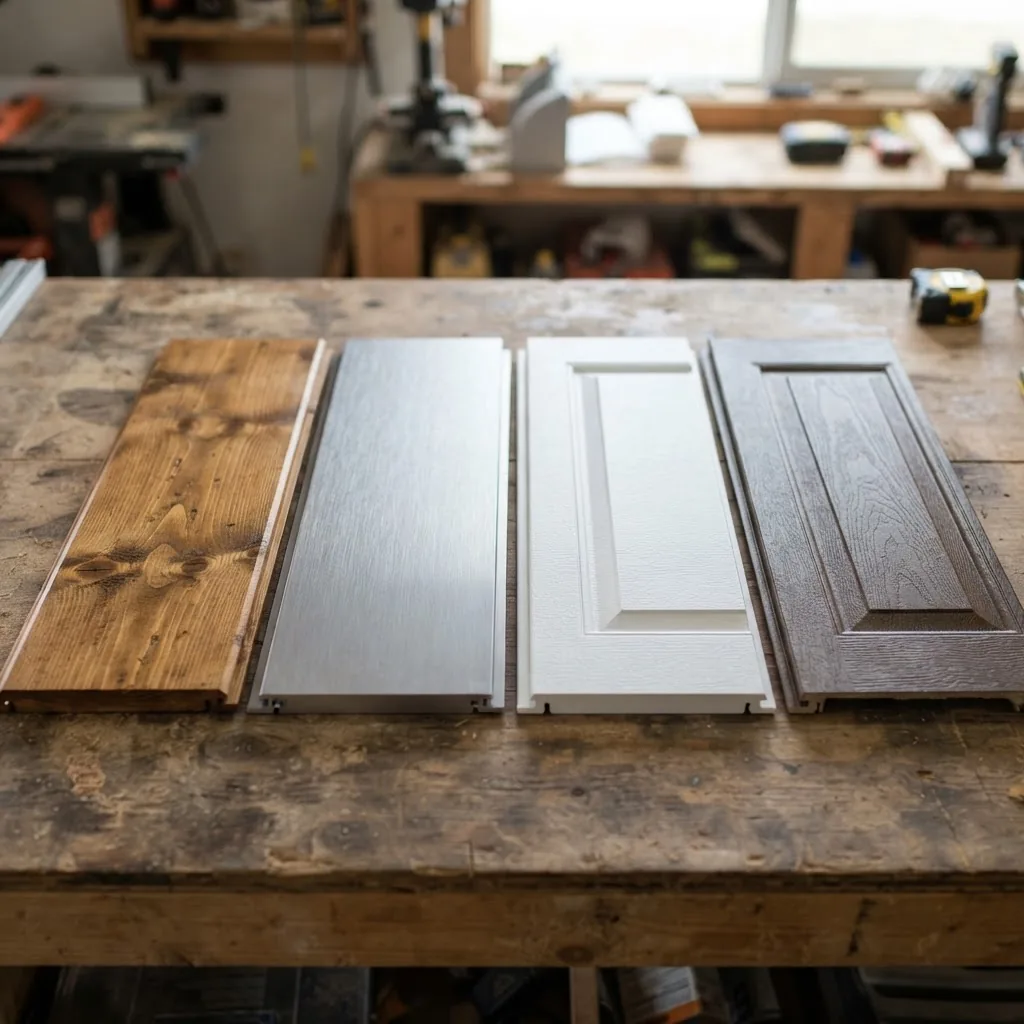
| Material | Pros | Cons | Typical Uses |
|---|---|---|---|
| Wood (Cedar, Pine, MDF) | Warm appearance; easy to shape; good for custom carved details. | High maintenance; prone to rot and expansion; requires yearly finish in wet climates. | Faux carriage house, plank overlays, custom trim. |
| Composite (PVC, HDU, Cellular PVC) | Low maintenance, stable, paintable; resists moisture better than wood. | Higher material cost than MDF; limited deep carving options. | Decorative details, raised/recessed panels, exterior trim. |
| Metal (Aluminum, Galvanized Steel) | Durable, modern finish; lightweight aluminum resists rust; good for narrow trims. | Dents easily (steel), can dent and creak in temperature changes; requires powder coat for longevity. | Modern flat panels, metal banding, accent trims. |
| Fiberglass | Lightweight, rot-resistant, can mimic wood grain; low maintenance. | Can yellow with UV exposure if uncoated; brittle in extreme cold unless reinforced. | Detailed raised-panel overlays, faux wood finishes. |
Material notes and trade-offs:
- Weight: Keep cover weight under 20 lb per panel for single-car doors unless you confirm door spring capacity; heavier covers can accelerate spring wear.
- Thickness: 1/4″ to 3/8″ is common for composite and fiberglass overlays; wood may be 3/8″–1/2″. Thicker panels need longer screws and may require backer strips.
- Durability: For coastal climates choose marine-grade composites or powder-coated aluminum; according to a 2024 industry report, coastal-grade composites show 30% better UV stability over standard composites.
- Finish options: Paint, clear coat, or factory-applied veneers; wood needs primer and two topcoats exterior acrylic enamel.
For deep-dive on the fiberglass option, see fiberglass garage door panels.
Transition: With materials compared, next decide which decorative panels best match your home and climate.
How to Choose the Right Decorative Panels for Your Garage Door
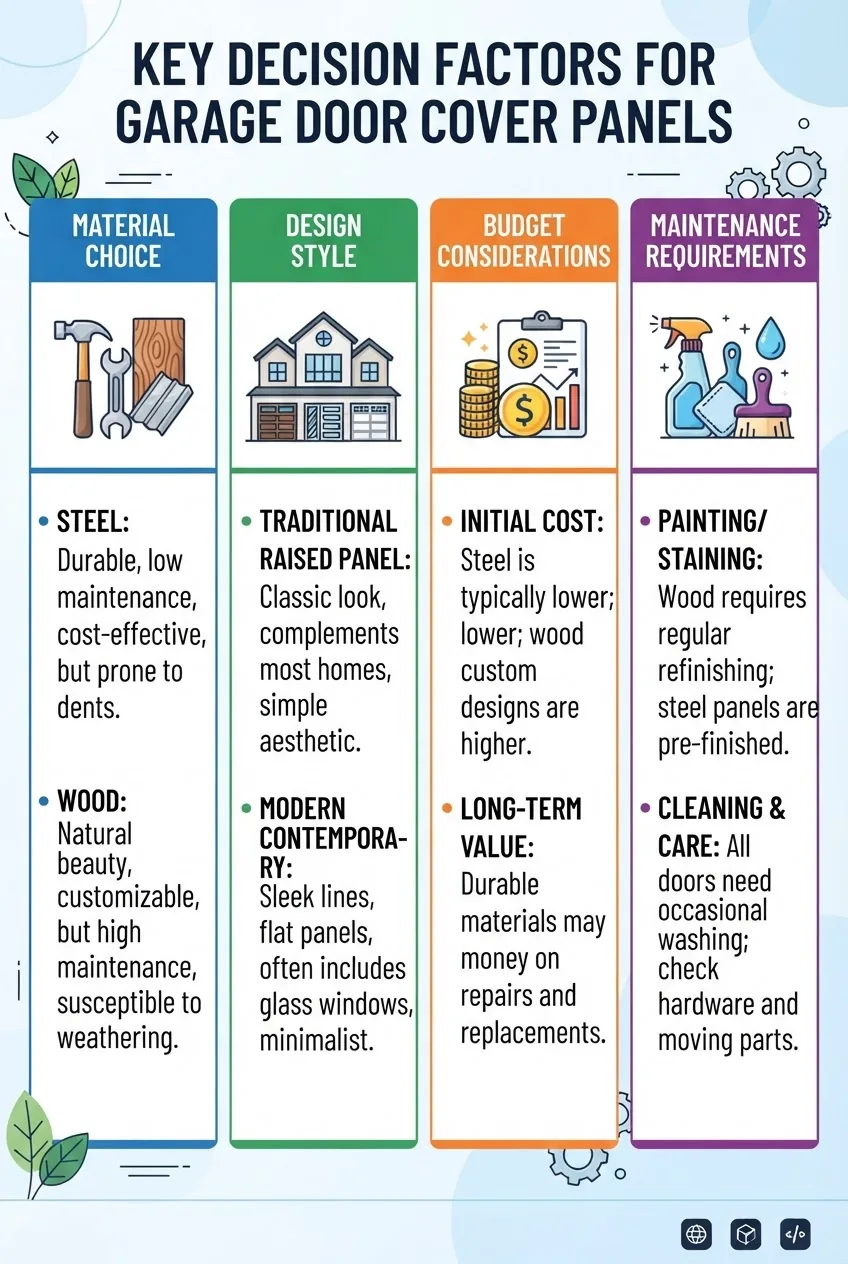
Choosing panels is like choosing a new coat for your door: match style, protection, and weight to function and budget. Align your decision to four key factors below.
- Match your home style — Craftsman homes pair with recessed grids and natural wood tone; modern homes favor flush metal or composite panels with minimal reveals.
- Weather resistance — For humid or coastal areas pick composites or powder-coated metals; for dry climates, wood is an option if sealed properly.
- Panel thickness and weight — Use 1/4″–3/8″ panels for minimal added weight; if covers exceed 30 lb per section, confirm spring and opener capacity.
- Color coordination — Choose neutral base coats and an accent trim color that ties to shutters or front door; lighter colors reflect heat in hot climates.
- Budget considerations — Expect DIY material costs: $150–$700 for a single-car door depending on material; professional installations start higher. See cost section for ranges and sourcing.
Decision checklist (quick):
- Do you need low maintenance? — Pick composite or fiberglass.
- Want authentic wood grain? — Choose real wood or high-quality fiberglass veneer.
- Worried about weight? — Measure opener torque and spring specs before selecting heavy metal panels.
- Do you prefer fast DIY? — Preformed composite overlays are easiest to fit and finish.
Transition: Once you’ve chosen style and material, plan the installation method—DIY or pro—and gather hardware and compatibility information in the next section.
Installation Options for Garage Door Cover Panels
There are three common installation methods: adhesive-only, screw-and-adhesive to backer strips, and mechanical clip systems. Your choice depends on panel material, door construction, and regional weather load.
Method A — Adhesive-only (fastest)
- Use 100% polyurethane construction adhesive applied in 3/8″ beads in an S-pattern on the panel back. Press into place with 4–6 clamps for 10–15 minutes.
- Fasten with temporary 1″ brad nails until adhesive cures (24–48 hours). Remove brads and fill holes.
- Best for lightweight composites and smooth metal doors. Not recommended in cold climates where adhesive cure slows below 40°F (4°C).
Method B — Backer strip + screws (most secure)
- Install horizontal backer strips inside the door face at fastening lines using 1.5″ stainless screws. Space screws 12″ on center.
- Apply adhesive and fasten cover through the door into backer strips with 1.5″ trim-head stainless screws, countersink and fill.
- Best for heavier panels (wood or thick composites) and doors that will be opened frequently.
Method C — Mechanical clip systems (non-penetrating)
- Attach U-shaped clips to the panel edge and hook over the door’s front rib or edge; secure with set screws per manufacturer.
- Use for rental properties or when you must avoid penetrating the door skin; verify clip compatibility with your door profile.
Compatibility considerations:
- Panel attachments must not interfere with hinges, rollers or safety sensors; leave 1/4″ clearance from hinge lines.
- Heavier covers can change door balance. Test balance after installation and adjust springs as needed (recommended professional if springs need major adjustment).
- For detailed frame and trim work see jamb trim and casing replacement.
- Layout and cut panels — Cut four 24″ x 18″ composite panels from 3/8″ cellular PVC. Use a circular saw with a fine-tooth plywood blade (60–80 TPI) at 3/4″ depth; cut feed rate 1/2″ per second to minimize tear-out.
- Create applied cross-brace — Cut 1″ x 3/8″ PVC batten strips at 45°. Fasten strips to panels with construction adhesive and 3/4″ stainless brad nails 10″ on center.
- Fit window inserts — Buy two 12″ x 6″ acrylic lites with pre-drilled frames. Route a 1/4″ recess on the panel face using a router with a 1/4″ straight bit, depth 3/16″. Test-fit glazing with 1/8″ perimeter gap; use closed-cell butyl tape for glazing seal.
- Prime and paint — Apply one coat exterior primer (acrylic bonding primer) and two coats exterior acrylic enamel. Dry times: 4 hours between coats at 70°F (21°C) and 50% RH.
- Mount and finish — Use backer strips and 1.5″ trim screws. Caulk all exterior seams with polyurethane sealant and tool the bead flush. Re-check door operation after 24 hours cure.
- Stenciling and multi-color borders — Use 3M blue painter’s tape for crisp reveals and two thin coats of 25% higher gloss paint on stencils to reduce bleeding.
- Decorative overlays — Machine-cut PVC overlays with CNC or jigsaw; thin reliefs can be glued to create shadow lines.
- Hardware aging — Apply patina on metal straps with chemical aging kits following manufacturer PPE guidelines.
- Personalization — Numbered house IDs or monograms carved into 1/2″ composite plaques and affixed with two stainless screws concealed by caps.
- Cleaning — Wash panels twice a year with mild detergent and soft brush; avoid pressure-washing closer than 3 feet at 1200 psi to prevent water infiltration into seams.
- Weatherproofing — Inspect caulk beads annually; replace once gaps exceed 1/8″. Recoat painted wood panels every 3–5 years or sooner in harsh sun/coastal climates.
- Repainting — Sand glossy finishes with 220-grit, apply primer then two coats of exterior acrylic enamel. Allow 24 hours cure before re-exposing to rain.
- Damage repair — For small dents in metal panels, use a rubber mallet and dolly. For cracked composite or fiberglass, use two-part epoxy patch kits; see garage door panel repair tips and repair kits for products.
- Warranty considerations — Keep purchase receipts and product data sheets; many manufacturers void factory warranties if panels are mechanically altered improperly.
- DIY material costs (single-car door): Wood overlays — $200–$800; composite overlays — $150–$700; metal accent trims — $120–$400; fiberglass overlays — $250–$900.
- Professional installation: Adds $300–$1,200 depending on complexity, local labor rates, and structural adjustments.
- Cost vs benefit: Decorative panels can significantly raise curb appeal; according to a 2024 industry report, targeted exterior upgrades like door resurfacing can increase perceived home value by 1–3% in resale scenarios.
- Buy pre-primed or prefinished panels to reduce labor and finish costs.
- Bundle purchase with a local fabricator for custom CNC-cut overlays — ask for a sample board before full order.
- Factor in spring and opener inspection costs: $100–$250 if adjustment or replacement is needed.
- Local suppliers and fabricators — request physical samples and cut lists.
- Online customization tools — many manufacturers offer virtual mockups; use them to preview color and panel layouts.
- Design galleries and customer reviews — examine multiple installations in climates similar to yours.
- Measurements taken in three places and recorded
- Material selected with weight and weather suitability confirmed
- Backer strips and mounting method planned
- Adhesive, screw types and primer/paint selected
- Door balance tested before and after installation
- Sealant and finishing applied and cured
- Documentation saved for warranties
garage door parts suppliers and repair components
how to change a garage door panel
garage door frame components
tilt up garage door hardware parts.
Safety and standards: follow OSHA recommendations for ladder safety and fall prevention when working at height; for guidelines see OSHA. For building-material exposure and weatherization standards consult industry standards at ICC.
Transition: If you want to make the door uniquely yours, apply the customization techniques below.
Customization Techniques for Garage Door Panel Covers
This section walks through concrete customization steps including a sample walkthrough: creating a faux carriage house panel with windows and applied molding.
Sample project walk-through: Faux carriage house with windows (single-car door)
Other advanced techniques:
Transition: Customizations require upkeep; learn how to care for finishes and extend longevity in the next section.
Maintenance and Longevity of Garage Door Decorative Panels
Good maintenance extends panel life. Below are practical care steps and repair tips.
Common longevity metrics: plain painted composite overlays last 7–12 years before refinishing; fiberglass overlays that are factory coated can last 10–15 years with low maintenance, according to a 2024 industry report. Regional climate and sun exposure shorten these ranges — factor local conditions into your material choice.
Transition: Now that care is covered, review expected costs and value to see whether panels meet your budget and resale goals.
Cost Overview and Value of Garage Door Cover Panels
Costs vary by material, door size, and labor. Below are typical ranges and value considerations.
Where to buy: For panel sheets, hardware and specialty components, see our pillar cost and sourcing guide: garage door panel replacement cost and where to buy panels.
Budget tips:
Transition: Finally, if you want more inspiration and reliable suppliers, the resources below will help.
Final Tips and Design Inspiration Resources
Before you commit, collect photos of your house from the street and create a three-swatch palette (trim, body, accent) to test on a 12″ x 12″ sample panel. Visit local showrooms to touch materials and request small samples. Read user reviews for finish longevity and check manufacturer data sheets for UV and temperature tolerances.
Resources:
Mini case study: In Arizona, a homeowner used powder-coated aluminum slat overlays to minimize thermal expansion; the lightweight install avoided spring changes and retained a stable finish in 110°F summers.
When you’re ready to order, request lead times and delivery windows; custom panels often require 2–6 weeks. For eco-conscious choices, look for certified materials — see FSC for sustainably sourced wood guidance.
Common mistakes and how to avoid them
I’ve seen installers rush measurement and end up with panels that bind at hinge lines — always measure three times and allow 1/8″ clearance. I once used standard construction adhesive in cold weather and it failed to cure; now I always check temperature and choose adhesives rated to cure at the job’s minimum ambient temp. Finally, I’ve installed panels without checking opener torque; after several cycles the door started binding — now I test door balance before final fastening.
Final checklist
When to call a professional
Call a pro if any of the following apply: your panels exceed 30–40 lb per door section; door springs need adjustment; the opener strains or stalls during test cycles; your door is an insulated sectional where penetration could void warranty; or you’re uncomfortable with ladder or power-tool work. For structural trim or frame changes, hire a licensed contractor or carpenter.


