

How to change a garage door panel — follow this hands-on guide and you’ll have a damaged panel removed and a new one installed, aligned, and tested. Expect 3–6 hours for a single-panel replacement with a helper; skill level: confident beginner (basic power tools and two-person lifts).
Before you start, you’ll clear the garage, verify the door operates, and have a helper available for lifting heavy panels.
Introduction to Changing a Garage Door Panel
This guide focuses on practical, step-by-step instructions for removing a damaged panel and installing a replacement so your door moves smoothly and safely. A garage door panel is one of the horizontal sections that stack as the door opens; panels wear from impacts, weather, and age. You’ll learn how to assess damage (dents, cracks, delamination), decide whether to repair or replace, and work safely around springs and cables.
Think of panel alignment like fitting puzzle pieces together for smooth movement: each panel must sit squarely in the tracks, rollers must roll freely, and fasteners must be tightened to specified torque ranges so the door balances correctly. I’ll also share a short case study from a recent two-panel replacement where careful spring management prevented misalignment and saved the homeowner from a costly service call.
Note: this article avoids extended cost comparisons and style catalogs — those are covered in sibling pages such as the fiberglass garage door panels guide and installation costs. Transitioning now to tools and materials you’ll need.
Tools and Materials Needed for Garage Door Panel Replacement
Gather the following before you begin. Each item is listed with why it’s required and recommended specs.
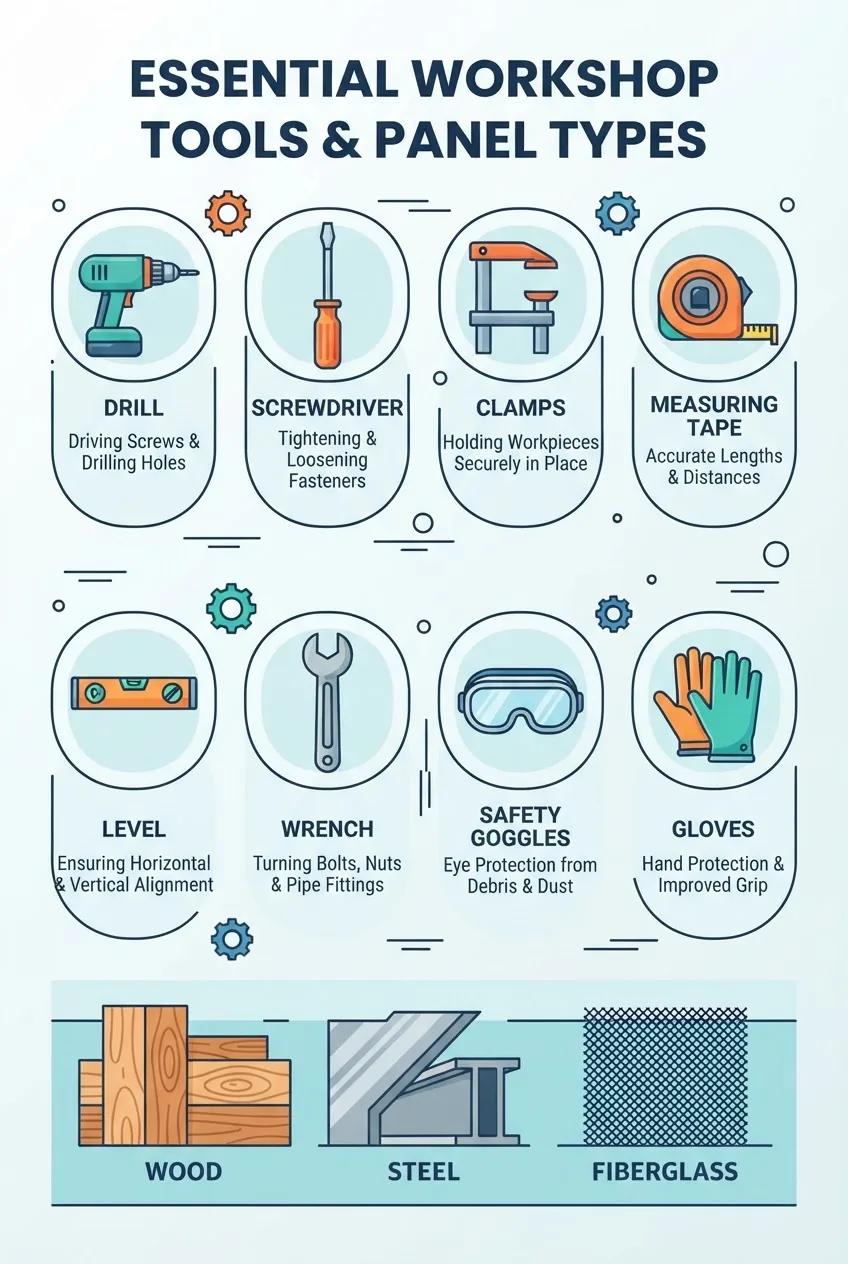
- Cordless drill (18V+) — 1/2″ chuck, use with Phillips and flat bits to remove panel screws and fasteners; keep a torque setting near 20–25 Nm for wood/steel panels when fastening.
- Screwdrivers and nut drivers — 1/4″, 3/8″, and 1/2″ sockets; magnetic tips speed reassembly.
- Clamps and panel lifters — two C-clamps to lock the door while working; panel lifter or help from a second person for 30–60 lb insulated panels.
- Measuring tape and 4′ level — measure panel height, track alignment, and ensure level within 1/8″ across the width.
- Pliers and adjustable wrench — for cable and bracket nuts; specify 10–14 mm wrench sizes common on residential hardware.
- Replacement hardware kit — extra rollers, hinges, 1″ and 1¼” self-tapping screws, carriage bolts (1/4″ x 1″), and weather seal strips matched to panel type.
- Safety gear — safety goggles, cut-resistant gloves, steel-toe boots, and hearing protection for pneumatic tools.
- Sealant and paint supplies — exterior-grade caulk, rust-inhibitor primer for steel panels, finish paint if needed.
- Replacement panel — exact match to your door type (wood, steel, fiberglass) sized to within ±1/16″ of original; if unsure, measure door width and individual panel height.
- Shop vacuum and towels — to clear debris and protect panels during handling.
For sourcing parts and specialty hardware, consult the garage door parts supplier guide and repair components online for verified suppliers and part numbers.
Safety Precautions Before Starting Panel Replacement
Follow these safety steps before touching fasteners, springs, or cables. Garage door springs (torsion or extension) store lethal energy—respect them.
- Disconnect power — unplug the garage door opener and remove remote batteries. Confirm opener motor has no power by trying the wall switch; there should be no response.
- Lock the door — lower the door fully and place two 2×4 blocks under the bottom edge; clamp the bottom panel to the track with two C-clamps (one per side) to prevent movement.
- Release spring tension only if qualified — do not attempt to adjust or remove torsion springs unless you are trained. According to a 2023 OSHA report on residential mechanical hazards, improper spring handling is a leading cause of serious garage-door injuries; consult manufacturer manuals or a pro. OSHA safety guidance
- Wear PPE — safety goggles, cut-resistant gloves, and steel-toe footwear at all times. Use hearing protection if using impact drivers or pneumatic tools.
- Use proper lifting techniques — panels can weigh 30–80 lb; lift with a partner using knees, not back, and hold panels vertical when moving to reduce wind catch.
- Check hardware condition — inspect cables, rollers and hinges before removal; frayed cables or rusted brackets mean call a pro. Manufacturer spring and cable manuals provide torque and cable specs — review them. Manufacturer guidelines
Transitioning to the main task: removing the damaged panel safely and systematically.
Step-by-Step Guide to Removing a Garage Door Panel
These steps are detailed for a typical sectional garage door with torsion springs. If yours is a tilt-up door, consult the tilt-up specific guide before proceeding. For a primer on the frame and component names, refer to parts of a garage door frame explained with components guide.
-
Confirm door position and secure it.
Lower the door fully and place two sturdy 2×4 blocks beneath the bottom edge. Clamp the bottom panel to both tracks with 2–3 heavy-duty C-clamps (one per track). Verify the door will not move by gently tugging upward; it should stay held. Time: 5–10 minutes.
-
Photograph and mark the door.
Take clear photos of the panel faces, hinge orientation, and track positions so reassembly mirrors original placement. Mark panel edges with a grease pencil—write “top” and “outside” so you don’t flip panels. Time: 5 minutes.
-
Disconnect the opener and release the carriage.
Unplug the opener and release the carriage by pulling the emergency release cord. Move the opener arm out of the way. Confirm there is no motor assistance before starting removal. Time: 2 minutes.
-
Remove screws attaching the panel to hinges and brackets.
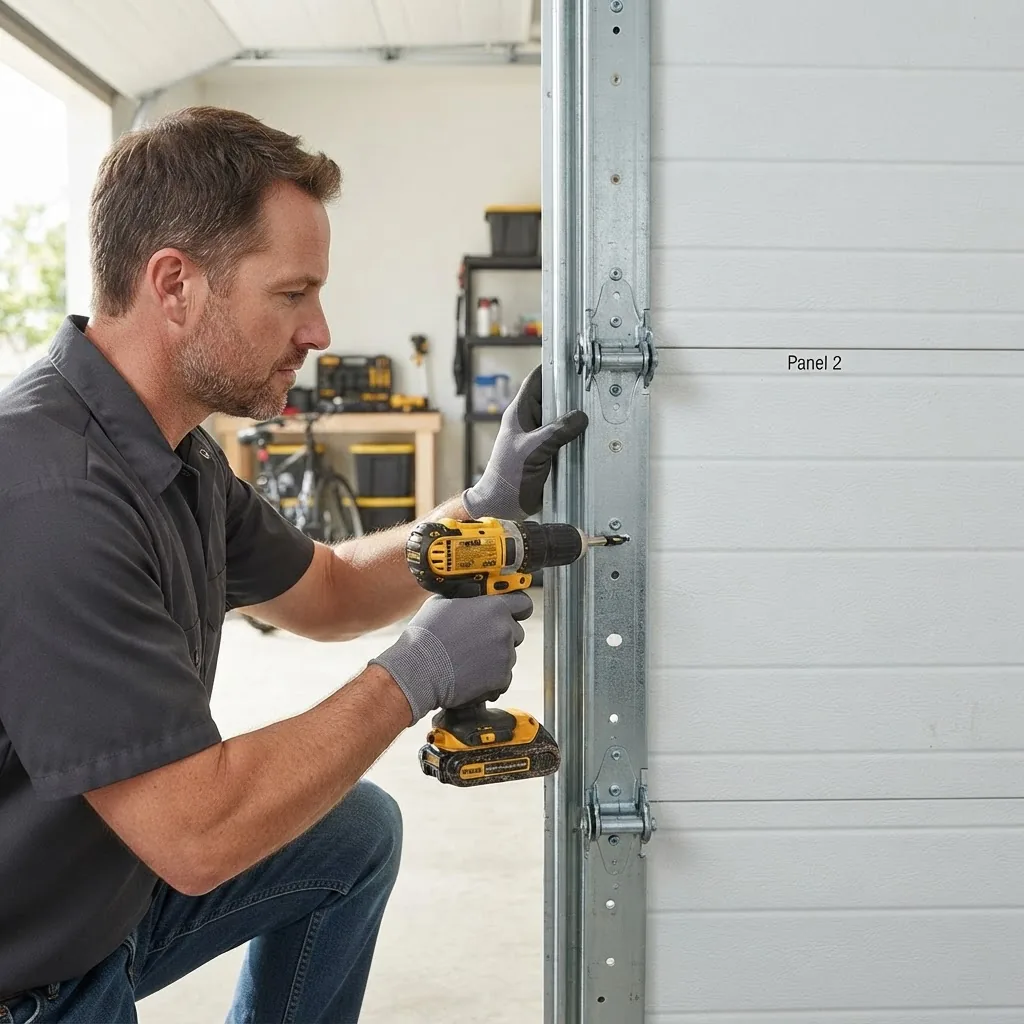
Starting on one side, use an 18V drill with the correct bit to remove hinge screws connecting the damaged panel to the panel above/below. Keep screws organized in labeled cups. For heavy-gauge steel panels, use a 1/4″ nut driver for carriage bolts on hinges. Time: 15–30 minutes.
-
Detach rollers from the track (top-down approach).
Working from the top edge of the panel, use a flat screwdriver to pry out the center guide that retains the roller if present, then pull the roller stem down and out of the track opening. Support the panel with a helper as you remove each roller to prevent dropping. Note roller stem types (nylon, steel) for replacement compatibility. Time: 15–30 minutes.
-
Remove the panel from brackets and hinges.
With fasteners removed and rollers freed, slide the panel slightly inward toward the garage then tilt the bottom outward (if removing a lower panel) or pull it away from the door stack (if removing a middle/top panel). For middle panels, remove upper hinge fasteners first, then lower. Have your helper lift straight up when detaching so the panel clears the track channel. Time: 10–20 minutes.
-
Lower the panel safely to the ground.
Keep the panel vertical as you move it out of the tracks to minimize pressure on edges. Place it on a padded surface or saw horses. For insulated or wood panels (heavier), use a panel lifter or additional helpers. Record panel weight and dimensions for ordering replacements: typical single-panel heights are 18″, 21″, 24″, 26″. Time: 5–10 minutes.
-
Inspect adjacent panels and hardware.
Check the panels above and below for warping, loose fasteners, or cracked hinges. Replace any hinge or roller that’s scored or bent. Measure the track alignment; if tracks are bent, address them before installing the new panel. Time: 10–20 minutes.
-
Label and store removed hardware and seals.
Place screws, nuts, and hinge pins into labeled bags in case they are reusable. Note replaced items in your work log. Dispose of bent rollers or frayed cables per local disposal rules. Time: 5–10 minutes.
-
Double-check spring and cable status.
Visually inspect torsion springs for gaps (broken coils), and cables for fraying. If you see damage, stop and arrange professional spring replacement—do not attempt to reuse or adjust springs. For additional reference on proper spring and cable specs consult the manufacturer manual you identified earlier. Time: 5 minutes.
-
Case study note — what I observed on a two-panel replacement.
On a project last spring I removed two middle panels after an impact. The homeowner had reused warped hinges, which caused the new panels to bind. Replacing hinges and rolling a test cycle with the opener disconnected ensured alignment before final fastening. Outcome: door balanced within 1/16″ and operated quietly.
After removal you’re ready to prep and install the replacement panel. Move on when tracks, springs, and adjacent panels are verified sound.
Installing New Garage Door Panels – A Detailed Process
Installing new panels requires methodical alignment to prevent binding or unbalanced loads. Below I follow manufacturer best practices and cite where particular torque, spacing, and fastener choices matter. After the installation steps I link to resources on sourcing panels and decorative options.
-
Confirm replacement panel fit.
Measure the panel width and height and confirm they match the removed panel within ±1/16″. Check hinge hole spacing aligns with the existing hinge pattern; if not, mark and pre-drill using a 3/32″ pilot for 1/4″ bolts. Time: 10 minutes.
-
Prepare the panel hardware and weather seal.
Install a new top and bottom weather seal on the replacement panel per manufacturer instructions. Apply a thin bead (3–4 mm) of exterior caulk at receiver joints if the door is metal to reduce corrosion. Pre-install hinges and rollers loosely—do not fully tighten yet. Time: 15–25 minutes.
-
Lift and position the panel into the tracks.
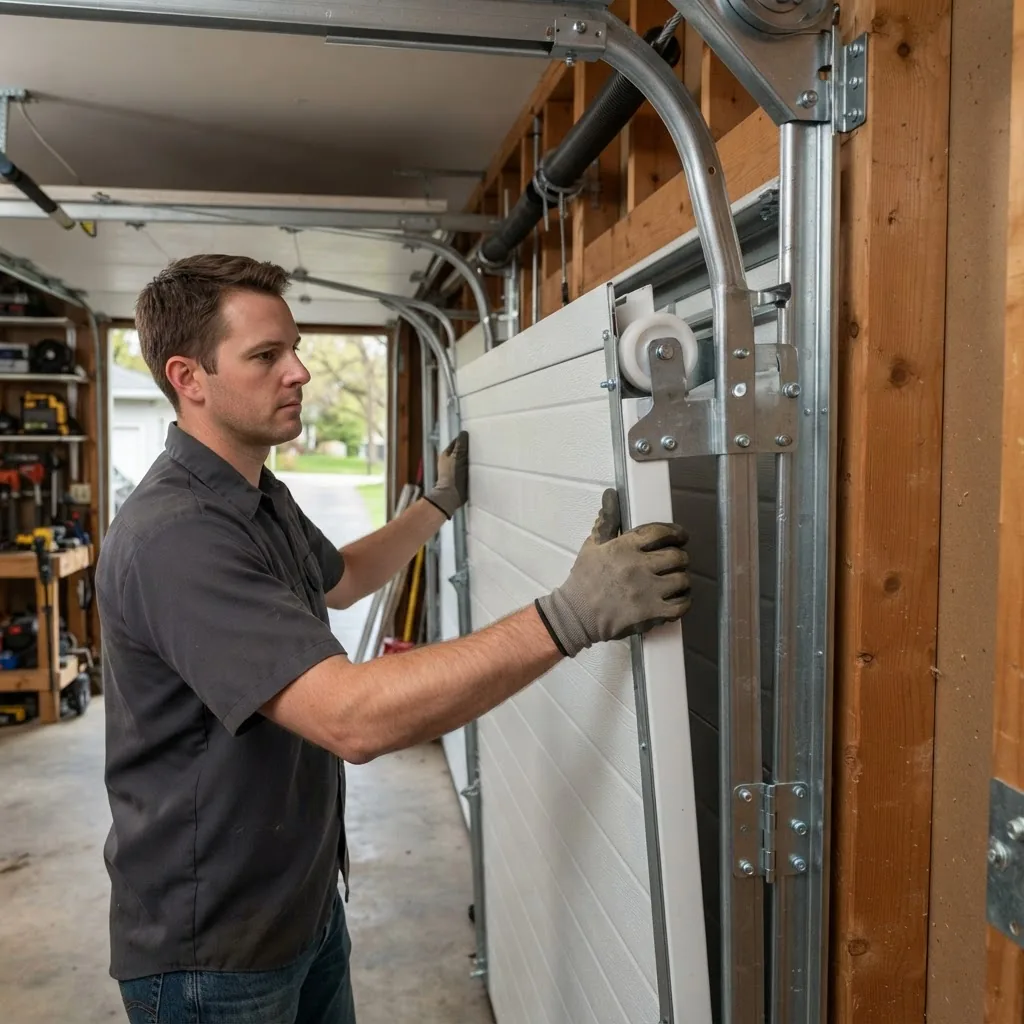
With a helper, tilt the panel into the vertical position and lift so the rollers enter the track. For middle panels, start at the top edge and angle into place; for bottom panels, slide the bottom sealing lip into the door sill. Use a second person to steady the panel while rollers engage. Time: 10–20 minutes.
-
Insert rollers and seat the panel fully.
Guide each roller stem into the track opening, then rotate rollers so they sit correctly in the track profile. For nylon rollers, ensure bearing orientation matches other rollers. After all rollers are seated, tap them slightly to ensure they are fully engaged in the track. Time: 10–15 minutes.
-
Reconnect hinges and fasten loosely.
Fasten hinge bolts finger-tight first to allow micro-adjustment. Use carriage bolts for original hinge types and self-tapping screws for sheet-metal H-frame adapters. Leave 1–2 mm gap between panel faces to allow thermal expansion; measure with a feeler gauge if available. Time: 10–20 minutes.
-
Align panel level and square.
Using a 4′ level set on the panel face, adjust shims or hinge positions until the panel is level within 1/8″ across its width. If a track is offset, slightly loosen track fasteners and correct per the manufacturer (typically 1–2 mm shifts). Tighten hinge fasteners to the manufacturer torque spec — commonly 8–12 ft-lb for 1/4″ bolts on residential hardware. Time: 15–30 minutes.
-
Reconnect or replace rollers, hinges, and cables as required.
Replace rollers with the same diameter and stem type. Reattach cable drums and ensure cable wraps are correct (typically 6–8 wraps on torsion drums). If cable slack exists, adjust springs only if you have spring-handling qualification; otherwise, hire a pro. After reassembly, test cable tension by lifting the door manually halfway — it should hold position. Time: 20–40 minutes.
-
Secure fasteners to final torque and install safety hardware.
Once alignment is verified, tighten all hinge and bracket fasteners to the recommended torque. Replace any missing safety clips or retainer pins. Install new anti-drop brackets if the previous ones were damaged. Time: 10–15 minutes.
-
Reconnect opener and test slow cycles.
Reconnect the opener and perform three slow manual cycles (open/close) at low speed, watching for rubbing, gaps, or noisy rollers. Check for even gaps between panels — no more than 3–4 mm is acceptable. If binding occurs, stop and loosen hinge fasteners to micro-adjust. Time: 10–20 minutes.
-
Seal, touch up, and document the work.
Apply touch-up paint or rust inhibitor to exposed edges, caulk seam joints where the panel meets stiles, and reinstall trim or jamb pieces if removed. Note part numbers and any nonstandard modifications in your maintenance log. For ideas on decorative refinements after installation, see garage door cover panels ideas and custom decorative options and recessed panel garage door styles and installation guide.
-
Final balance and opener adjustment.
Test door balance by disconnecting the opener and moving the door halfway; it should stay in place. If it moves, spring tension needs adjustment — leave this to a pro if springs are torsion type. Reconnect the opener and adjust travel limits per its manual so the door fully closes and reverses reliably. For purchasing panels and pricing guidance, see the garage door panel replacement cost and where to buy panels.
-
Quality check and noise suppression.
Lubricate rollers (nylon rollers only require minimal lubrication), hinges, and tracks with a garage-door lubricant. Tighten loose hardware after 24 hours of operation. Check opener force settings and reversal sensitivity; test with a 2×4 across the threshold — opener should reverse on contact. For more on costs and where to buy, consult the garage door panel replacement cost and where to buy panels.
Transitioning next to alignment and securing tips you can use after installation to ensure reliable operation.
Aligning and Securing Garage Door Panels Properly
Proper alignment prevents wear, noise, and premature hardware failure. Below are targeted checks and a short checklist to get alignment right.
- Check panel level — place a 4′ level on each horizontal panel face; acceptable deviation is under 1/8″ (3 mm) across the width.
- Panel gap uniformity — gaps between stacked panels should be consistent; aim for 2–4 mm. Uneven gaps indicate hinge or track misalignment.
- Tighten in sequence — tighten hinge fasteners in a star pattern from center outward to avoid warping; final torque typically 8–12 ft-lb.
- Track spacing — vertical tracks should be parallel and plumb within 2 mm over the full height; adjust track fasteners or add shims behind mounting plates if required.
- Roller alignment — rollers must sit centered in the track profile; replace rollers that wobble. Nylon rollers: expect quieter operation but inspect bearings every two years.
- Test cycles — perform 10 open/close cycles to let the door settle; inspect for rubbing, popping sounds, or inconsistent stopping points.
Checklist to verify alignment and security:
| Check | Acceptable Threshold |
|---|---|
| Panel level deviation | ≤ 1/8″ (3 mm) |
| Panel gap uniformity | 2–4 mm |
| Roller movement | Smooth, no wobble |
| Door balance (manual test) | Stays at halfway point |
Fine-tune adjustments by loosening adjacent fasteners, nudging the panel position, and retightening. If you encounter persistent gaps or binding after multiple adjustments, the frame may be out of square and require professional correction.
Repairing Minor Damage to Garage Door Panels Instead of Replacement
Minor dents and hairline cracks can sometimes be repaired at lower cost than full-panel replacement. This section compares repair vs replacement and outlines repair methods for common materials.
Repair vs replace — practical trade-offs:
- Wood panels: Small splits or edge damage can be epoxied and filled; large rot or structural compromise requires replacement.
- Steel panels: Minor dents can be pulled and filled; deep creases, perforation or failed insulation typically call for replacement to prevent rust.
- Fiberglass panels: Small cracks can be fiberglass-repaired with putty and gelcoat; delamination or structural failure favors replacement. For a deep dive on fiberglass options and costs see fiberglass garage door panels guide and installation costs.
Repair process overview (dent repair and crack patching):
- Clean and sand — remove dirt, sand to rough up paint around the area (P80–P120 grit), and de-grease with acetone.
- Pull shallow dents — use a stud welder/dent puller for metal or a suction device for shallow dents; for thin steel you’ll need a dolly on the opposite side to avoid creasing.
- Apply body filler — use an automotive-grade filler for steel, or a wood filler for timber panels. Apply in 2 mm layers, dry 15–30 minutes between coats.
- Sand and prime — sand smooth with P240–P320, apply rust-inhibitor primer on steel, then paint with exterior-grade finish matching original color.
- Seal and protect — apply a final clear coat for wood and fiberglass to prevent moisture ingress.
Repair kits and guidance: minor damage can be managed with consumer repair kits. For detailed kit options and step-by-step product instructions see repair garage door panel tips and available repair kits. Note: kits are limited for structural failures and won’t restore insulation or factory finish perfectly.
Case example: a 2-foot dent on a steel panel — I used a stud-type dent puller, two filler layers, and matched automotive spray paint. The visual improvement was strong, and operation remained smooth; however, the paint sheen differed slightly from original factory finish.
Troubleshooting Common Issues After Panel Installation
After installation, some issues can arise. Use these quick diagnostic steps and fixes when the door is sticking, noisy, or misaligned.
Door sticks or binds while opening/closing
Check for localized rubbing on panel edges and bent tracks. Loosen hinge fasteners, realign the panel until it clears the rub, then retighten. Replace any bent track sections — small dents can be hammered out with a pipe dolly and sanded smooth.
Door noisy after new panel
Confirm roller type matches previous setup (nylon vs steel). Lubricate hinges and bearings with a silicone-based lubricant; do not over-lubricate nylon rollers. Tighten loose hardware and replace worn rollers.
Panel gaps appear uneven
Check hinge orientation and shims. Loosen hinge bolts, insert 1–2 mm shims behind the hinge plate as needed, and re-level. If gaps remain inconsistent across multiple panels, the frame may be out of square and require professional straightening.
Opener won’t track limits properly
Adjust travel limits on the opener per the opener manual and verify the force settings. If the door reverses unpredictably, test the safety reversal with a 2×4 at floor level; adjust sensitivity accordingly. If limit adjustments don’t correct movement, check for spring issues or binding in the track.
For tilt-up specific hardware questions or if a part seems unfamiliar, consult the tilt up garage door hardware parts and installation guide. If you suspect spring malfunction, stop work and contact a professional — springs require specialist tools and training.
Maintenance Tips to Extend Your Garage Door Panel’s Life
- Clean panels twice a year with mild detergent and rinse to remove road salt and pollutants.
- Lubricate rollers, hinges and bearings annually; avoid silicone on nylon roller tread unless manufacturer recommends.
- Inspect seals and weatherstrips yearly; replace if cracked or compressed to maintain thermal performance.
- Repaint or touch up steel panels every 3–5 years to prevent corrosion; use rust-inhibiting primer.
- Check and tighten fasteners after one week of operation and then annually.
- Keep drainage at the threshold clear to prevent water wicking up into bottom panels and causing rot or rust.
- Consider adding a door sweep and repainting exposed edges when re-trimming; see garage door jamb trim and casing replacement cost guide for trim updates.
When to Call a Professional for Garage Door Panel Replacement
Call a professional if any of the following apply:
- Broken torsion springs or frayed cables are present.
- Frame or track is bent significantly, indicating structural issues.
- Door will not balance after panel installation (fails the halfway hold test).
- Electrical opener requires complex limit or force adjustments after installation.
Professional services offer certified spring handling, warranty-backed parts, and load testing. If you’re unsure about spring tension or cable integrity, hire a licensed installer to avoid injury or further damage.
Common mistakes and how to avoid them
I’ve seen homeowners try to adjust torsion springs with basic tools — I stopped that and called a pro. I also once reused warped hinges, which led to binding after installation; replacing hinges avoided repeated disassembly. Never skip photographing your setup before removal; I once reassembled a panel rotated 180° and had to redo the job.
Final checklist before finishing the job
- All fasteners tightened to spec and labeled replacements used where needed.
- Panel level within 1/8″ and gaps uniform 2–4 mm.
- Rollers run smoothly; no wobble or rubbing.
- Door balances at halfway when opener disconnected.
- Safety reversal functions correctly and opener travel limits set.
- Manufacturer instructions adhered to for any spring or cable work.
When you’ve ticked each box, run 20 cycles to settle the system and re-check fasteners after the first day of use. For sourcing parts and detailed component suppliers, revisit the garage door parts supplier guide and repair components online. For further reading on panel styles and buying panels visit the pillar and sibling articles linked earlier.
Conclusion
By following these steps you can remove a damaged panel, install a replacement, and restore safe, quiet operation to your garage door. Always prioritize safety around springs and cables, document your work, and test balance and reversal systems thoroughly. If you hit a spring, cable, or structural issue, call a professional. Ready to start? Gather tools, confirm a helper is available, and refer to the linked supplier and style guides as you choose the replacement panel.


