

By the end of this hands-on guide you’ll have a correctly framed garage door rough opening ready for hardware and track installation; a typical single opening takes roughly 4–10 hours depending on size and crew. Skill level: intermediate DIY or pro carpenter (basic framing, level, and layout experience assumed).
Before you start
- Permits and plan check (confirm local code and manufacturer rough-opening requirements)
- Tools: 25′ tape, 4′ and 8′ levels, speed square, circular saw, reciprocating saw, framing nailer (3½” nails), hammer, chalk line, impact driver, framing clamps, adjustable jack post
- Material basics: pressure-treated sill plate, 2×4/2×6 studs, double or LVL header stock sized to span, galvanized hurricane anchors, structural screws
- Safety: eye protection, hearing protection, respirator for cutting, gloves, and a stable scaffold or ladder
- Site checks: confirm roof/ceiling load path above opening, clear obstructions, verify slab level at threshold
Quick tools list (practitioner): tape (true zero caliper), speed square for plumb and layout, framing nailer set to 80–120 psi, cordless impact (80+ ft‑lb), reciprocating saw for demo, and a short hydraulic jack for temporary header support.
Introduction to Garage Door Framing
garage door framing is the structural work that creates the rough opening, supports header loads, aligns jambs, and establishes the mounting surfaces for tracks and hardware. The framing purpose is threefold: (1) transfer roof and floor loads safely around a large opening, (2) provide accurately sized, plumb, and square jambs for smooth door operation, and (3) deliver a durable substrate for weather sealing and finish trim.
Key terminology defined up front: a rough opening is the framed opening dimension before the door and trim are installed; a header is the load-bearing member spanning the opening; king studs run full height at the opening edge and carry header load to the sill; trimmer (jack) studs support the header ends; the sill plate secures the bottom of the wall to the foundation.
Framing accuracy is critical: door operation tolerances are tight — most overhead doors require the jambs be plumb and the header level within 1/8″ across the opening for a smooth installation. According to the 2024 International Residential Code, openings that alter load paths require engineered headers or approved alternatives; consult the code or a structural engineer where roof/ceiling loads change direction.
Transition: With those basics set, next we’ll cover precise dimensions and the measurements you must use when laying out any garage door opening.
Understanding Garage Door Rough Opening Dimensions and Sizes
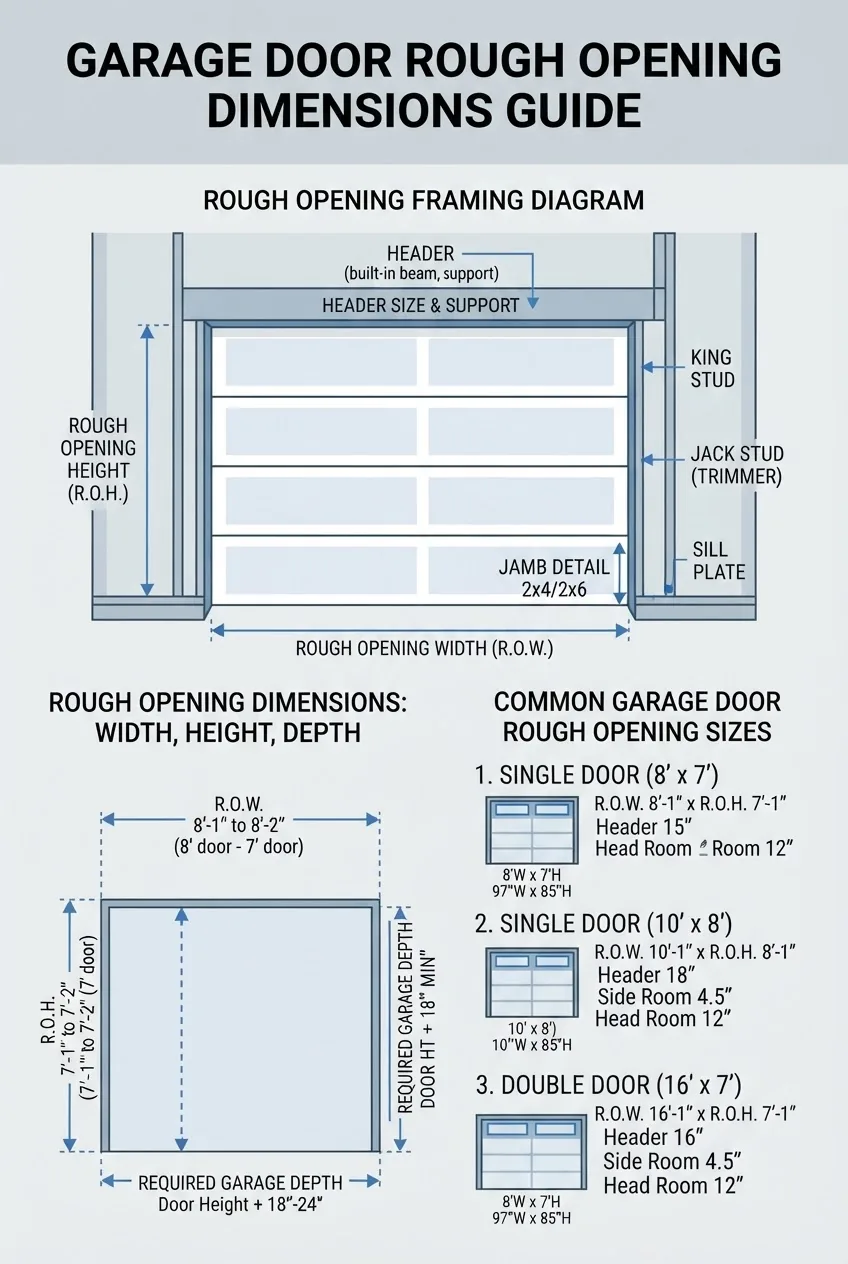
When I say rough opening, I mean the framed cavity width, height, and the depth necessary to accept the door tracks, jambs, insulation, and any finishing. Manufacturers most often specify a rough opening that is slightly larger than the door to allow clearance for hardware, track depth, and shims.
Common rule-of-thumb used by many manufacturers: add 2″ to the door width and 2″ to the door height (one inch each side and one inch above the door). That yields a working table of typical rough openings for common residential doors:
| Door Size (nominal) | Rough Opening Width | Rough Opening Height |
|---|---|---|
| 8′ x 7′ (96″ x 84″) | 98″ (8’2″) | 86″ (7’2″) |
| 10′ x 8′ (120″ x 96″) | 122″ (10’2″) | 98″ (8’2″) |
| 16′ x 7′ (192″ x 84″) | 194″ (16’2″) | 86″ (7’2″) |
Dimensional tolerances I use on-site: aim for +/- 1/8″ plumb and level across the jamb and header. For width, allow a final shim range of 1″ per side for insulation and weather-stripping — if your rough opening is undersized by more than 1/4″ per side, you’ll need to widen it.
If you’re working specifically with a 10×8 door, see the manufacturer’s nuances for track and operator clearances; for a dedicated sizing and options reference, check this guide: 10×8 garage door sizing and options
Depth (wall thickness) matters: standard stud depth 2×4 (3½”) typically accepts low-headroom conversions or adapter jambs; 2×6 walls (5½”) are preferred where insulation and thicker jamb detail is needed. For deep tracks or insulation builds add blocking and continuous jamb extensions to reach the required depth.
Note: some manufacturers call for a 2″ headroom above the door for typical torsion hardware; low-headroom tracks may reduce that requirement — always verify with the manufacturer installation manual for the door model you purchase. For code and header load details, consult the authoritative code source: 2024 International Residential Code.
Transition: the dimensions are only part of the story — the components that make that opening structural will determine long-term performance and code compliance.
Essential Components of Garage Door Frame Construction
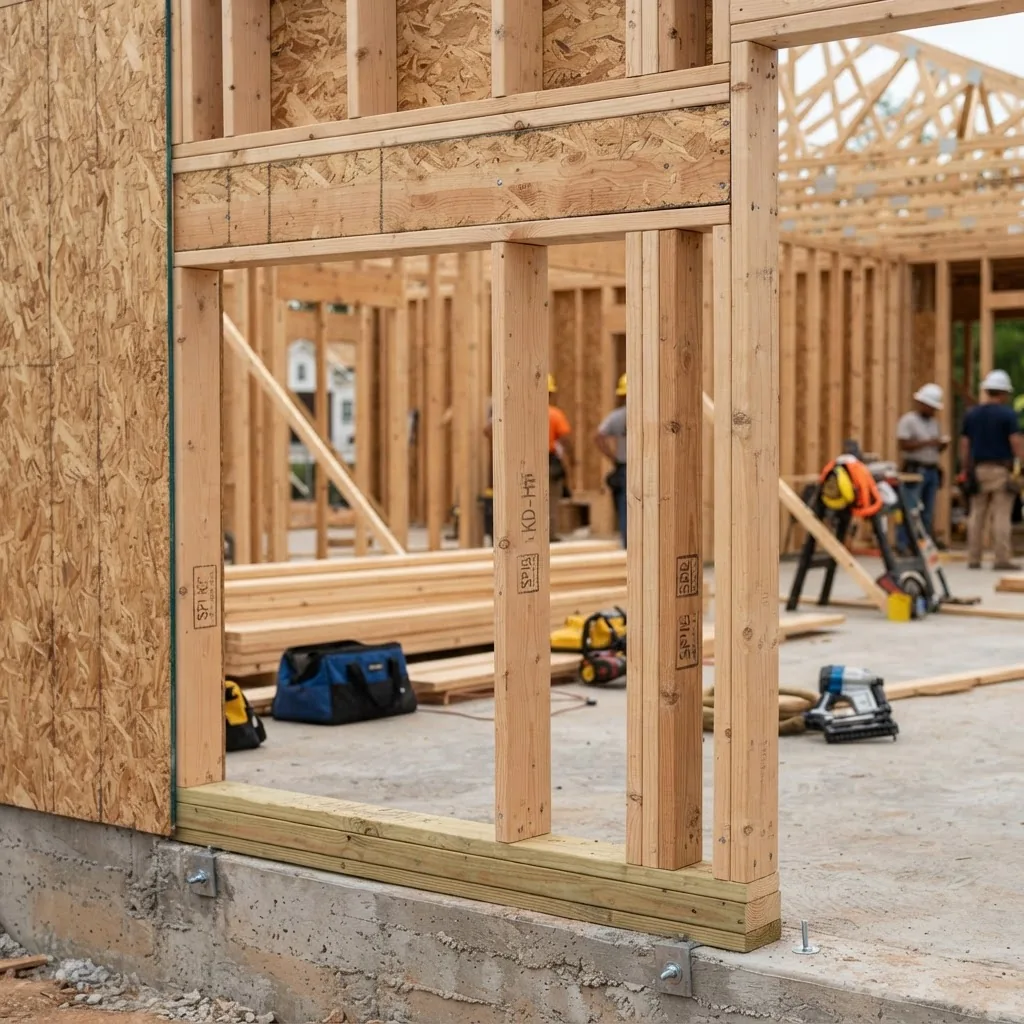
The primary framing pieces in a garage door opening are the header, trimmer studs (also called jack studs), king studs, sill plate, and the jambs that form the vertical faces where the door hardware attaches.
Component quick definitions and typical dimensions I use:
- Header: a built-up member (two or three 2x lumber, or an engineered LVL/LSL) spanning the opening. A single-car (up to 10′) typical header is often 2-2×10 or an LVL sized per span tables; larger spans (16′) typically need engineered LVL or laminated headers sized by a structural table. According to the 2024 IRC, header sizing must account for roof and ceiling loads; when in doubt, use an engineered header or consult a structural engineer (IRC 2024).
- Trimmer (jack) studs: set under each header end. Use at least two 2x studs (or a single 4x) for larger headers; fasten to king stud with nails and structural screws.
- King studs: full-height studs nailed to the opening edge carrying the header load to the sill. Use standard spacing and confirm with code/engineer for multiple-car openings.
- Sill plate: pressure-treated wood anchored to foundation; attach rim joist and king studs to the plate with approved anchors.
- Jamb detail: the finished vertical surface the door seals against; include backing and blocking for hardware. For insulated installations add continuous jamb extensions and weatherstrip rabbets.
Practical framing diagram references and material choice: wood framing (SYP #2 grade) is common for residential; metal studs (cold-formed steel) are used in commercial or where rot is a concern. For in-depth material options and performance comparisons, see the garage door framing materials.
Header sizing trade-offs I weigh on-site: a wider built-up header (3-2×10) reduces deflection but uses more material; LVL provides lower depth and predictable deflection but costs more. The header functions as a load-bearing beam; think of it like a small floor beam spanning the opening — if the header deflects, the track alignment and door operation will suffer.
Manufacturer jamb detail: follow the door manufacturer installation manual for jamb thickness and anchor patterns. Many overhead door manufacturers publish installation manuals online — consult the specific manual for track, hinge, and seal clearances before nailing off jambs.
Transition: with components in mind, below is a detailed, step-by-step how-to for framing the opening accurately and safely.
Step-by-Step Guide: How to Frame a Garage Door Opening
Below is a procedural layout you use on-site. Steps are ordered for a new framed wall on a slab; modify for retrofit or framed-wall removal projects. Each numbered step starts with a bolded action phrase.
- Confirm permit and site layout. Verify permit, check site dimensions, and confirm the opening location on the wall. Measure twice: snap chalk lines showing opening center and jamb lines. Record finished floor elevation at threshold; if slab has slope over 1/4″ across opening, plan for a ramp or threshold plate.
- Verify rough opening dimensions and header design. Using the door size, determine rough opening width and height from the earlier table and manufacturer requirements. For example, for a 16×7 door plan for a 16’2″ x 7’2″ rough opening. Confirm header size with span tables or the IRC; for a 16′ span I commonly specify an LVL sized per load tables, or a triple 2×10 built-up header with bearing plates. When the roof load changes direction above the opening, consult a structural engineer. External reference: 2024 International Residential Code.
- Mark and cut the opening (demo stage). If removing existing wall or block, cut sheathing and backing carefully. When cutting masonry or CMU, use proper anchors and flashing methods — keep sill plate clearing intact and protect the slab edge. For wood walls, cut bottom plate and remove studs up to points where header support posts will be installed.
- Install temporary supports and jack posts. Before removing supporting studs, run temporary shoring above the header line using 2×4 shores or adjustable screw jacks and beams to carry roof/ceiling loads. I set shores 2–3′ inside the wall line and install a temporary beam under the existing load path before removing studs.
- Place and anchor the sill plate. Ensure the sill plate is pressure-treated where it contacts masonry or slab edge. Drill and install anchor bolts per local code (typically every 6′ with a bolt within 12″ of ends — check IRC or local code). Shim to level at the threshold, adjusting for slab irregularities to within 1/8″.
- Build and install the header assembly. Cut header members to length, assemble with construction adhesive and nail pattern meeting code (e.g., 10d nails every 12″ staggered on a built-up header or structural screws for LVL). Set header on temporary jack studs and secure to trimmer studs with approved fasteners. For long spans, install header bearing plates on top of trimmers where applicable. If using LVL, seal cut ends per manufacturer instructions. For engineered header sizing consult an engineer or the manufacturer manual.
- Install trimmer and king studs. Fasten two trimmer studs under each header end to transfer load to the sill plate. Add king studs outside the trimmers, nailed at 16″ on-center or as required by framing practice. Toe-nail or use structural screws and install blocking to resist twisting.
- Plumb and square the jambs, then fasten. Using a 4′ level, plumb each jamb to within 1/8″ tolerance top-to-bottom and check diagonal measurements for squareness. Temporarily clamp a solid 1x or 2x spacer at the jamb to ensure mounting faces are straight. Fasten jambs to king studs with 3″ structural screws through predrilled holes every 12″. Leave space for shims behind the jamb for final adjustments.
- Install header backing and hardware blocking. Install blocking as called for by the door manufacturer for track brackets and spring anchor plates. Place full-height solid blocking at hinge points and hardware mount points. Confirm anchor bolt locations and predrill pilot holes for heavy hardware to avoid splitting.
- Check level, plumb, and clearances before sheathing. With the header and jambs installed, recheck all dimensions: width at top, middle, and bottom must be within 1/8″; diagonals must match within 1/8″. Confirm headroom (clearance above header) matches the door and operator requirements — low-headroom conversions can alter this.
- Install sheathing, flashing, and sill seals. Apply weather-resistive barrier and flashing per manufacturer and local code. At the threshold, install a continuous sill gasket or seal and provide a drainage path where slab meets framing.
- Final prep for door installation. Leave jamb faces ready (no loose shims), verify anchor pattern aligns with manufacturer template, and document header elevation and jamb plumb for the installation crew.
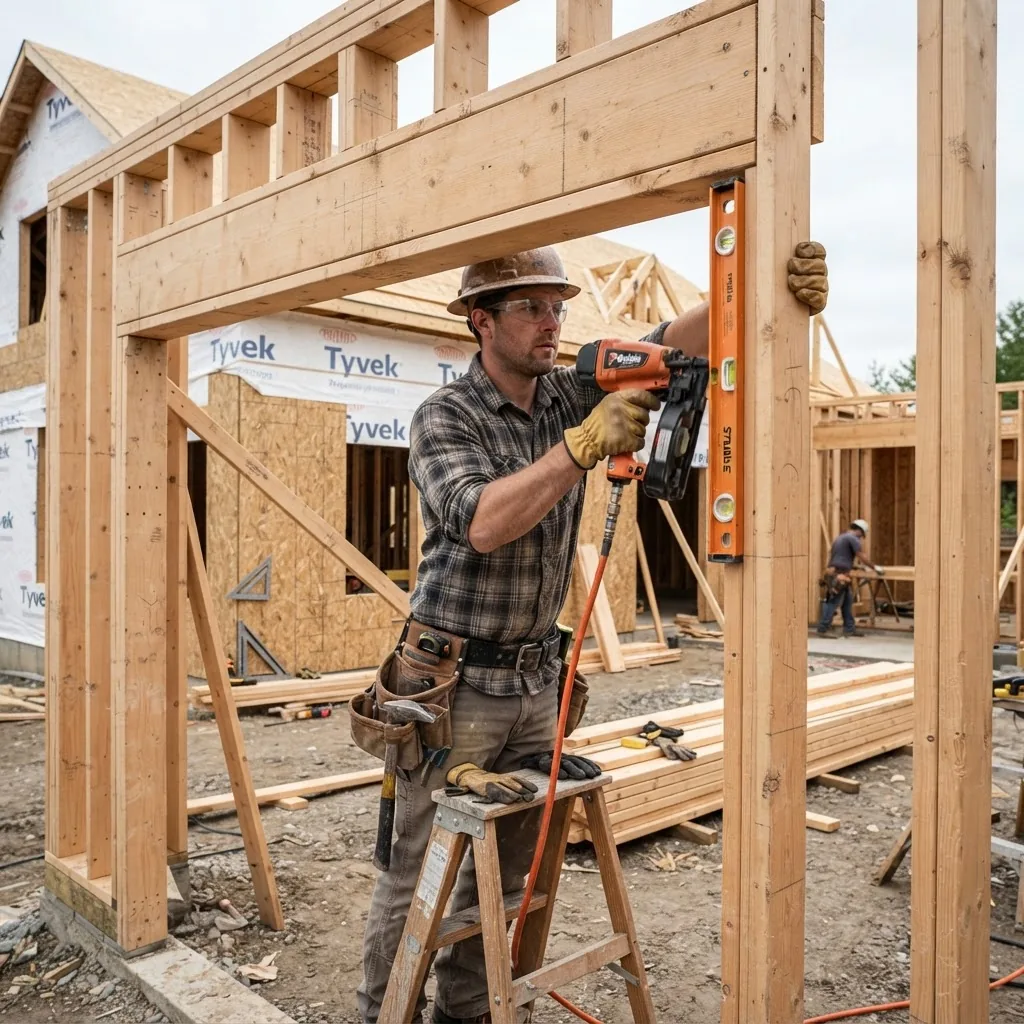
Case study — framing a 16×7 opening (practical walkthrough)
I framed a 16’x7′ opening on a single-car garage retrofit. Time breakdown on site with two carpenters: layout and demolition 1.5 hours; temporary shoring and header assembly 2 hours; setting header, trimmers, and jambs 2 hours; sheathing and flashing 1 hour — total 6.5 hours. Tools used: 3½” framing nails in a high‑capacity nailer, two jack posts, 1‑3/4″ LVL header (engineer-specified), and long structural screws for hardware block.
- Layout and measure — measured slab and established 16’2″ width by 7’2″ head height. Marked centerlines and verified slab flatness within 1/8″.
- Temporary support — installed two adjustable jack posts and a 2×8 temporary beam across the opening 2′ inside the line to take roof load.
- Header install — installed a glued-and-screwed 1-3/4″ LVL with bearing plates; confirmed no sag after unloading temporary posts.
- Jamb alignment — shimmed jamb bottoms to account for 3/16″ slab dip; plumbed to 1/8″ tolerance and fastened with 3″ structural screws every 12″.
- Blocked hardware — installed full-height blocking at hinge locations and a 3/4″ plywood backing behind operator mount points per the manufacturer’s template.
Common mistakes and how to avoid them (practitioner notes)
I once failed to shim the sill properly and ended up with a 3/16″ twist in the jambs that caused the first spring installation to bind. I now always check threshold level at three points and install a continuous sill shim where the slab has any depression. When under time pressure I have also failed to confirm the manufacturer’s headroom; that mistake forced me to retrofit a thicker headroom kit. Double-check clearances before finalizing the header.
Transition: now that you’ve seen the practical steps and a case study, let’s cover durable framing details and industry best practices that protect performance over time.
Garage Door Framing Detail and Best Practices
Good framing is a combination of structural integrity, weatherproofing, and precise alignment. Below are best-practice items I apply on every job.
- Nailing and fastener patterns: use 10d or 16d nails per header face in a staggered pattern every 12″ on built-up headers, or follow LVL manufacturer fastener schedules. Use structural screws at hardware mounting points to resist cyclic loads.
- Anchoring the frame: anchor sill plates to PSD or concrete with bolts spaced per code, typically within 12″ of corners and every 6′; use epoxy anchors where code allows. Tie king studs to sill plate with metal straps for uplift resistance.
- Shimming and leveling: shim jambs with composite shims; torque screws gradually and re-check plumb. Keep shim stacks under 3/8″ recommended—if larger, rebuild the substrate instead of over-shimming.
- Moisture barriers and flashing: wrap the header and jambs with a weather-resistant barrier, lapping flashing over head and jambs; install drip edge or sill flashing at the threshold to direct water away.
- Insulation and thermal breaks: add full-depth insulation to jamb cavities and continuous seals at the head to reduce air leakage. For insulated doors review the R-value effect on track anchors—use nonthermal-bridging fasteners where possible.
- Hardware blocking: install solid blocking at hinge, track brackets, spring anchor, and opener mount points to manufacturer templates. Pre-drill mounting holes to avoid splitting and align holes with the operator template.
- Design-specific considerations: for special designs like flush-faced doors, follow specific framing contours and reveal details — see guidance on flush panel garage doors and framing considerations.
- Combined openings: when integrating an entry door in the garage wall, add separate king/trimmer arrangements and through-wall flashing appropriate to the entry door: see garage doors with entry doors framing.
- Insulation choices: for insulated doors and energy efficiency planning, review framing adjustments and continuous jamb requirements in the insulated garage doors and framing and compare with insulated vs non insulated garage door framing.
- Contemporary and modern frames: modern doors with large glazing or concealed hardware require stiffer headers and concealed flush jambs; read more on modern garage door frame construction.
Checklist (quick verification): check header deflection under no-load < 1/240 of span, jambs plumb within 1/8", diagonals within 1/8", hardware blocking installed, flashing continuous, and sill anchored per code.
Transition: even well-built frames run into a handful of common problems — next we cover troubleshooting and fixes.
Common Mistakes and Troubleshooting in Garage Door Framing
Below are frequent errors I see and step-by-step fixes to get the frame back to spec.
- Error: Rough opening too small. Fix: Remove jamb studs and sister new studs after planing or cut back sheathing; where masonry prevents widening, use jamb adapters and wider seal trims but avoid forcing a door into an undersized opening.
- Error: Misaligned jambs (not plumb). Fix: Loosen fasteners, install shims at base, re-level with a 4′ level, and reinstall using structural screws; if twist is >1/4″, rebuild the jamb assembly.
- Error: Header deflection causing track misalignment. Fix: Add a sister header or add an LVL support under the existing header, correct bearing plates, or consult an engineer for full-width correction.
- Error: Frame not anchored to slab (uplift risk). Fix: Install anchor bolts or epoxy anchors to manufacturer and code specs; add metal straps to king studs to distribute uplift forces.
- Error: Inadequate blocking for hardware. Fix: Remove sheathing where necessary and install full-depth blocking sized to the hardware template; seal and re-sheath.
When troubleshooting, document measured dimensions and take photos for manufacturer support — many installation issues can be resolved by matching your photos to the manufacturer’s required anchor pattern or by referencing the installation manual directly (manufacturer manuals are authoritative for clearances and mounting).
Summary and Next Steps for Garage Door Installation
Key takeaways: accurately calculate rough opening dimensions (width, height, and depth), build a header sized for the span and load, ensure jambs are plumb to 1/8″, and provide manufacturer-recommended blocking and anchorage. Proper sheathing and flashing protect the frame from moisture and extend lifespan.
If you want a deeper dive on pricing, brand comparisons, and hiring an installer, see the main pillar: Garage Door Prices Guide for Brands and Installation Cost
For entry door replacement and installation following framing, consult: garage entry door installation tips
Final note on codes and manufacturers: always cross-check header and fastening schedules with the 2024 International Residential Code, rely on the door manufacturer’s installation manual for clearances, and reference industry material standards from the APA – The Engineered Wood Association when selecting engineered headers or sheathing materials.
When to call a professional: if your roof load path is uncertain, if header spans exceed typical residential sizes (>16′), or if the job requires cutting into CMU or load-bearing masonry — call a licensed structural engineer or experienced installer. According to a 2024 industry report on construction safety, structural errors on openings are a leading cause of retrofit failures; consult a pro for complex changes.


