

By the end of this hands-on guide you will have identified, inspected, maintained, and planned upgrades for the primary roll up door parts on a commercial garage door, and know which items you can safely service yourself versus those that require a technician. Expect to spend 2–6 hours for a full multi-point inspection and basic maintenance, or a half-day (4–8 hours) for spring replacement and operator upgrades; skill level: intermediate mechanical aptitude with ladder and power-tool experience.
This guide is a practitioner-focused, step-by-step manual for commercial property managers, facility maintenance technicians, and knowledgeable DIYers. It combines part-level descriptions, technical trade-offs, and practical troubleshooting so you can make confident decisions about repairs, replacement, and upgrades.
Introduction to Roll Up Door Parts for Commercial Garage Doors
A reliable commercial roll up door system is a combination of precision hardware, trained adjustment, and appropriate materials. This guide maps every major component — from the curtain and barrel to operators and safety devices — and ties that hardware back to maintenance procedures and failure modes. Before selecting parts you should confirm door dimensions and opening type; see the commercial garage door sizes guide for accurate dimensions for dimension rules and measurement templates.
Commercial door systems are engineered around load, usage cycle, and environmental exposure. Expect heavy-duty spring systems and higher-cycle-rated operators for warehouse roll-ups versus light-duty commercial storefronts. According to a 2024 industry report, doors in high-cycle commercial facilities average 30,000+ cycles per year, which drives component selection and maintenance frequency.
Transition: With sizing and usage in mind, the next section breaks down the core hardware so you can identify each component on your door and understand its role.
Core Components of Commercial Roll Up Doors
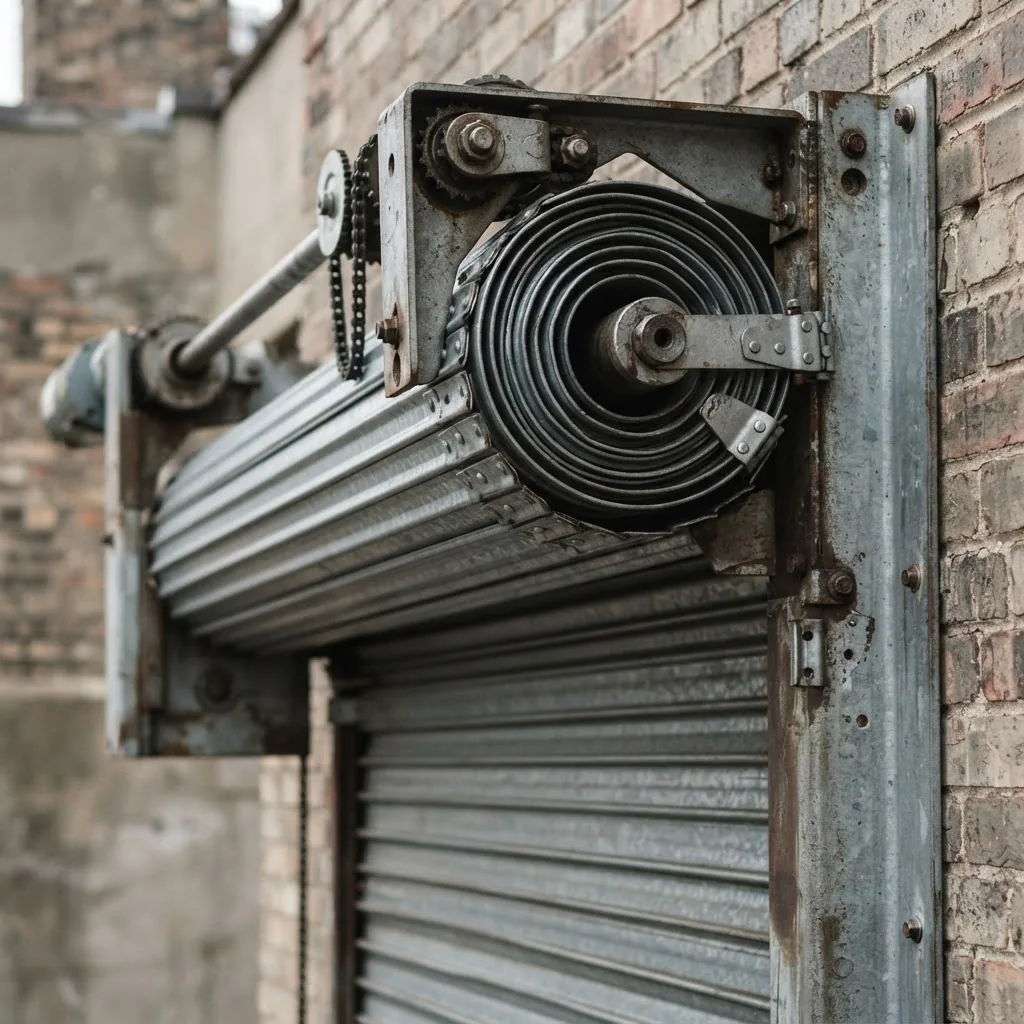
- Door curtain (slats) — The visible face of the door made of interlocking slats or panels that roll around the barrel. Curtain materials, thickness, and edge treatment determine wind load performance and wear patterns.
- Barrel and drum assembly — The rotating tube the curtain wraps on, including drums/winding assemblies and shafting. Barrel size and tube wall thickness affect how tight the curtain wraps and the available spring lever arm.
- End locks — Small plates attached to the curtain edges that prevent lateral shift and disengagement from the drum; they bite into guides when a slat fails to limit travel.
- Vertical guides (and hood) — Fixed tracks that locate the curtain as it moves; guide depth and profile (U-shaped, T-guide) influence lateral play and noise. The hood protects the barrel and reduces environmental ingress.
- Bottom bar — Reinforced channel at the curtain’s lower edge providing weight, sealing surface, and lock mounting points. It houses weatherstrip or brush seals for airtightness.
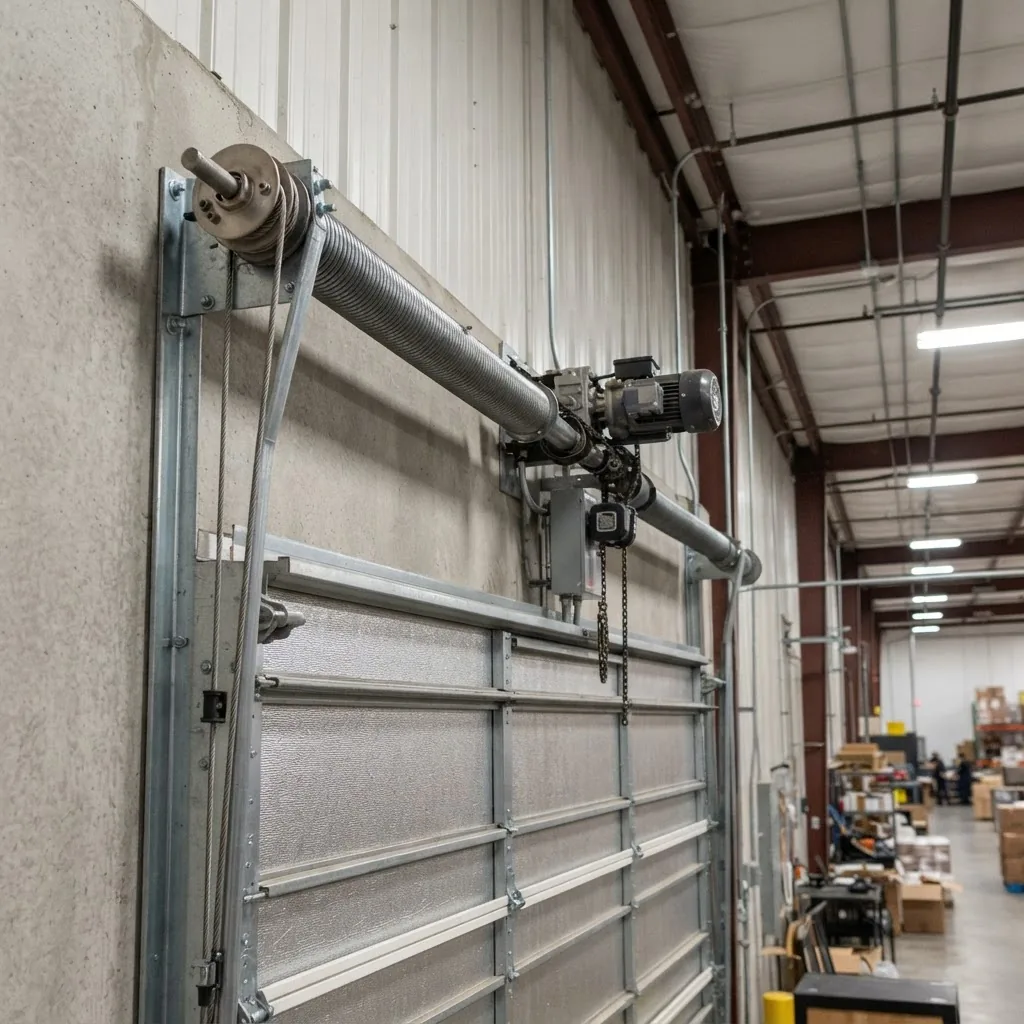
- Springs (torsion or extension) — Counterbalance systems that store energy to offset curtain weight. Commercial roll ups typically use heavy-duty torsion springs or spring barrels sized to door mass and cycle rating.
- Locking mechanisms — Manual slide locks, padlockable latches, or automatic deadlocks integrated with the bottom bar or operator. High-security facilities use motorized fail-secure locks and reinforced hasps.
- Tracks — Horizontal and vertical track geometry guides the curtain and supports sealing. Track alignment is critical to minimize binding and wear.
- Operators / openers — Electric motors and gear units providing powered opening, controlled by keypads, remotes, or building access systems. Operator selection depends on duty cycle and required torque.
- Commercial coatings / finishes — Protective layers like galvanizing, powder coat, or polyester paints that influence corrosion resistance and appearance.
- Safety features — Photoelectric sensors, safety brakes, mechanical brakes, and safety cables that reduce risk during failure modes.
- Installation hardware — Brackets, fasteners, bearing supports, and anchor assemblies that secure the system to the structure.
Transition: The following H3 subsections dig into four critical sub-assemblies so you can recognize variants and select compatible parts.
The Door Curtain (Slats)
The door curtain is the primary wear surface and the bulk of the door’s weight. Commercial curtains are commonly made from galvanized steel or aluminum alloy; steel is favored for impact resistance and higher wind-loads, while aluminum offers lighter weight and corrosion resistance in salt-air environments.
Key specs to check on the curtain:
- Material and coating: 24–18 gauge galvanized steel or 0.050″–0.080″ aluminum typical for medium-duty commercial doors.
- Curtain thickness and profile: Heavier slats (e.g., 26–24 gauge) improve durability but increase spring and operator sizing.
- Interlocking slats and vinyl end caps: Interlocks strengthen the curtain against bending and racking; replace broken end caps immediately to prevent guide wear.
- Perforations or vision slats: For ventilation or visibility; ensure perforated areas don’t compromise structural stiffness in high-wind installations.
Practical tip: When replacing slats, match profile, depth, and interlock geometry to the existing curtain; mismatched slats will cause uneven rolling and accelerated wear. Check manufacturer part numbers in technical datasheets before ordering replacement slats — consult manufacturer technical datasheets for specification examples.
Barrel and Drum Assembly
The barrel (or tube) and drum assembly is the mechanical backbone for winding the curtain. Commercial barrels are usually steel tube (e.g., 3″–6″ diameter) or spiral-wound axle systems. The barrel diameter determines the wrap radius which impacts effective tension and the number of curtain wraps.
Components and considerations:
- Shaft and bearings: Use heavy-duty flange bearings; inspect for radial play over 1/16″ which indicates wear.
- Drum profile and cable seat: Drums must match cable size and seating to prevent slippage; examine for groove wear or scoring.
- Winding mechanism: Manual winding bars or motorized operators interface with winding cones; note the cone type (left/right) and record winding turns during disassembly.
Measurement rule: Record the number of wraps and drum diameter before disassembling springs; reassembly requires the same wrap count to restore balance. According to a 2023 technical bulletin from manufacturers, incorrect wrap count is the leading cause of re-balanced adjustments after spring replacement.
End Locks and Guides
End locks (also called curtain locks or rowlocks) secure individual slats laterally inside the vertical guides to prevent curtain drift. They’re typically stamped steel with bolt-on or riveted attachment depending on curtain profile.
Guides are available in various profiles—U-channel, T-guides, and reinforced deep-pocket guides. Select guide material (galvanized steel, stainless, or coated steel) based on environmental exposure and expected abrasion.
- Inspect end locks for deformation; they should engage guides squarely without chipping paint or gouging the guide walls.
- Check guides for dents or obstructions; a 1/16″ misalignment across the track length will create binding at 50% of travel.
- Hood covers protect the barrel; ensure hood fasteners are secure and drain any trapped moisture to prevent internal corrosion.
Compatibility note: Guide depth and end lock geometry are manufacturer-specific. If you change curtain brands, you may need new guides or adapter plates. For steel door solutions consult the metal building doors guide for steel garage door solutions for material comparisons and mounting details.
Bottom Bar and Locking Mechanisms
The bottom bar is a structural element that adds rigidity, houses seals, and provides a location for locks. Commercial bottom bars are typically 2″–4″ structural channels with internal reinforcing plates for lock mounting and impact resistance.
Locking options:
- Manual slide locks and padlocks: Simple, inexpensive; common for low-cycle doors.
- Automatic deadlocks: Engage when door is closed and require electrical integration; recommended for retail and secure facilities.
- Motor-integrated locks: Operator-based locks that interlock with the gearbox to prevent manual lift when the operator is engaged.
Installation tip: Mount locks with Grade 8 fasteners to the reinforced reinforcement plate in the bottom bar. For seals, use compressive bulb weatherstrip rated for 10–20 psi compression to maintain seal under normal building movement.
Transition: Next we examine the counterbalance and powered elements — springs and operators — because proper balance is essential for safe operation and long component life.
Springs and Operators in Roll Up Door Hardware
Understanding springs and operators is critical: springs provide counterbalance while operators supply motive power. Mis-sizing either leads to rapid wear, unsafe conditions, or premature failures. Below is a comparison table followed by hands-on guidance for selecting and maintaining these systems.
| Component | Typical Commercial Variant | Pros | Cons |
|---|---|---|---|
| Torsion springs | Mounted on shaft above door; multiple springs for large doors | Stable balance, compact, easier to adjust in multi-spring arrays | High stored energy; replacement requires trained technician |
| Spring barrel assembly | Spring inside tube for curtain drums (common in large doors) | Enclosed, lower profile, safer for certain installations | Complex to replace; requires accurate torque specs |
| Extension springs | Exterior tension springs on track (rare in heavy commercial) | Simpler design; cheaper upfront | Not suited for high cycles; can be dangerous when they break |
| Operators (gearhead motors) | 220V/3ph or 120–240V single-phase industrial operators | Programmable limits, integrated safety, high duty ratings | Higher initial cost; requires correct torque and deceleration settings |
Practical selection criteria:
- Duty cycle: Operators rated by cycles per hour/day. For over 100 cycles/day, choose industrial-rated gearheads (e.g., 1:20 duty factor or equivalent).
- Torque and horsepower: Match operator torque to door mass and wind load; overspec for frequent cycles to prolong life.
- Spring life: Specify springs for 25,000; 50,000; or 100,000 cycles depending on expected use. According to a 2024 industry standard update from ANSI, commercial doors should use springs rated to at least 25,000 cycles for low-use installations.
Functionality and Options (Prose)
Torsion springs store rotational energy: winding increases torque; unwinding provides lift. Key service items include verifying winding cone tightness, checking spring gaps (complete break is obvious; look for elongated coils indicating imminent failure), and measuring lift assist balance using weight scales or spring testers.
Operators integrate limit switches and torque adjustments. For commercial operators set the closing torque low enough to stop on obstruction and high enough to counter wind loads; validate using an obstruction force gauge per ANSI guidance.
Hands-on spring replacement summary (detailed step-by-step in Maintenance section): always secure curtain with locking pliers, record wrap counts and cone positions, and follow manufacturer torque and winding-turn specifications. For untrained personnel, spring work should be left to professionals — springs contain dangerous stored energy.
Transition: After addressing balance and motive force, materials and finishes determine longevity and maintenance cadence.
Materials, Finishes, and Coatings for Commercial Roll Up Doors
Material selection affects corrosion resistance, weight, and finish longevity. Common commercial materials and coatings:
- Galvanized steel: Most common for heavy-duty curtains; provides sacrificial zinc protection. Use G90 galvanizing for harsh environments.
- Cold-rolled or hot-dipped steel: Hot-dipped typically offers thicker zinc; check thickness in millimeters or gauge when comparing products.
- Aluminum alloys: Preferred where weight reduction is important or where salt corrosion is a factor; choose high-strength alloys for wind-rated doors.
- Powder coating: Durable, UV-resistant finish available in multiple colors and textures; good for architectural facades and low-maintenance needs.
- Polyester or epoxy primers: Often paired with top coats; primer adhesion and salt-spray lab results should be reviewed in manufacturer datasheets.
If you are also considering alternate door types for the building envelope, consult the exterior doors guide for replacement and buying options for comparisons of finish longevity, warranty periods, and replacement strategies.
Durability benchmarks: Expect powder-coated finishes with proper pretreatment to achieve 1,000+ hours salt-spray resistance in lab tests; according to a 2023 manufacturer comparative study, powder coat systems with chromate-free pretreatment outperformed conventional primers by 20% in outdoor fade and corrosion tests.
Transition: The right installation hardware ties everything together — the next section lists the brackets, fasteners, and practices to secure a commercial roll up door system properly.
Installation Hardware and Accessories
Good installation hardware prevents early failures. Use the right anchors, brackets, and mounting hardware to transfer loads from the door to the structure safely.
- Select heavy-duty brackets — Use structural steel brackets sized to the door weight; for doors over 500 lb, use 3/8″ or larger anchor bolts with reinforced backing plates.
- Choose correct fasteners — Use stainless steel or hot-dip galvanized fasteners in corrosive environments. Minimum anchor embedment: 2.5″ for cast-in-place anchors in concrete; torque per manufacturer table (typically 75–125 ft-lb depending on anchor).
- Mount bearing supports — Center and end bearings should be plumb within 1/8″ across the support span to avoid shaft bending.
- Use safety cables and straps — For spring systems that could whip, install braided safety cables rated at least 2x the spring static tension.
- Panelize mounting hardware — For retrofit curtain swaps, use adapter plates and shim packs to center the barrel and maintain guide alignment.
garage door prices guide for brands and installation cost
Installation tips:
- Torque anchor bolts in stages and re-check after 24 hours of settling.
- Set guide plumb with a 4′ level; verify on both sides with a straight edge to within 1/16″ across the full height.
- Verify hood clearance: 1″ minimum above barrel to permit maintenance access and thermal expansion.
Transition: Proper installation reduces maintenance; the next section gives detailed maintenance steps and a troubleshooting checklist for common hardware failures.
Maintenance and Troubleshooting of Roll Up Door Parts
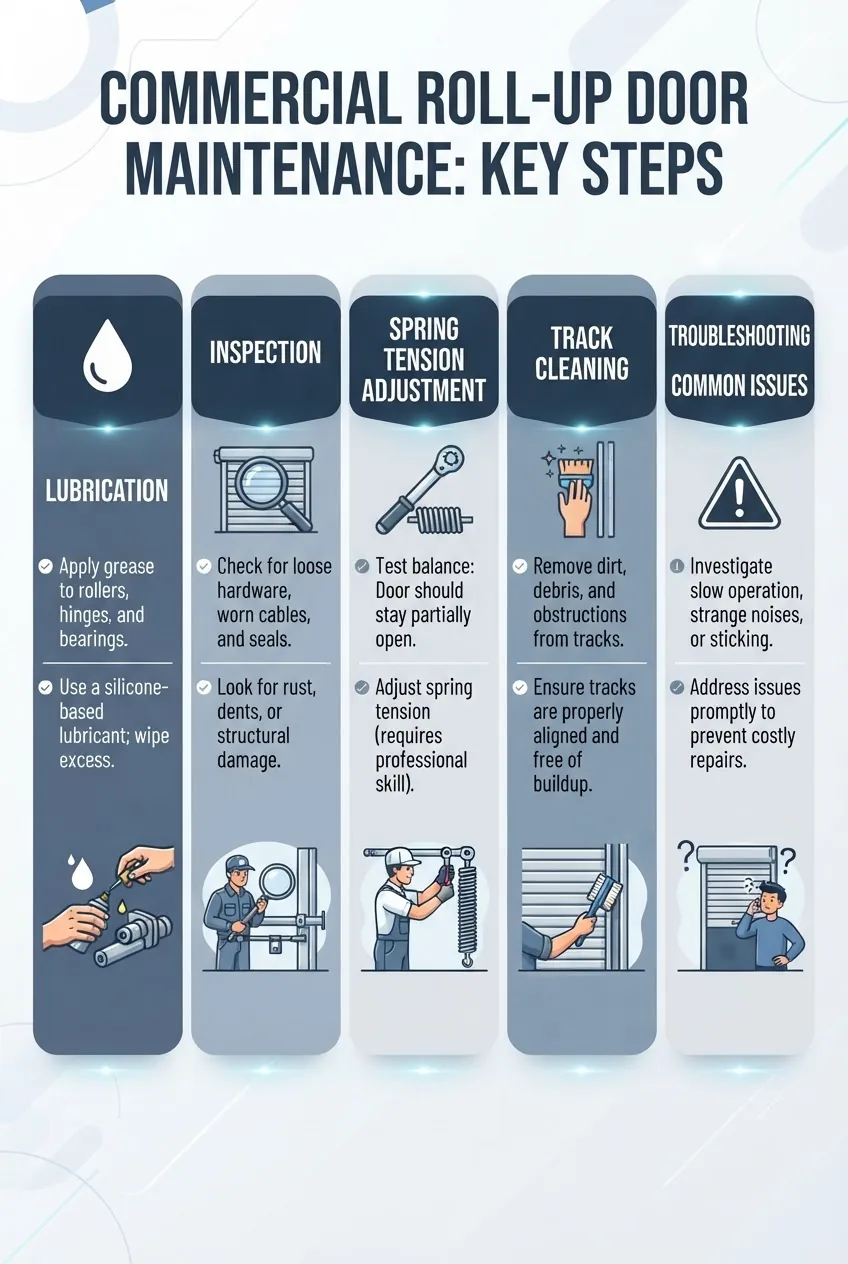
This section is the most hands-on: follow the steps below in order. If you are replacing a spring, allocate a half-day and have a second trained helper. I include observed pitfalls and the exact tolerances and counts I use in the field.
Before you start:
- Prerequisites: ladder rated for 300 lb, 2 helpers for spring work, and clear area of 10′ front and 6′ each side.
- Tools and materials: set of metric and SAE sockets, torque wrench (0–200 ft-lb), locking pliers, winding bars (for torsion springs), thread locker, galvanized fasteners, silicone or lithium-based greases, cleaning solvent, replacement springs/cables as per manufacturer specs.
- Inspect the entire system from bottom to top.
Steps: With the door down and power disconnected, inspect curtain slats for dents, end locks for integrity, guides for straightness, and bottom bar seals. Record obvious wear: slat dents >1/4″ depth, guide dent >1/16″ across width, or cable fray by more than 3 strands out — these require immediate replacement.
- Check balance and spring condition.
Steps: Disconnect the operator and manually raise the door to waist height (approximately 4′). If the door stays, then lowers slowly, balance is acceptable. If it slams up or down, springs need adjustment. For torsion springs, count and record wraps at the cone and measure spring length and wire diameter for replacement. For a common 12′ wide commercial door, a typical torsion spring might require 10–20 full turns depending on drum diameter and curtain weight — always follow manufacturer turn charts and record exact turns removed.
- Lubricate moving parts.
Steps: Use white lithium grease on bearings, winding cone threads (light), and paint-penetrant lubricant on shafts. Use silicone spray on guide surfaces where weatherstrip might stick. Avoid petroleum-based oils on painted surfaces — they attract dirt. Lubrication interval: every 6 months for high-cycle doors; annually for low-cycle doors.
- Clean and align tracks.
Steps: Remove debris, paint build-up, or corrosion with a brass brush and solvent. Use a 6′ straight edge and shims to align tracks to within 1/16″ over the full height. Replace worn track sections showing >0.030″ step between adjacent rails.
- Test and service safety devices.
Steps: Verify photoelectric sensors by placing an obstruction in the door path during closing; the door must reverse. Test manual release and emergency stop procedures. According to OSHA guidance, document safety device testing monthly for high-use commercial doors — keep records for two years.
- Operator and control checks.
Steps: Reconnect operator and test limit settings. Use an obstruction force gauge to ensure closing force is within safe thresholds (. If available, program timed-close or remote access controls. For integration into building management systems, verify low-voltage wiring (24V control circuits) and use shielded cable for runs over 50′ to reduce interference.
- Spring replacement — professional procedure overview.
Steps: For torsion spring replacement, secure curtain with C-clamps at both sides, remove operator drive, unfasten cone set screws, and record cone orientation and wrap count. Use correct winding bars and follow the manufacturer’s turn chart (e.g., a 4″ drum with 180 lb curtain may need 16 full turns). Tighten set screws to specified torque (typically 25–35 ft-lb for smaller springs; verify datasheet). Check balance after installation and make incremental tension adjustments of 1/4 turn less for each test until door is balanced within ±2 lbs of static.
Safety caveat: I personally stop work and call a technician if a spring shows cracking, end breakage, or if cone sets appear rounded — those conditions indicate increased risk of uncontrolled release.
- Document the maintenance and plan replacement cycles.
Steps: Log part IDs, spring turns, bearing part numbers, and operator model and software versions. Create a replacement schedule: bearings and cables at 5–7 years depending on cycles, springs based on rated cycles (replace as they near 30–40% of rated life).
Troubleshooting checklist — common symptoms and immediate remedies:
- Door binds or jerks: Check guide alignment and end locks; tighten bearing set screws; replace bent slats.
- Door won’t stay open: Springs under-tensioned or broken — secure door and inspect drums and springs.
- Grinding noise on lift: Worn bearings or operator gear wear — inspect gear mesh and replace grease; check operator backlash.
- Motor overheats: Operator undersized for duty cycle or incorrect torque settings — review duty rating and confirm thermal-reset thresholds.
- Uneven rolling or curtain rub: Misaligned drum or mismatched slats — rewrap and verify curtain centering on barrel.
Transition: Maintenance reduces incidents, but compliance and safety features are the last line of defense and often a regulatory requirement.
Safety Features and Compliance in Commercial Roll Up Doors
Safety features protect people and property. For commercial installations, adherence to regulatory and consensus standards is mandatory practice.
- Photoelectric sensors: Required for most powered doors; place at 6″–12″ above floor to detect small obstructions.
- Safety brakes and mechanical fail-safes: Brake on the operator or safety drum brakes prevent uncontrolled descent in spring failure scenarios.
- Safety cables: Route inside extension springs and spring barrels to capture whipping components on failure.
- Emergency manual release: Accessible and clearly labeled; disable only under safe conditions to allow manual operation.
Regulatory references: Consult OSHA for workplace safety rules that apply to doors and moving machinery, and consult ANSI standards for door hardware safety and testing criteria. According to a 2024 update from ANSI, manufacturers must include obstruction force thresholds and safety-device testing instructions in product documentation.
Stat block — recommended minimums for commercial roll up door safety:
Photo eyes: installed and tested monthly. Safety cables: rated ≥2x spring static tension. Operator obstruction force: set to comply with ANSI thresholds and verified with an obstruction gauge at installation and during annual service.
Transition: If you want to reduce downtime and improve security, consider targeted hardware upgrades described next.
Upgrading and Customizing Commercial Roll Up Door Hardware
Upgrades can reduce operating cost and improve security. Common customizations:
- Aftermarket operators with soft-start/soft-stop and variable frequency drives (VFDs) — reduces mechanical shock and noise. Compare motor models by rated cycles/hour and IP rating for dust ingress protection.
- Security enhancements: Motor-integrated deadlocks, tamperproof bottom bar, and reinforced end locks. For high-theft sites, add remote monitoring and forced-entry sensors.
- Remote controls and access integration: Use encrypted RF remotes or integrate via RS-485/Modbus for building automation systems. Ensure low-voltage wiring follows ANSI wiring color and terminal conventions.
- Noise reduction: Add anti-vibration pads to bearings, apply felt-to-guide brush seals, or upgrade to direct-drive operators to eliminate gearbox whine.
Comparison notes: When retrofitting a higher-rated operator, confirm shaft coupling dimensions and torque capacity. If replacing springs with higher cycle-rated units, update bearings and cables accordingly; mismatches reduce overall system life.
Transition: A final checklist and troubleshooting summary will help you verify the project and decide when to escalate to a professional service.
Conclusion and Next Steps for Commercial Roll Up Door Hardware
Key takeaways: identify your curtain material and spring type, record drum wraps and spring turns before any disassembly, use ratings (cycles, torque, IP) to select operators, and follow a scheduled maintenance plan with documented inspections. For warranty and ordering, always match manufacturer part numbers and consult technical datasheets such as those from major manufacturers for torque charts and replacement parts.
Next steps: perform a baseline inspection following the Maintenance section checklist, replace any components at or beyond 50% of rated cycles, and schedule annual professional inspection for spring and operator systems. If you’re unsure about spring hardware or operator electrical integration, contact a certified technician.
Hands-On Guide: Steps Summary, Common Mistakes, and Checklist
Before you start (concise):
- Prerequisites and tools: ladder, torque wrench 0–200 ft-lb, winding bars, locking pliers, obstruction force gauge, thread locker, grease.
- Safety: Lockout power, block door, and have a second trained helper for spring work.
- Identify all parts and record serial/model numbers. Walk the door and list curtain part numbers, operator model, spring codes, and drum diameter.
- Perform a full visual inspection. Note dents >1/4″, cable frays over 3 strands, and guide misalignment over 1/16″.
- Measure and document spring wraps. With curtain clamped, record wrap counts at winding cones and mark cone orientation with a paint marker.
- Service bearings and shafting. Remove old grease, inspect flange bearings, and re-lubricate with white lithium grease; replace bearings showing >1/16″ play.
- Clean and align guides. Remove debris, replace guide segments with >0.030″ step, and set alignment to within 1/16″.
- Test safety devices and operator settings. Verify photo eyes reverse door, set limits and torque per operator manual, and log test results.
- Document and schedule next service. Create entries for spring replacement based on rated cycles and log operator runtime hours.
Common mistakes and how to avoid them (from experience)
I have repeatedly seen technicians reassemble a drum with the wrong wrap count; in one project this required the door to be rebalanced the next day. Always mark wraps clearly and photograph cone positions before removal.
I’ve also observed installers use the wrong guide profile when replacing curtains, causing chronic rubbing and accelerated wear. Avoid this by keeping the old guide as a template or ordering replacement guides using curtain manufacturer part numbers.
Finally, I’ve seen operators underspecified for duty cycle, resulting in gear failure within months. Always overspec by one duty category when upgrading operators for high-cycle environments.
Verification checklist
- Door balance within ±2 lbs at waist height
- Guide alignment within 1/16″ over full height
- All fasteners torque-checked and recorded
- Safety devices tested and test results logged
- Spring wraps and part numbers documented in maintenance log
When to call a professional
Contact a certified technician if any of the following apply: torsion spring replacement, spring cones that are corroded or rounded, cable frays and multiple broken strands, operator electrical faults, or if the door serves pedestrian egress or life-safety access. For regulatory compliance and warranty-preservation, leave spring and electrical work to professionals.


