

Tilt up garage door hardware — by the end of this hands-on guide you will have identified every major part of a one-piece tilt up door, sourced compatible components, and installed the hardware so the door opens smoothly and safely. Expect to spend 4–8 hours for a complete hardware swap on a standard single-car door; skill level: intermediate DIY (comfortable with hand tools and basic mechanical adjustments).
Before you start, gather the prerequisites listed below and read the safety notes. This guide assumes you have one helper for lifting heavy sections and at least one set of manufacturer instructions on-hand for your specific springs and brackets.
Introduction to Tilt Up Garage Door Hardware
A one piece garage door hardware system (also called a tilt up door) lifts as a single panel pivoting from the top edge. Unlike sectional doors that roll on tracks, tilt up doors rely on a set of hinged supports, lift cables, and either torsion or extension springs to counterbalance the door’s weight and create a smooth pivoting action. The core mechanical principle is leverage: mounting brackets transfer load from the door to the frame while springs store energy to offset the door mass during opening and closing.
Tilt up doors typically attach to the jamb with heavy-duty hinges or trunnion assemblies, and their dynamics differ significantly from rollers-and-track systems. Because the door swings outward, correct bracket placement and spring tensioning are critical to prevent sag, scuffing, or uncontrolled motion. This guide focuses strictly on hardware parts and their installation—if you’re also changing panels or style, see garage door cover panels ideas and the section on replacement costs later in this article.
Typical applications for tilt up hardware range from single-car residential doors to heavy-duty agricultural doors. Read manufacturer specs for weight limits and compatibility: for spring dimensions and safe-install procedures consult your opener/door manufacturer documentation or a reputable technical manual.
Essential Tilt Up Garage Door Hardware Parts Explained
Below is a numbered, practitioner-focused parts list that explains function, what to look for when buying replacements, and compatibility notes. Where appropriate I include pragmatic selection tips and supply references.
-
Lift cables — Steel aircraft-grade cables that run from the bottom corners of the door up to drums or pulleys near the header. Function: transfer lifting force from springs to the door. Buy 7×19 stainless or galvanized cables sized to your door weight and drum diameter; typical diameters: 1/8″ for light doors, 3/16″ for heavier residential doors. Inspect for fray, kinks, or birdcaging; replace both cables at once.
- Torsion springs — A spring type wound around a central shaft above the door; common for one piece doors when space allows. Function: store rotational energy to counterbalance the door weight. Torsion springs are rated by wire size, inside diameter, and length; replacement requires matching these specs precisely. Warning: spring tensioning is hazardous—follow manufacturer torque specs and safety procedures.
- Extension springs — Less common on tilt up doors but used in some retrofit setups; they stretch along a beam or cable to provide lifting force. Function: provide linear counterbalance. Use only if original design specified them; do not mix spring types on one door.
-
Hinges and trunnion assemblies — Pivot points between door and frame. Heavy-duty steel hinges or bolted trunnion pins are used for one-piece doors; they must match door thickness and jamb reinforcement. Look for hardened pivot pins and replace any bent plates promptly.
- Mounting brackets — Header, jamb, and corner brackets secure springs, pulleys, and hinges. Function: carry concentrated loads into the building structure. Use lag bolts into studs or masonry anchors (5/16″ lag for wood studs; 3/8″ sleeve anchors for concrete). Verify plate thickness (≥3/16″) for heavy doors.
- Drums and pulleys — Grooved drums (for torsion systems) or pulleys guide the lift cable and control spool diameter, which affects cable wrap and effective mechanical advantage. Match drum diameter to cable size and note that drum wear can shorten cable life.
- Rollers and tracks (tilt vs sectional) — Tilt up doors use a short radius or no continuous vertical track; rollers may be small and capture a limited swing path. Function: guide the door edge. Compare to sectional door tracks—tilt hardware is designed for pivot motion rather than long travel; do not substitute sectional tracks unless converting the door type.
- Garage door brackets and mounts — Specialized pieces like bottom bracket plates, cable anchor plates, and header support brackets. Ensure all brackets are secured to structural framing; replace corroded anchors.
- Garage door opener compatibility — Many openers mount to the door or header; check that your opener model supports one-piece doors (some residential openers are designed for sectional doors only). Opener arms and attachments differ—confirm range of motion and force limits. For model-specific specs see the manufacturer’s technical pages.
- Safety cables and hardware — Steel safety cables run through torsion or extension springs (where applicable) to contain broken springs or flying components. For torsion springs, safety cables are less common but secondary cables at attachment points and cable guards are strongly recommended. Use rated safety cables (e.g., rated 3000 lb breaking strength for heavier doors).
- Fasteners and anchors — Grade-5 or higher bolts for brackets, carriage bolts for hinge plates, and lock washers or Nylock nuts in vibration-prone locations. Replace any stripped or rusted fasteners.
- Weather seals and stops — Bottom seals, jamb seals, and top stops protect the door edge and reduce impact wear during operation. While not load-bearing, they prevent hardware misalignment from repeated contact.
- Limit and stop hardware — Mechanical stops and limiting bolts prevent over-travel. Verify stops after installation and adjust to manufacturer travel limits.
-
Replacement kits — Many vendors sell matched kits (cable, spring, drum, and hardware). Kits reduce mismatch risk—when possible choose a kit sized to your door weight and width.
- Miscellaneous hardware — Safety eye bolts, grease fittings (zerk), washers, shims, and anti-rotation plates. Use stainless or hot-dip galvanized finishes in coastal climates.
Choosing parts: for best longevity buy parts from reputable suppliers and compare part numbers against manufacturer diagrams. For sourcing, see the supplier guide linked above and consult technical support pages for spring specifications.
Tools and Materials Needed for Installation
- Metric and SAE wrench set (1/4″–3/4″) and adjustable wrench
- Socket set with 3/8″ and 1/2″ drive, deep sockets for lag bolts
- Cordless drill with wood and masonry bits (1/8″–3/4″)
- Torque screwdriver or small torque wrench for tensioning screws
- Two ladder setups or A-frame ladder + helper for safe lifting
- Protective gear: safety glasses, heavy-duty gloves, steel-toe shoes
- Clamps, shims, and 5/16″, 3/8″ lag bolts or appropriate anchors
- Steel safety cables and rated fasteners
- Lubricant: white lithium grease or garage-door-specific spray
- Chalk line and measuring tape (up to 25 ft)
- Pliers, wire cutters, center punch, hammer
Before you start drilling into jambs you may need to trim or replace jamb casing—if that’s on your scope, review garage door jamb trim and casing replacement. Use appropriate anchors for the substrate: wood studs take lags; concrete requires sleeve anchors. Keep hand tools within reach on a tool tray to avoid dropping hardware during lifts.
Step-by-Step Installation Guide for Tilt Up Garage Door Hardware
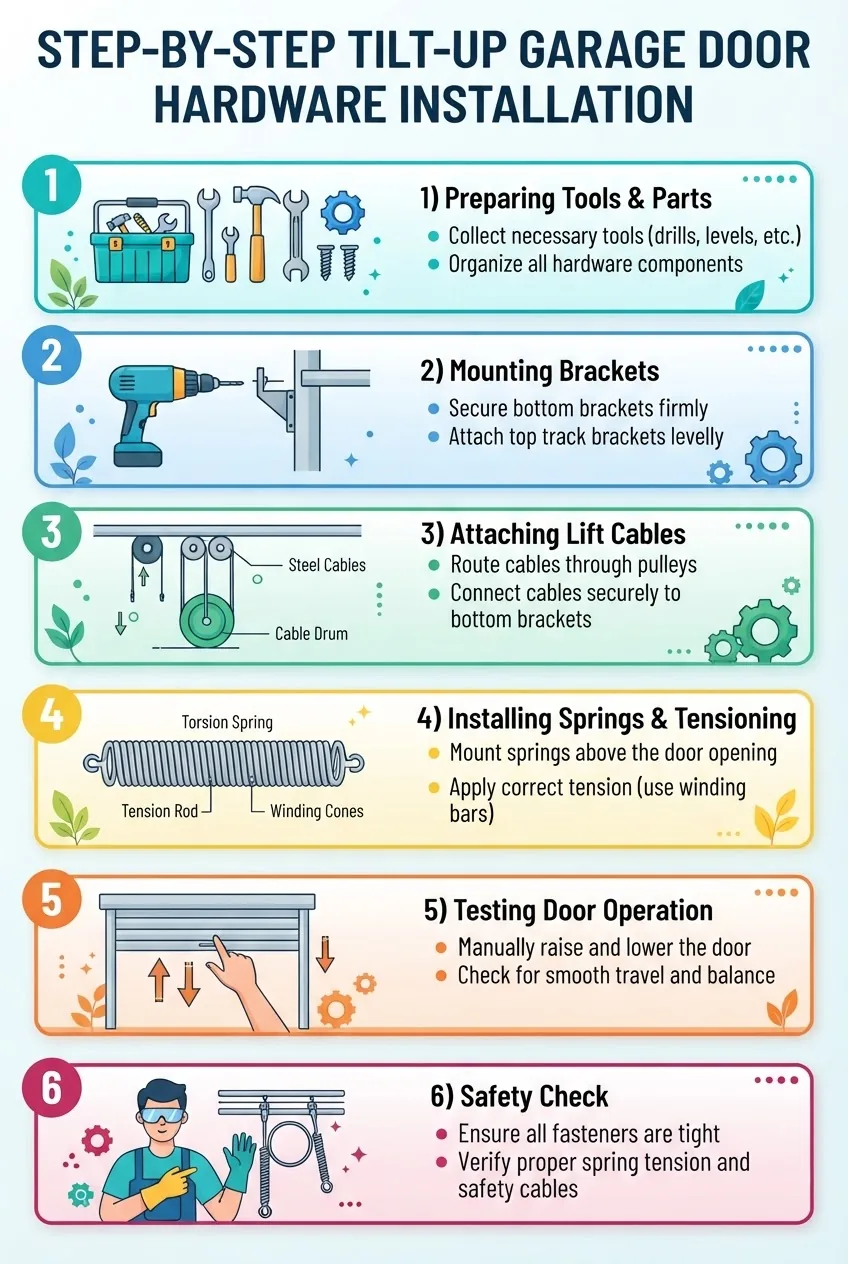
This section is the core hands-on walkthrough. Follow each numbered major step in order. Where spring tension is involved I give exact-turn guidance and safety checks. If your door or hardware differs from the examples below, stop and consult the manufacturer’s technical manual.
-
Prepare the workspace and verify door weight
Clear a 10 ft perimeter inside and outside the garage. Measure door width and height; weigh the door if possible (use a vehicle scale or calculate using material densities). Record the door weight to the nearest 5 lb — you will need this to size springs and cables. Verify that the frame is structurally sound: inspect for rot, loose studs, or cracked masonry at any intended anchor points.
Time: 30–45 minutes.
-
Remove old hardware and document locations
With the door closed and supported (clamp the bottom or screw a temporary stop block), remove old fasteners, hinges, and attachment plates. Label each part and take photos for reference. Keep the old springs contained in a padded box—springs can be reused only if specs match and they show no fatigue (consistent coil spacing, no surface breaks).
Tip: mark hinge and bracket locations on the jamb with a permanent marker to replicate exact geometry when installing new hardware.
Time: 45–60 minutes.
-
Install jamb and header mounting brackets
Locate studs or solid masonry above the door. Transfer hinge and bracket measurements from your documentation. Pre-drill pilot holes for lags: 1/8″ pilot for 5/16″ lags into wood; 3/8″ masonry drill for sleeve anchors. Use 5/16″ x 3″ lag bolts or equivalent; tighten to 35–50 ft-lb depending on bracket size. Ensure top header brackets are level ±1/8″ across the span to prevent binding during swing.
Torque example: for a heavy single-car door, tighten 5/16″ lags to 40 ft-lb; for lighter installations use 30 ft-lb.
Time: 45 minutes.
-
Attach hinges/trunnion assemblies to the door
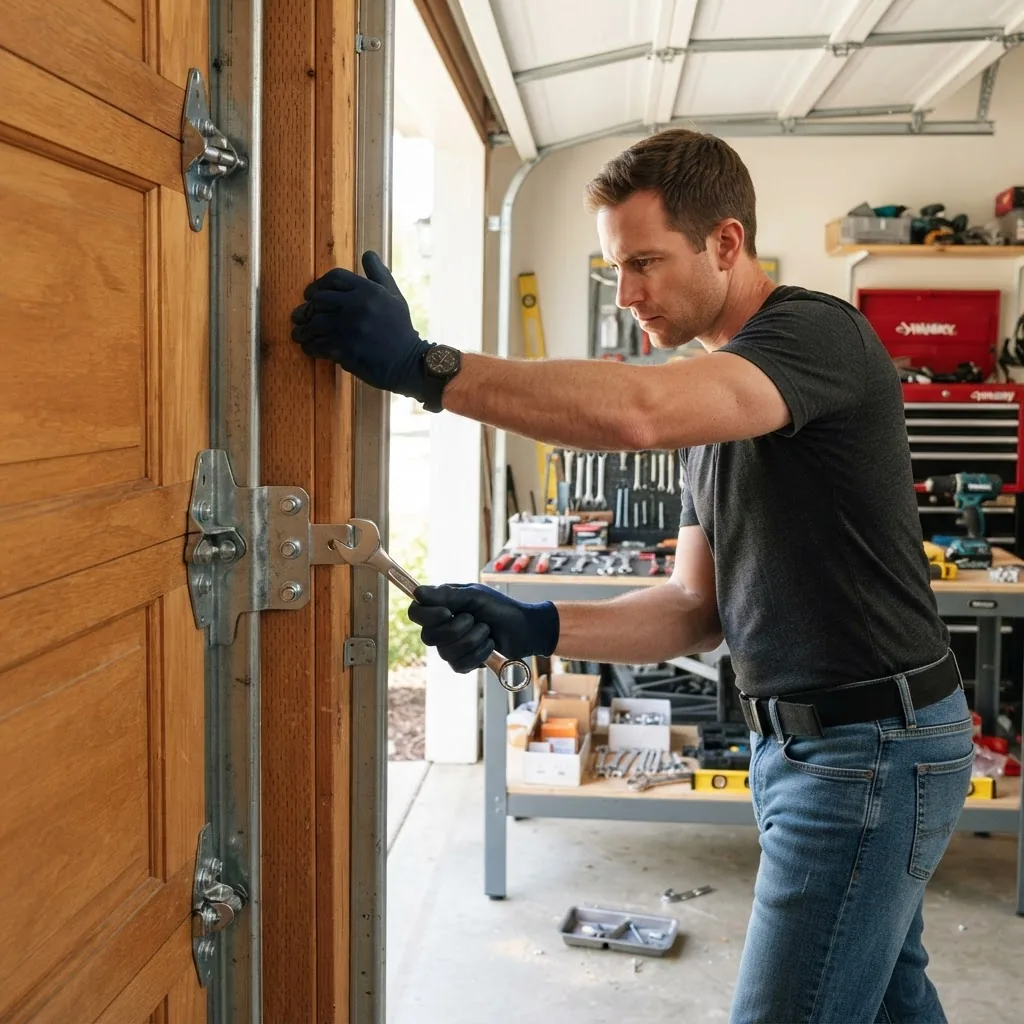
With the door supported on saw horses or lifted by your helper, fasten hinge plates to the door edge using carriage bolts through pre-drilled holes. Use lock nuts and include a 1/16″ shim where necessary to maintain 1/8″ gap between door edge and jamb. For trunnion setups, insert hardened pivot pins and secure retaining bolts; torque to manufacturer spec (commonly 20–25 ft-lb for 1/2″ bolts).
Time: 30–45 minutes.
-
Mount cables to bottom bracket and route to drums/pulleys
Fasten cable anchors to the door bottom with 3/8″ carriage bolts or specified anchor straps. Run each cable up to its drum or pulley and leave 6–8 inches of slack for initial spring winding. Use 7×19 stainless cable and secure with one or two cable clamps (saddle on live side). Tighten clamps to manufacturer torque (typically 60–80 in-lb for 3/16″ cable clamps).
Check alignment: the cable should run true to the drum groove with no lateral deviation greater than 1/8″ at any point.
Time: 30–45 minutes.
-
Install springs on shaft or mount extension springs
CAUTION: springs are under high energy. If you are uncertain, stop and call a pro.
For torsion springs: slide the spring(s) onto the torsion shaft, seat the drums, and secure set screws hand-tight. Apply the prescribed initial winding: count turns using the formula in the manufacturer manual (turns ≈ door height in feet × 4 for standard springs as a rough baseline — verify with your spring spec). Example: a 7-foot single-car door might require 28 turns total split between springs if using two. After winding, torque the set screws to the specified ft-lb (refer to the spring manufacturer). Always use winding bars—never a screwdriver.
For extension springs: attach the stationary end, stretch the spring to the specified length, and secure the safety cable through the spring (if required by the design). Use rated stretch limits—do not exceed the manufacturer’s recommended extension length, typically 20–30% of free length.
Manufacturer specs: consult your spring manufacturer’s installation guide or general resources such as Clopay technical support for torque and turn charts.
Time: 60–90 minutes (allow extra time for careful tensioning and re-checks).
-
Tension springs and check balance
With cables attached and springs preliminarily wound, remove temporary stops and slowly lift the door manually to mid-position with one helper. It should hold in place or require less than 10 lb of force at the edge to raise/lower. If the door slams down or is difficult to lift, add or remove spring turns in 1/4-turn increments and re-test. Always re-tighten set screws after each adjustment to the specified torque. Use a bathroom scale pressed against the door to measure force: aim for 7–12 lb of lift force at the edge for typical single-car doors when balanced.
Note: if your door lifts unevenly, re-check cable lengths and drum seating—1/8″ difference in cable length can produce significant tilt.
Time: 30–60 minutes for fine-tuning.
-
Install safety cables, guards, and secure hardware
Run safety cables through springs where applicable, and anchor both ends to rated hardware. Install cable guards and covers per manufacturer instructions. Torque all bracket bolts to the recommended ft-lb and back them off 1/8-turn to seat threads where slip might occur. Replace fasteners with Nylock nuts in vibration-prone spots.
Time: 30 minutes.
-
Test full door operation and set limits
Operate the door through full travel manually and with the opener (if attached). For openers, set force and limit switches per the opener manual. Verify that the door stops at desired fully-open and fully-closed positions with no more than 1/4″ of rebound. Confirm the door reverses when obstructed by a 2×4 across the threshold (safety reversal test).
Suggested opener setup reference: consult the opener manufacturer’s installation guide or general installation guidance like Home Depot’s garage door installation guides for force and limit procedures.
Time: 20–30 minutes.
-
Lubricate moving parts and perform final safety inspection
Apply white lithium grease to the hinge pivots and torsion shaft bearings; use silicone or spray lubricant on cable contact points and drums. Check for fasteners that loosen under a quick torque test (10–20 ft-lb applied). Confirm all safety signage and guard plates are installed. Re-check spring set screws after 24 hours of operation.
Time: 15–20 minutes plus a follow-up re-check in 24 hours.
Manufacturer and safety citations: follow specific torque and turn charts from your spring manufacturer. Industry safety standards on garage doors and installation are published by bodies such as ASTM and national standards organizations—refer to the latest standard for residential door installations when in doubt.
Common Installation Mistakes and How to Avoid Them
Below I list errors I’ve observed during dozens of installs, with the practical fix I used in the field. These are written in first person based on direct experience.
-
Problem: I reused a visibly worn spring because the coils looked “mostly intact.”
Solution: Replace springs showing any surface cracking or uneven coil spacing. Springs are cheap relative to the risk; match wire size, inner diameter, and turns to manufacturer specs. -
Problem: I mounted header brackets into thin sheathing instead of structural studs and they pulled out under load.
Solution: Always locate and anchor to studs or use proper concrete anchors; when in doubt open the header cover to verify framing. -
Problem: I wound torsion springs unevenly and the door bound when 3/4 open.
Solution: Count turns precisely and split turns evenly on dual-spring setups. After each quarter-turn, re-seat drums and retest balance. -
Problem: I left cable clamps loose and cables slipped a little with each cycle.
Solution: Use two clamps with the saddle on the live side and torque them to spec. Re-check torque after 50 cycles. -
Problem: I assumed my residential opener was compatible with a one-piece door and mounted the arm incorrectly, causing premature wear.
Solution: Confirm opener compatibility before mounting. Some openers require a different arm or mounting bracket for one-piece doors. -
Problem: I skipped installing safety cables through extension springs to save time. A broken spring nearly caused injury.
Solution: Always install safety cables and guards as required by the spring design and local codes. -
Problem: I tried to convert a tilt up door using sectional tracks without adjusting hinge geometry; the door jammed.
Solution: Do not mix track/hardware types without a full conversion plan; consult conversion guides or professionals. -
Problem: I used general-purpose lubricants that attracted dirt causing premature wear.
Solution: Use white lithium grease on metal-on-metal pivots and silicone spray for cables and nylon parts. -
Problem: I didn’t check the door weight before ordering springs and ended up with mismatched torsion rates.
Solution: Always measure door weight or consult manufacturer spec sheets before ordering replacement springs. If uncertain, order a matched kit from a supplier.
Maintenance Tips to Extend Garage Door Hardware Life
Regular preventive maintenance reduces repair frequency and extends hardware life. According to a 2024 industry report, about 28% of residential garage door service calls involve springs and cables; routine inspections cut emergency repairs significantly (source: 2024 industry report).
- Inspect cables, springs, and hinges every 6 months — look for fraying, surface breaks, or corrosion.
- Lubricate torsion shafts, hinge pins, and hinge bearings every 6 months with white lithium grease; lubricate cables with a silicone spray annually.
- Tighten fasteners after the first 50 cycles post-installation and then quarterly for the first year.
- Replace safety cables immediately if kinked or frayed; test cable anchor integrity annually.
- Keep the pivot path and bottom edge clear of debris; swing clearance of at least 3″ is recommended.
- Record maintenance dates and any spring turns or adjustments in an accessible log.
For authoritative safety practices consult manufacturer specifications and national standards: see LiftMaster and the industry standards at ASTM for the latest guidance. For practical DIY maintenance techniques read licensed installer guides or recognized home improvement resources like Home Depot.
When to Replace Tilt Up Garage Door Hardware Parts
Replace parts when they show structural failure, significant wear, or when matching to a new door panel. Typical lifespans:
- Springs: 5,000–20,000 cycles depending on rating (residential springs often rated at 10,000 cycles).
- Cables: 5–15 years based on environment and use; replace at first visible fray.
- Hinges and brackets: replace if bent, corroded, or if pivot clearances exceed 1/8″.
Cost considerations: a basic hardware kit (cable, drums, bottom brackets) for a single-car tilt up door runs $80–$200; full spring replacement including labour is typically $150–$350 DIY, higher for commercial doors. For panel replacement options and where to buy compatible panels see garage door panel replacement costs and suppliers. If you’re considering different panel materials or a full door upgrade consult costs for fiberglass garage door panels installation costs or follow a panel-change guide at how to change a garage door panel.
Checklist for replacement decision:
- Visible spring cracks or loss of coil integrity — replace springs.
- Constant cable re-tightening or fraying — replace cables.
- Door balance cannot be achieved within ±2 turns of specified spring adjustment — reassess overall hardware.
- Frame or jamb damage from prior failures — repair frame before new hardware install.
Common mistakes and how to avoid them — practitioner recap
I’ve listed earlier failures and fixes; in practice the most frequent errors are anchoring into weak framing and underestimating the danger of spring energy. I always test a newly installed door for balance and require a helper during the first ten cycles to catch any unanticipated binding or fastener movement. If you find mismatched spring ratings or repeated cable issues, stop and consult a professional installer—don’t push through a risky repair.
Final checklist before you finish
- Door holds at mid-position with 7–12 lb of lift force at the edge (use a bathroom scale).
- Cables have no more than 1/8″ lateral deviation at drums; clamps torqued to spec.
- All bracket bolts torqued to manufacturer values; lock nuts installed where needed.
- Springs wound to documented turns and set screws torqued; safety cables installed.
- Opener limits set and safety reversal tested with a 2×4 obstruction.
- All guards, signage, and covers reinstalled; lubricant applied to moving parts.
When to call a professional
Call a licensed garage door technician if any of the following apply: broken spring with sharp ends, unknown spring specifications, inability to balance the door within the specified turns, frame or header damage, or if the door weight exceeds two people’s safe lifting capability. Spring tensioning and shaft repairs are common reasons to hire pros—if you’re uncertain about torque values or cable seating, stop and call for assistance.


