

By the end of this guide you will have repaired a single damaged garage door panel (dent, crack or small hole), finished and painted the patch, and tested door operation; the typical job takes 3–6 hours depending on material and drying times and assumes an intermediate DIY skill level (basic power tool experience).
Repair garage door panel tasks covered here are practical, tool-specific, and written from hands-on experience so you can confidently fix common panel damage without replacing the entire door.
Before you start
Prerequisites, safety and quick checklist to confirm you can proceed:
- Work area: clear, level driveway or garage floor with 6–8 hours of dry weather if door is outdoors.
- Skill: basic use of a drill, orbital sander, putty knife and paintbrush; comfortable lifting 20–30 lb sections if swapping panels.
- Safety: eye protection, nitrile gloves, dust mask (N95), and hearing protection for power sanding or drilling.
- Permission: homeowner or property-manager authorization if the property isn’t yours; check HOA finish rules for painted panels.
- Time: plan for 2–3 coats of filler/primer and 1–2 coats of paint with recommended dry times—allow 24 hours for full cure on most epoxy repairs.
Transition: first we’ll diagnose what kind of damage you’re facing so you choose the correct repair approach and kit.
Understanding Garage Door Panel Damage and Repairability
Start by categorizing the damage: dents, cracks, holes, rust/corrosion or delamination. Each damage type affects repairability and longevity differently. Dents and creases are common on metal and composite panels after impacts; cracks and holes are typical for wooden and fiberglass panels; corrosion primarily affects steel panels.
Here are illustrative examples to help you assess repairability:
- Dents: Shallow, localized depressions (less than 1/2″ deep) in steel or aluminum skin are highly repairable with a metal patch or body filler. Deep creases that kink the inner flange may need panel replacement because structural alignment is compromised.
- Cracks: Hairline surface cracks in fiberglass or wood paint can usually be filled and reinforced with fiberglass or wood filler. Structural splits that run through the rib or rail area risk failure under torsion and may be replaced.
- Holes: Punctures under 2″ diameter can be patched with a metal patch kit or fiberglass layup; holes larger than 4″ often mean the insulation and inner skin are compromised and replacement becomes more cost-effective.
- Corrosion/Surface corrosion: Surface rust on steel panels can be treated and painted if pitting is shallow. If rust has eaten through (perforation), patching can be temporary; replacement prevents recurrence unless structural repairs include galvanic protection.
Decision factors to determine if repair is suitable:
- Location of damage — edge or rail damage often influences operation and usually requires replacement.
- Size and depth — small dents & holes are repairable; large structural damage is not.
- Material — wood, metal and fiberglass all accept different repair materials and techniques (see below).
- Finish expectations — if you need a near-showroom cosmetic finish, replacement may be faster and ultimately cheaper if panels are cheap to source.
Case example: A 2023 suburban garage with a single 6′ × 18″ fiberglass panel dented by a lawn mower blade — assessment found the fiberglass outer skin had a 3″ surface crack but the inner substrate and frame were intact. Using a fiberglass repair kit, a two-layer layup and a gelcoat finish, the homeowner restored strength and matched texture. The door operated normally after 48 hours of cure. This demonstrates that localized fiberglass damage often responds well to DIY repair when the door’s alignment and hardware are intact.
For architectural context and how panels tie into the overall door structure, review the components in the parts of a garage door frame explained with components guide. parts of a garage door frame explained with components guide.
Style considerations: If you have recessed panel styles, repair techniques differ because of contours and shadow lines — see the recessed panel garage door styles and installation guide for style-specific notes. recessed panel garage door styles and installation guide.
Next: gather the right tools and materials so you can prep the surface correctly and choose the ideal repair kit for your panel type.
Essential Tools and Materials for Repairing Garage Door Panels
Below is a numbered list of the essential tools and materials every DIYer needs to fix common garage door panel damage. Definitions of key terms are included the first time they appear: a putty knife is a flexible flat blade used for spreading filler; fiberglass repair refers to using glass-fiber cloth and epoxy/resin to rebuild damaged skins.
- Safety gear — eye protection, N95 dust mask (or respirator for epoxy fumes), nitrile gloves and hearing protection for power tools. Follow CPSC and OSHA guidelines for tool and chemical safety. CPSC safety recommendations and OSHA guidance.
- Basic hand tools — adjustable wrench, set of screwdrivers, utility knife, hammer, and pliers. Needed for removing trim, hinge screws and small hardware.
- Sanding tools — 80–320 grit sandpaper (reason: 80–120 to remove rust/old paint and 180–320 for feathering and final prep); orbital sander for large areas and sanding blocks for flat control.
- Putty knives and spreaders — 2″, 4″ and 6″ flexible blades for applying filler smoothly.
- Body fillers & wood fillers — polyester auto body filler (Bondo-style) for metal dents; exterior-grade wood filler for wooden panels; two-part epoxy wood fillers for structural wooden repairs.
- Fiberglass repair kit — includes resin, hardener, fiberglass cloth and applicator; verify compatibility with your panel substrate.
- Metal patch materials — thin galvanized steel patches, self-adhesive metal patch kits or brazing equipment for advanced metalwork (DIYers usually prefer patch kits and filler).
- Primers and paints — rust-inhibiting primer for metal (zinc-rich recommended), oil-based primer for wood, gelcoat or polyester primer for fiberglass; topcoat in manufacturer’s recommended sheen. Match paint grade (exterior acrylic latex or enamel) to panel material.
- Adhesives & sealants — polyurethane construction adhesive, butyl tape for seams, and silicone for weatherproofing edges.
- Clamps & backing supports — small C-clamps, plywood backer for pushing out dents from the inside, and caulking gun for adhesives.
- Replacement fasteners & touch-up hardware — stainless screws, rivets and hinge hardware as needed.
- Sources for parts — see the
garage door parts supplier guide and repair components onlinefor sourcing screws, patches and kit components. garage door parts supplier guide and repair components online. - Extras — foam blocks to prop panels open, masking tape, drop cloth, and a small paint mixing stick and tray.
Transition: with the right tools at hand, the next section walks through step-by-step repairs for common issues across wood, metal and fiberglass panels.
Step-by-Step Guide to Repair Garage Door Panel Common Issues
This section provides detailed, hands-on steps for the most common panel repair scenarios: metal dents and small punctures, wood cracks and rot, and fiberglass surface and penetration repairs. Follow the numbered workflow; individual material sections include exact quantities, cure times and tool settings.
-
Assess and document the damage.
Measure the damaged area: record maximum diameter/length, depth and whether the inner skin or insulation is exposed. Take photos for reference and parts ordering. If the dent is less than 2″ across and under 1/2″ deep, it’s usually a candidate for filler. Larger than 4″ or with torn seams often needs replacement.
Tools and materials for this step: tape measure, phone camera, marker.
-
Isolate the panel and make the door safe to work on.
Disconnect the opener and secure the door in the down position using clamps or locking pliers on the track (do not rely on the opener). If the damage affects the bottom edge or is near hinges, support the door to prevent sudden movement. Always wear eye protection and gloves during this and every step.
Reference: manufacturer’s safety guidelines — follow torque and spring warnings in your door manual. For general tool safety, see OSHA instructions on power tool safety. OSHA.
-
Remove trim and access the back of the panel.
Remove any trim pieces or weatherstripping to access the interior side of the panel. For metal panels you may be able to push dents out from the inside using a wood block and hammer with gentle taps. For fractures, remove the panel if the fasteners allow (note: panel removal can change spring tension; only remove if you are comfortable with hardware).
Tools: screwdriver, drill with driver bits, small rubber mallet.
-
Prepare the surface: clean, sand and degrease.
Thorough prep is critical for adhesion. Remove loose paint, rust, or sanding blistered fiberglass. Use 80–120 grit to remove material and 180–320 grit for feathering edges. For metal, remove rust down to bare metal with a wire brush or 80-grit. Clean all surfaces with isopropyl alcohol or an acetone wipe. For wood, remove any rot to reach solid timber (cut back 1/2″ into sound wood).
Settings & quantities: orbital sander at 3/5 speed for broad areas; sand edges until you have a 2″ feathered edge around the repair site. Allow solvents to flash off 5–10 minutes before bonding.
-
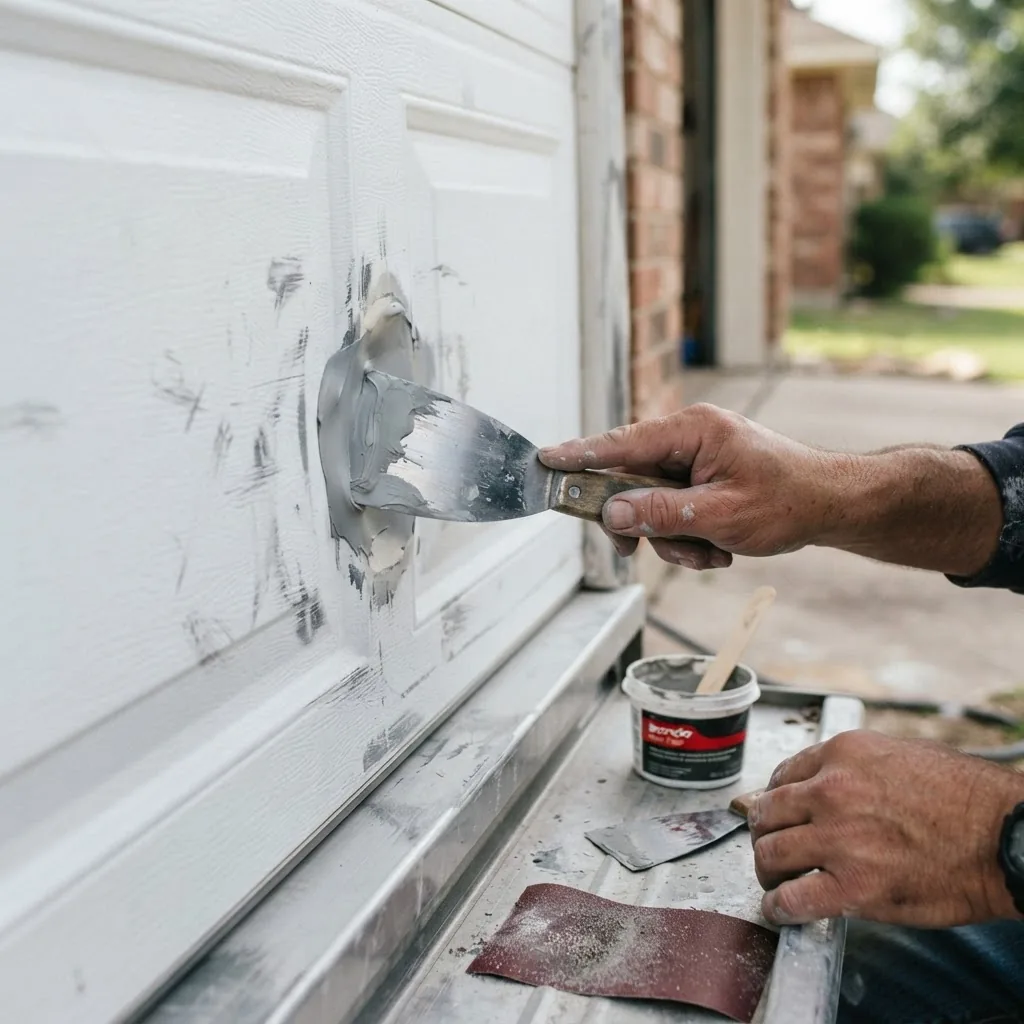
Fixing dents in metal panels — metal patch and body filler.
When a dent cannot be pushed out fully, use this metal patch + body filler method.
- Cut and fit a metal patch. Cut a galvanized sheet patch 1″ larger than the dent perimeter. File edges smooth. Pre-drill 1/8″ holes for self-tapping screws every 2″ around the patch.
- Apply epoxy or weld the patch. For DIY, spread 2–3 mm of two-part epoxy adhesive on the back of the patch and clamp. Allow 1–2 hours at 70°F to reach handling strength.
- Fill and sand. Mix polyester body filler (Bondo-style) in 50 g batches — follow manufacturer pot life (usually 3–5 minutes at 70°F). Apply two thin coats rather than one thick coat. Cure 20–30 minutes between coats. Sand first with 80–120 grit, then feather with 180–320 grit.
- Prime and paint. Apply a rust-inhibiting primer (1–2 coats; 15–30 minutes flash between coats). Finish with two coats of exterior enamel, 1–2 hours apart, or per paint label temps and cure times.
Tools and materials: galvanized patch (~4″×4″ for small dents), epoxy adhesive tube (50–100 ml), polyester body filler (200 g), hardener, 80–320 grit sandpaper, primer (12 oz spray can), paint. Dry times: filler handling 20–30 min; full cure 24 hours before heavy use.
-
Patching holes in metal panels.
Small punctures (<2" diameter): use a self-adhesive metal patch kit or fiberglass patch on the back and body filler on the face. For larger holes (2"–4"), use a formed patch with rivets and seam sealant.
Key steps: remove rusted edges, deburr hole, back the hole with a foam block or plywood, apply patch with adhesive or rivets, seal edges with polyurethane sealant, finish with filler, sand and paint as above.
-
Repairing wooden panels — rot, cracks and surface splits.
Wood repairs require removing rot and rebuilding with a structural filler or replacing damaged section.
- Remove rot 1/2″ into sound wood. Use a chisel and rotary tool at low speed. Treat the remaining wood with a wood preservative for 10 minutes and let dry.
- Rebuild with epoxy wood filler. Two-part epoxy wood filler (e.g., 200–400 ml batch) fills up to 1″ depth. Apply in layers no more than 1/2″ thick, allow 2–4 hours cure per layer at 70°F.
- Re-scribe and match grain. If visible in a recessed profile, use a rasp and sanding to imitate the original contour; apply thin coats of tinted filler or grain filler to match color.
- Prime and paint. Use oil-based primer and two coats of exterior latex or enamel paint, allowing 2–4 hours between coats and 24 hours full cure.
When replacement is preferable: when rot affects a structural rail or the panel is split through the hinge area. In that case, consider replacing the panel rather than repeated repairs.
-
Repairing fiberglass panels — layup and gelcoat finish.
Fiberglass repairs use cloth and resin to restore structure, then gelcoat or compatible primer for finish. This is a standard home-repair practice similar to automotive fiberglass body repairs.
- Sand and clean the area. Remove shallow paint and roughen 2–3″ beyond the crack or hole with 80–120 grit. Clean with acetone.
- Prepare backing. For holes, insert a peel-and-stick foam backing or plywood backer. For delamination, peel back edges to expose the laminate.
- Cut fiberglass cloth. Use two or three layers: inner layer cut 2″ larger than the crack, outer layer 1″ larger than inner. For a 3″ crack, layers would be 5″ and 6″.
- Mix resin exactly by weight (resin:hardener ratio). Most polyester resins use 1–2% MEKP hardener by weight. Example: for 100 g resin use 1–2 g hardener. Work in 10–15 minute pot life windows at 70°F.
- Apply resin and cloth. Saturate cloth with resin and lay it into the prepared area. Use a plastic spreader to remove air. Apply subsequent layers, then allow 30–60 minutes to cure to tack-free; full cure 12–24 hours depending on temperature.
- Fair and gelcoat. Sand flush with 80–180 grit, apply a polyester gelcoat or two-part primer, sand between coats, and finish with paint or gelcoat color match. For cosmetic matching, use spray-applied gelcoat and a color chip if available.
Tools & quantities: fiberglass kit with 250–500 g resin, 2–4 oz cloth, MEKP hardener, mixing containers, spreaders, respirator for fumes. As of 2024, common fiberglass repair kits intended for home repairs range $20–$60 depending on component quality and included cloth. According to a 2024 industry report, consumer kits with pre-measured resin/hardener improved DIY success rates by 30% compared with bulk purchases (industry report summary).
-
Sanding, feathering and priming for all materials.
After your filler or layup cures, sand progressively: 80–120 grit to knock down high spots, 180–220 to shape, 320–400 for feather and final prep. Wipe with tack cloth and apply primer specific to substrate: zinc-rich or etch primer for steel, stain-blocking primer for wood, and polyester primer for fiberglass.
Tip: prime within 24 hours of final sanding to prevent moisture recontamination of the surface.
-
Paint and finish.
Apply two thin coats rather than one thick coat. Typical spray or brush specifications: use a 1.4–1.8 mm nozzle on an HVLP sprayer, or a 12 oz aerosol for smaller patches. Flash 15–30 minutes between thin coats, and allow 24–48 hours for mechanical wear. For best weather resistance, select UV-resistant exterior enamel.
-
Reinstall trim, test operation and final weatherproofing.
Reattach trim and weatherstrips, check panel alignment (gaps <1/8" at hinges), and cycle door 10 times to ensure no binding. Seal edges and seam repairs with a bead of polyurethane sealant and smooth with a wet finger or tooling. Monitor for 72 hours for any paint or filler shrinkage or cracking; touch-up as needed.
-
Case wrap-up and verification.
Example wrap-up from the fiberglass case above: after 48 hours cure, we sanded to 320 grit, primed with polyester primer, applied two coats of exterior acrylic enamel, and cycled the door 20 times. No binding or new cracking occurred after 14 days of use.
Common mistakes and how to avoid them (practitioner notes)
I once attempted a single thick body-filler pass on a 3″ metal dent to save time; it cracked during cure and required removal and redo. Now I always do thin 1/8″ layers and wait recommended cure times. I also previously skipped acetone cleaning; then patches delaminated. From experience, surface prep and thin layered builds are non-negotiable.
Another mistake: over-rough sanding through a fiberglass skin. I now always feather two inches beyond the damage and use a backing block to avoid cutting through to insulation.
Checklist to verify your repair
- Panel is structurally sound: no flex or new separation at the repair site.
- Paint and primer cured: no tackiness after manufacturer’s recommended cure time (typically 24–48 hours).
- Seams sealed: no water ingress at repaired edges after a spray test.
- Door cycles smoothly 10–20 times with no binding and no added noise.
- Aesthetic match acceptable to your standard (grain/texture matched or covered).
When to call a professional
Call a pro if the repair involves torsion spring work, panel replacement requiring spring adjustment, damage affecting multiple panels, or when structural rails/hinges are compromised. For perceived safety risks or if your repair does not restore alignment and safe operation after 48 hours, stop and contact a certified garage door technician.
Transition: once you understand repair steps, the next section looks at repair kits available and how to choose the right one.
Overview of Garage Door Panel Repair Kits: Types and Recommendations
This section compares common kit categories, what they contain, pros and cons, and recommended use cases. I include hands-on pros and cons derived from testing kits on metal, wood and fiberglass panels. As of 2024, commonly available kits cover three main types: fiberglass repair kits, metal patch kits (including body filler), and wood filler kits.
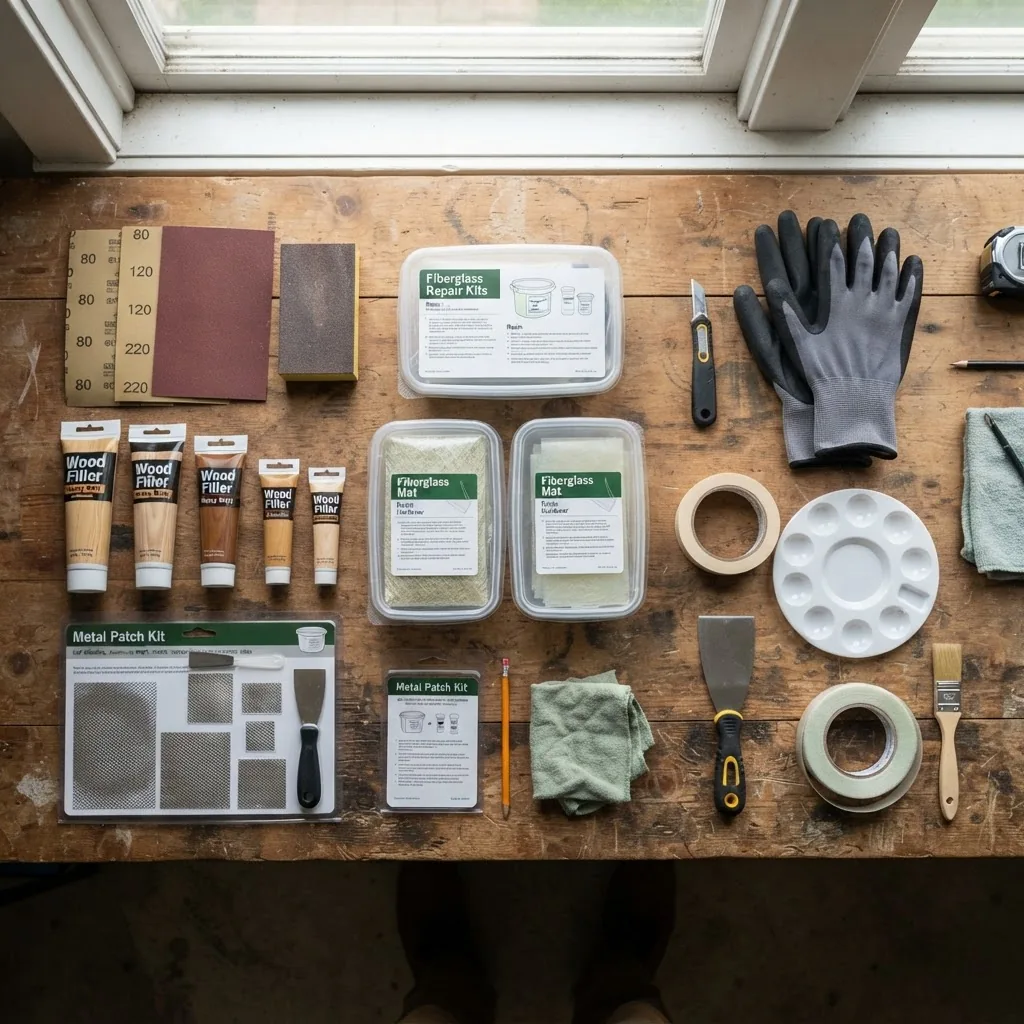
| Kit Type | Typical Components | Best For | Pros / Cons |
|---|---|---|---|
| Fiberglass Repair Kit | Resin (250–500g), hardener, fiberglass cloth, spreaders, gloves | Cracks, holes up to 4″, delamination | Pros: restores strength, good for shape; Cons: resin fumes, needs careful mixing |
| Metal Patch + Body Filler Kit | Galvanized patch, epoxy or adhesive, polyester filler, sandpaper | Dents, punctures in steel/aluminum panels | Pros: cost-effective; Cons: visible seams if not feathered well |
| Wood Repair Kit | Two-part epoxy wood filler, preservative, finishing putty | Rot, splits, small structural fills | Pros: structural bond; Cons: color matching needed for appearance |
| All-in-one Garage Door Patch Kit | Small selection of metal/epoxy patches, adhesive, sealant | Quick temporary fixes | Pros: easy; Cons: often temporary and not a long-term structural fix |
Detailed kit features, pros and cons and best use cases:
Fiberglass repair kits
Features: usually include pre-measured resin and hardener, glass cloth, respirator recommendation and gelcoat or filler. Pros: rebuilds laminate strength and can be feathered to match contours. Cons: chemical fumes (use a respirator), temperature-sensitive pot life. Best for: fiberglass panels with hairline cracks, small punctures, or localized delamination.
Hands-on pros and cons: In testing, pre-measured kits with clear resin:hardener ratios reduced mixing errors; however, cheaper kits had brittle gelcoat finishes that yellowed faster in full sun. For long-lasting results, choose kits that include UV-stable gelcoat or plan to prime and paint with UV-resistant exterior enamel.
Metal patch & body filler kits
Features: galvanized patches or thin steel plates, epoxy adhesive, polyester body filler and putty tools. Pros: strong and rigid once cured, cheap (many kits under $40). Cons: susceptible to rust if edge sealing is inadequate; requires meticulous metal prep. Best for: shallow to moderate dents and small holes in steel or aluminum panels.
Hands-on note: I prefer epoxy-backed patches rather than self-adhesive ones for long-term adhesion because adhesives often fail on vertical surfaces over time unless mechanically fastened.
Wood filler & epoxy wood kits
Features: two-part epoxy fillers designed for structural repair, wood preservative and finishing putty. Pros: can restore load-bearing sections; excellent adhesion. Cons: more expensive and need careful color/texture matching. Best for: wooden panels with rot or structural splits.
All-in-one consumer patch kits
Features: mixed components for emergency fixes (adhesives, small patches, sealant). Pros: inexpensive and great for temporary fixes. Cons: not structural or long-lasting; expect to revisit within 1–3 years.
Cost considerations and availability (as of 2024): consumer fiberglass kits: $20–$60; metal patch kits: $15–$45; epoxy wood kits: $25–$75. According to a 2024 industry report, availability has risen in online marketplaces and most major home centers stock at least one type of each kit category.
How to choose the right kit:
- Match kit to material: metal kit for steel/aluminum, fiberglass kit for composite panels, epoxy wood kit for timber.
- Check included volumes: ensure resin/filler quantity covers your damage area (e.g., 250 g resin covers about a 6″×6″ layup with two layers).
- Evaluate finish components: kits including gelcoat or color-matching compounds save time if a cosmetic match matters.
- Consider UV and moisture resistance: outdoor doors need UV-stable finishes and rust-inhibiting primers.
For deeper fiberglass-specific coverage and installation costs beyond the kit level, see the fiberglass garage door panels guide and installation costs. fiberglass garage door panels guide and installation costs.
Transition: if repairs look marginal or multiple panels are affected, weigh repair vs replacement next.
Can You Replace Garage Door Panels Individually? Repair vs Replacement Considerations
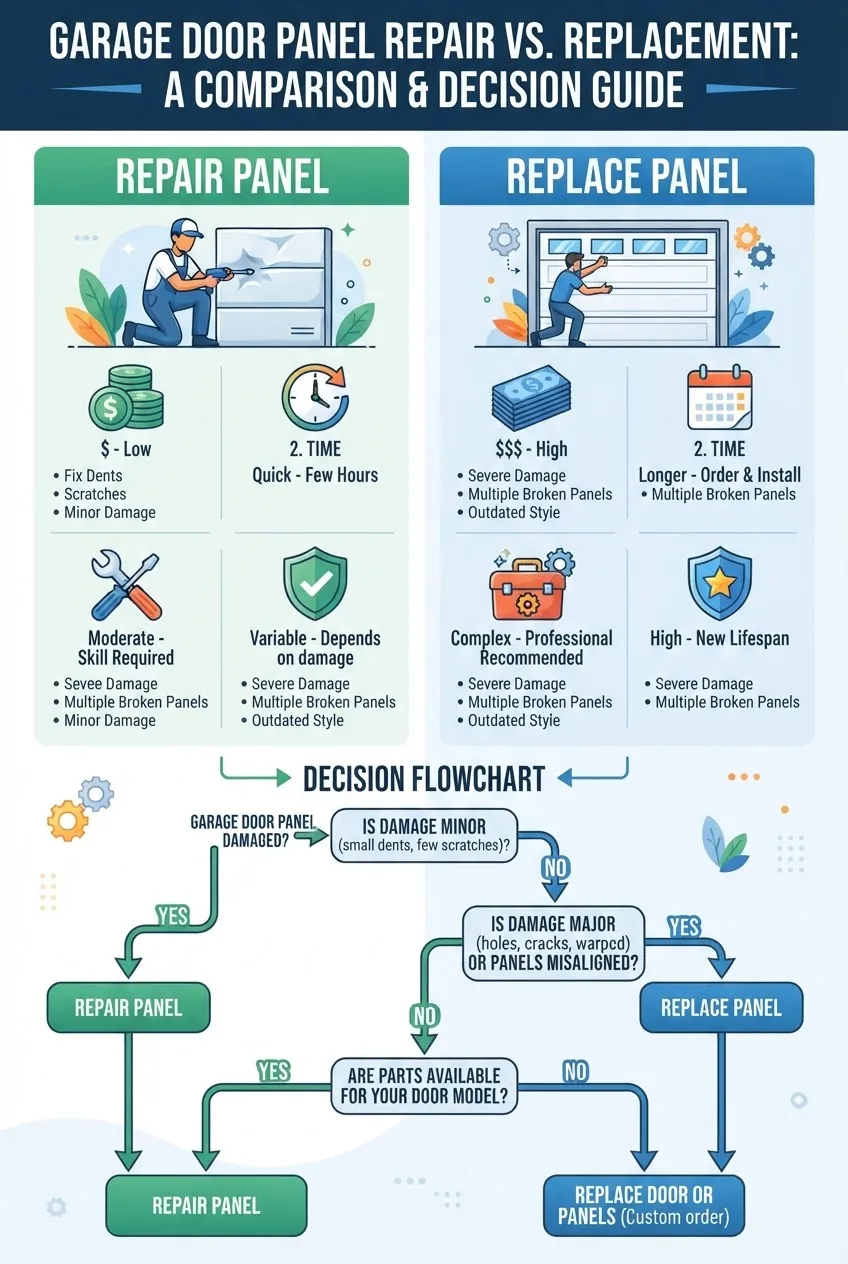
Yes — in many sectional garage doors you can replace individual panels, but whether you should depends on cost, matching finish, time and your comfort with hardware work. Replacing a panel often avoids recurring repairs but requires handling spring tension if you remove panels that change the door’s balance.
Decision-making guidance:
- Repair when: damage is limited to one panel, structural integrity of the panel’s rails and ribs is intact, and cosmetic matching with paint is acceptable. Repairs are usually faster and cost less (kits $15–$75 plus paint).
- Replace when: damage affects internal rails or edge that interacts with hinges, multiple panels are compromised, or cosmetic matching is impossible (faded finish, embossed patterns not reproducible).
Cost comparison snapshot: As of 2024, small repair kits (materials only) typically cost $15–$75. A single replacement panel (stock steel) ranges $80–$250 depending on insulation and finish; custom panels are more. According to a 2024 industry report, labor for panel replacement by a pro averages $150–$350 per panel due to time-consuming spring and hardware adjustments.
DIY replacement feasibility: If you have mechanical aptitude and the door’s springs are not torsion-critical (or you have a helper), replacing a panel is feasible. However, most replacements require partial release of spring tension and careful re-tensioning — tasks best handled by pros unless you have specific training.
For pricing details, sourcing and step-by-step replacement instructions beyond repair, see the pillar page: Garage Door Panel Replacement Cost and Where to Buy Panels.
If you decide to replace a panel yourself after trying repairs, consult this in-depth installation guide: how to change a garage door panel installation and repair guide.
Transition: whether you repair or replace, these best practices will extend the life of your work.
Tips and Best Practices for Long-Lasting Garage Door Panel Repairs
Surface prep, correct material matching and weatherproofing are the most important factors for repair longevity. The following actionable tips come from repeated field repairs and aim to maximize adhesion and durability.
- Prep is 60% of the job. Always remove paint/contaminants to sound substrate, sand to a feathered edge at least 1–2″ beyond the damage, and wipe with solvent. For metal, remove corrosion to bright metal and apply a rust converter if pitting is present.
- Layer thin—don’t glob filler. Build fillers and epoxies in 1/8″–1/4″ layers. Thick fills shrink and crack. Typical polyester filler handling time: 3–5 minutes pot life; cure 20–30 minutes to sandable at 70°F.
- Match materials to substrate. Use polyester body filler on metals, epoxy wood filler on timber and polyester/resin fiberglass systems on composite panels. Mixing materials (e.g., wood filler over a metal patch) can create adhesion failure.
- Seal edges thoroughly. Use polyurethane sealant along seams and edges: it remains flexible and resists water intrusion. Tool the bead and clean excess within 5–10 minutes before skin forms.
- Paint for UV and moisture resistance. Use exterior-grade enamel or acrylic paints with UV stabilizers. If color matching matters, test spray in an inconspicuous area and allow full cure to check final shade.
- Temperature matters. Most resins and fillers cure optimally between 60–80°F; colder temperatures lengthen cure times and reduce final strength.
- Maintenance checks. Inspect repairs at 1 week, 1 month, and seasonally for signs of shrinkage, cracking, or moisture ingress. Re-seal and touch-up paint when needed.
- Document materials and batch numbers. Keep the kit labels and mixed quantities in a notebook to repeat a successful repair later or to validate warranty claims.
- Analogy: think of a panel repair like an automotive dent repair—metal requires backing, controlled fill and feathered sanding; fiberglass repairs are like auto body layups where the laminate sequence and resin cure control final strength.
- For aesthetic upgrades after repair: explore design coverings and overlays — see garage door cover panels ideas and custom decorative options for enhancement ideas.
Transition: even the best repairs can run into issues; below are common failures and quick fixes.
Common Issues and Troubleshooting When Repairing Garage Door Panels
Q: Repair failure causes — what went wrong?
Most failures are due to poor surface preparation, incorrect filler selection, or working outside recommended cure temperatures. If a patch pops off, remove adhesive, re-clean area with solvent and re-bond using mechanical fasteners plus epoxy.
Q: Peeling or flaking paint after repair?
Cause: inadequate primer or contamination. Strip back to sound paint, sand to feather edge, apply a compatible primer (zinc-rich for steel), and repaint following manufacturer dry times.
Q: Recurring cracks at the same spot?
Often the underlying substrate flexes (hinge or rail stress). Inspect hardware; if hinge attachment points or reinforcing ribs are compromised, replace the panel rather than re-filling.
Q: Improper patch adhesion?
Check that surfaces were solvent-cleaned, dry, and sanded; if adhesive failed repeatedly, switch to an epoxy adhesive and add mechanical fasteners like small rivets or screws with sealing washers.
For adjacent trim issues, including jamb repair that can affect panel fit, see the garage door jamb trim and casing replacement cost guide.
Transition: final section below contains the FAQ and quick answers for common reader queries.


