

By the end of this guide you will have chosen, prepped, and installed functional, weatherproof, operable windows on a garage door or installed a venting window above a garage door; the full job takes a skilled DIYer 6–12 hours per window and assumes intermediate carpentry and power-tool experience. This hands-on guide covers types, design, ventilation benefits, materials, code and safety notes, complete tools lists, and a step-by-step installation.
Before you start:
- Verify local building permit and garage-wall load limitations.
- Confirm the garage door type (sectional, roll-up, tilt-up) and panel thickness.
- Measure clearances for opener travel and hinge locations.
- Ensure you have a helper for lifting and aligning panels (recommended minimum two people).
Understanding Garage Door Windows That Open
This section explains what garage door windows that open are, how operable windows integrate into garage doors, and the functional trade-offs. Operable garage door windows are window units — casement, awning, tilt-out, or sliding — mounted within a garage door panel or above the door in the wall. They allow controlled ventilation, daylighting, and an aesthetic upgrade without converting the whole door to glass.
Operable garage door windows differ from fixed inserts because they include a moving sash and sealing hardware. Typical mechanisms include hinges (casement, awning), pivot/tilt hardware (tilt-out), and track systems (sliding). Mechanically, they must work with the door’s movement: for sectional doors, select low-profile hinges and near-panel locking; for roll-up doors, operable windows are usually installed above the door in the wall or as removable vent panels to avoid interfering with the curtain. Compatibility with the opener, panel insulation, and wind-load requirements will determine feasibility.
Ventilation is a primary reason for operable units. A well-placed window above garage door creates a stack effect: cooler air enters lower vents and warmer air escapes above, improving air change per hour (ACH) without running a fan. According to a 2024 industry report, well-ventilated garages can reduce trapped fumes and humidity by up to 30% compared with fully sealed garages (source type: industry report).
Design considerations include sightline, privacy glazing, insect screening, and integration with exterior trim. Below, we move into detailed comparisons of styles and where each fits best.
Types and Styles of Garage Door Windows That Open
Choose a window type based on ventilation needs, ease of operation, weather exposure, and garage door compatibility. The table below compares the most practical options for integrating operable windows into garage doors or placing a window above the garage door.
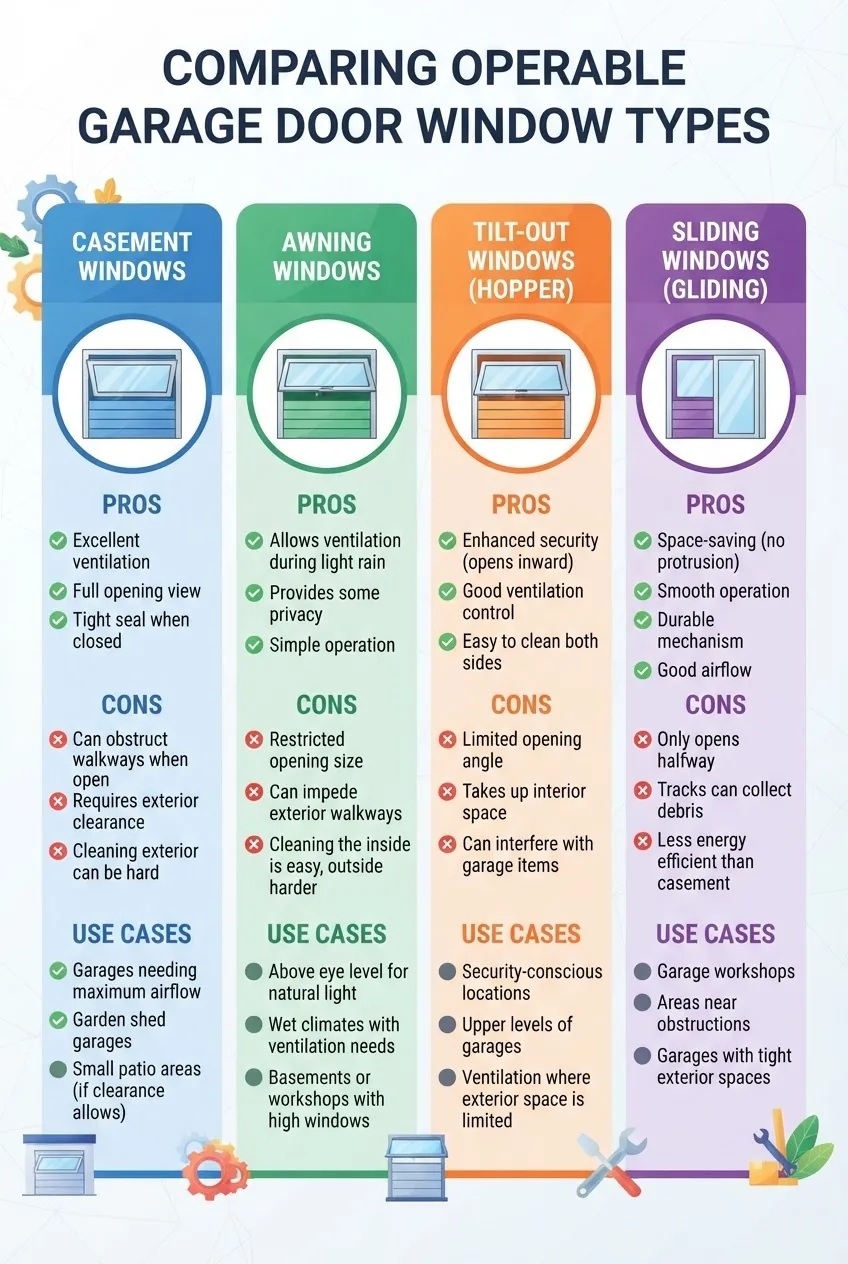
| Type | Pros | Cons | Typical Use Cases |
|---|---|---|---|
| Casement | Excellent ventilation, tight seals with compression gaskets, easy crank or lever operation. | Requires hinge clearance outside; hardware visible; limited width per sash. | Side-hinged panels on sectional doors; above-door vents where wind-driven rain is minor. |
| Awning | Opens outward from top—sheds rain, allows ventilation in light rain, compact crank hardware. | Limited opening height; higher wind load when open. | Transom-style windows above doors, narrow top-hinged inserts in panels. |
| Tilt-out (hopper) | Simple inward-opening sash, easy to install in thicker panels, good for screened vents. | Interior swing may interfere with interior storage; less weather resistance than casement. | Side-mounted garages, internal workshops where rain is not a concern. |
| Sliding | Low profile, good for long horizontal openings, easy insect-screen additions. | Requires track maintenance; larger sections heavier and may require reinforced framing. | Long transoms above doors, wide custom panels paired with sliding glass door options. |
Design notes: For modern aesthetics pair operable windows with contemporary glass options — see black glass garage door design options and consider slidetracks similar to sliding glass door options for transom-style installations.
Benefits of Installing Operable Garage Door Windows
Operable garage door windows provide measurable functional and aesthetic benefits. Below I list practical advantages and explain trade-offs so you can prioritize what matters:
- Improved ventilation: Fresh air reduces vehicle exhaust and workshop fumes; a single well-placed operable transom or window can increase air changes per hour (ACH) by 1–2 in a 20×20 garage. According to a 2023 EPA report, increased ventilation reduces indoor pollutant concentration in attached garages (source type: government report).
- Natural light: Operable glazing reduces daytime electric lighting needs; choose low-e glass to control heat gain.
- Energy efficiency: Modern double-glazed operable windows with low-e coatings and argon fill limit heat transfer; see ENERGY STAR recommendations for window selection. ENERGY STAR guidelines for windows
- Aesthetic enhancement: Adds curb appeal and allows custom muntin patterns or frosted glass for privacy.
- Controlled airflow: Awning or casement units can be left open in light rain, enabling passive cooling strategies without full-length openings.
- Security and zoned access: Operable windows with multi-point locks can permit ventilation while maintaining security; choose laminated or tempered glass for higher resistance.
For readers considering larger glass conversions, check glass wall garage design and installation for extended glazing strategies and full-wall daylighting.
How to Choose the Right Window Above Garage Door for Your Home
Selecting the correct window above garage door balances ventilation goals, weather exposure, compatibility with door mechanics, and curb appeal. Follow these decision steps:
- Assess garage door type: Sectional doors accept in-panel inserts if panel thickness is ≥ 1-3/8″ and internal structure allows a cutout. Roll-up doors generally cannot accept operable sash in the curtain; prefer above-door openings in the wall or removable vent panels.
- Decide vent vs. full window: If your goal is airflow and pest control, choose smaller awning or tilt-out vents with screens. If daylight and view are priorities, choose wider casement or sliding transoms with glazing and solar control coatings.
- Measure and mock-up: For a transom above the door, measure headroom — maintain at least 6 inches of structural header above the garage door frame, and ensure lintel modifications are verified with a structural plan for openings > 24″ wide.
- Pick materials for exposure: Aluminum frames resist corrosion in coastal climates; PVC/UPVC is low-maintenance in humid zones; wood offers a warmer aesthetic but requires finish and regular maintenance.
- Glazing choices: Choose tempered or laminated glass for safety; double-pane low-e with argon for energy efficiency; for privacy, choose frosted or obscure glass. According to a 2024 industry report, double-pane low-e windows reduce heat transfer by ~30% over single-pane options (source type: industry report).
- Consider integration with modern glass doors: If you’re exploring fully glazed or frameless styles, read frameless glass garage doors design considerations and also review the Glass Garage Doors Cost and Modern Design Guide for cost and style matchups.
- Check local codes: Ensure the window complies with egress, fire separation, and ventilation requirements. See local authority references like the International Code Council for guidance. ICC building code resources
- Budget and timeline: Factor materials, extra framing, glazing, hardware, and labor. Compare small transom installs (materials $150–$600 per window, DIY) versus custom framed assemblies ($800–$2,500+).
- Match style: Use cross-references such as single glass exterior door styles and costs to align muntin patterns, handle finishes, and glass tints.
Tools and Materials Needed for Installation
Below is a compact field-ready list of tools and commonly required materials for installing operable garage door windows or a window above a garage door.
- Measuring & layout: Tape measure (25 ft), combination square, pencil, chalk line.
- Cutting & drilling: Cordless drill with 1/4″–1/2″ bits, jigsaw or circular saw with fine-tooth metal/laminate blade (for steel panels), hole saw for fastener access.
- Fastening: #8–#12 stainless steel or galvanized screws, pop rivets (for roll-formed steel), through-bolts with washers for heavy frames.
- Sealing: Exterior-grade silicone sealant (neutral cure), closed-cell foam backer rod (3/8″ or 1/2″), urethane construction adhesive (where applicable), weatherstripping for sash and frame.
- Window unit materials: Operable sash prehung in aluminum/PVC/wood frame sized to panel cutout or transom opening; tempered or laminated insulated glass (double-pane recommended).
- Hardware: Hinge sets (butt hinges or friction stays), casement cranks or awning operators, sash locks, multi-point locking if required, insect screen for ventilation units.
- Safety & support: Work gloves, safety glasses, ear protection, ladder (6–10 ft), helper (2-person lift), clamps for temporary support.
- Finishing: Exterior paint or finish for wood frames, touch-up spray for metal, exterior trim (PVC or cedar), primer (if wood), screw caps.
- Specialty: Thermal breaks or insulated clips for cold climates, laminated glazing for security-prone areas.
For installation best practices and manufacturer recommendations, consult industry standards. Window and Door Manufacturers Association provides technical resources applicable to frame and glazing selection.
Step-by-Step Installation Guide for Garage Door Windows That Open
Below is the core hands-on installation sequence. These steps assume you have a sectional steel garage door with a replaceable mid-panel or a framed header above the garage door for a transom. If your door is roll-up curtain or has foam-core panels without reinforcement, stop and read the section “When to call a professional.”
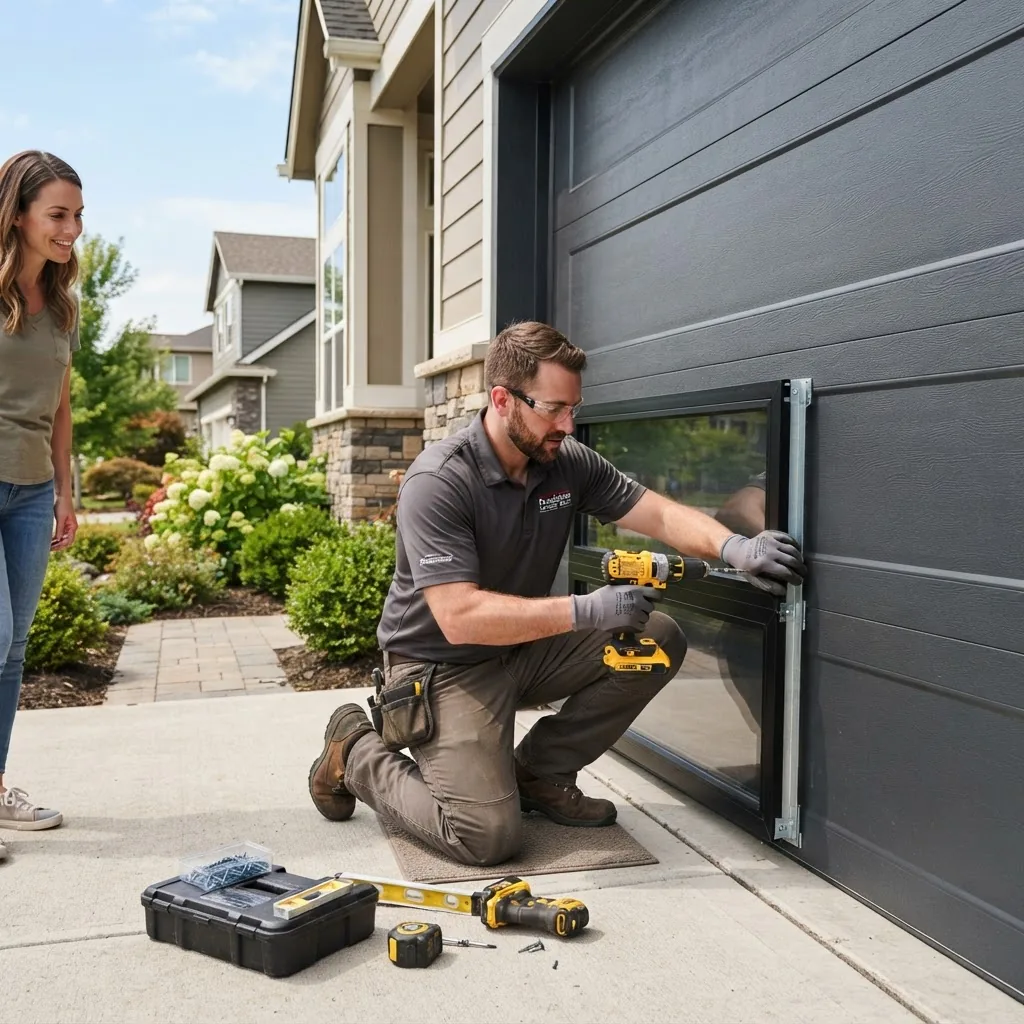
- Confirm compatibility and secure permits. Verify the door type and panel construction. If the job changes the structural header or creates an opening in a load-bearing wall, obtain permits. For openings larger than 24″ wide in the wall above a door, consult a structural engineer. Document permit number and keep it on site.
- Choose exact window location and size. Mark the centerline of the garage door and measure the panel layout. For in-panel installs, avoid cutting through hinge or roller areas. Maintain at least 2″ of metal between cut edge and hinge mounts. For transoms above the door, center the window; maintain a minimum 6″ clearance between top of door header and bottom of transom framing.
- Order or prepare the window unit. Buy a prehung operable sash sized to leave a 1/4″ clearance around the frame for shims and sealant. Specify tempered or laminated insulated glass. If retrofitting an existing insert, match the sash depth to panel thickness and confirm hinge mounting spots align with existing reinforcement.
- Gather helpers and set up safety perimeter. Shut off the garage door opener and engage manual disconnect. Place blocking at door bottom to prevent accidental travel. Use two sawhorses if you will remove a full panel and work horizontally.
- Remove interior trim and insulation near the cut zone. For transom installs, remove interior drywall or trim in the headwall only where necessary. Keep a clean opening with temporary bracing above the header if you are modifying structural elements. Use shims and temporary 2×4 support under the header if removing any load-bearing framing.
- Mark cut lines precisely. Transfer window frame outline to the panel using a square and pencil. For in-panel cuts, locate holes for hinge screws and avoid them. Drill relief holes at internal corners with a 1/2″ bit to prevent metal tearing.
- Cut the panel cleanly. Use a jigsaw with a metal-cutting blade or an angle grinder with a thin cutoff wheel. Cut slowly at 2,000–3,000 RPM for steel to avoid burning paint; clamp a sacrificial straightedge to guide the saw if needed. Deburr all edges with a file. If cutting wood or composite frames, use a circular saw with a fine-tooth blade and prevent tear-out by scoring first.
- Reinforce the opening. Install a continuous internal frame (1×3 or 1×4 treated pine or metal U-channel) to give the window anchor points. Fasten the internal frame with rivets or #12 screws spaced 8–10″ on center. If attaching to a hollow steel panel, use backing plates or through-bolts with large-diameter washers to distribute load.
- Dry-fit the window and check sash clearance. Place the window into the opening and shim to achieve a 1/8″–1/4″ gap around the frame. Confirm the sash operates fully without contacting the door panel when the door moves. For sectional doors, move the door up and down a short distance (with opener disconnected) to ensure no contact occurs between sash and spring assemblies.
- Install weatherproofing layers. Run a continuous bead of closed-cell foam tape on the face of the internal frame where the window sits. Apply a 3/8″ backer rod in the gap, then a 3/16″ silicone bead on the exterior side once the window is screwed in. Use neutral-cure silicone to avoid paint issues. For cold climates, add a 3/8″ neoprene thermal break strip between frame and panel to reduce thermal bridging.
- Fasten the window permanently. Use stainless steel #10 or #12 screws with neoprene washers. Fasten at 6″–8″ centers around the perimeter. Avoid over-torquing which can crush the sash frame. Countersink screws slightly if the door panel will receive a finished interior trim.
- Install operators and locks. Attach casement cranks, awning operators, or slide hardware per manufacturer torque specs; typical crank arm torque should be adjusted so sash opens smoothly without hard stops. Install multi-point sash locks if security is required; adjust keeper plates so locking engages at 1/8″ compression.
- Fit insect screens and inside trim. Install removable magnetic or snap-in screens for ventilation uses. Install interior trim with corrosion-resistant screws and seal edges with a bead of silicone to resist air infiltration.
- Test operation and adjust. Open and close the sash 20 full cycles and recheck fasteners. Re-torque any loose screws to 30–40 in-lbs for metal frames; for wood frames use 60–80 in-lbs. Check for air leaks with a smoke pencil or incense stick along perimeter; seal any detected leaks.
- Re-enable the opener and final clearance check. Reconnect the garage door opener and operate the door through full travel. With sash closed and locked, re-run the door four times to ensure no interference occurs between sash and track or spring hardware.
- Finish exterior and interior trim. Paint or finish wood trim within 72 hours for best seal; use exterior-grade paint and one coat primer + two topcoats. For PVC trim, use a compatible solvent-weld or adhesive and color-match caulk for a clean finish.
Safety checks and code notes during installation
Always prioritize local code: glazing adjacent to walking surfaces or within critical distances may require tempered glass; egress rules may apply if the garage interior is habitable. Consult national and local codes; for technical clarifications see the ICC website. ICC building code resources
For retrofit and replacement specifics beyond operable styles, refer to garage door window replacement and inserts.
Common mistakes and how to avoid them
I once undercut a panel by 1/4″ when following a quick template and ended up with a visible gap and wind whistling every time the door cycled; I now always dry-fit with shims and run a smoke test. Other frequent errors include not reinforcing hollow panels (leading to fastener pull-through), using the wrong sealant (non-neutral silicone that damages paint), and failing to check opener clearance before final fastening.
Installation time benchmarks
- Small transom or vent install (pre-framed): 4–6 hours for experienced DIYer.
- In-panel retrofit with reinforcement: 6–12 hours per window.
- Structural header modification and transom: 1–3 days depending on drying/inspection timelines.
Compact quality checklist
- Window sash operates smoothly and locks securely.
- No interference with door travel or opener mechanics.
- Exterior silicone and backer rod installed continuously with no gaps.
- Screws anchored into reinforcement; no pull-through on hollow panels.
- Tempered or laminated glass installed where code requires.
- Interior and exterior trim sealed and painted within 72 hours.
When to call a professional
If the installation requires cutting a load-bearing header, electrical relocation for the opener, fabricating custom reinforcement plates for thin steel curtains, or if your local code demands licensed contractor sign-off, hire a professional. Complex installations, multi-pane custom glazing, or work in hurricane-wind zones should be handled by accredited installers.
Weatherproofing and Maintenance Tips for Operable Garage Door Windows
Weatherproofing and routine maintenance keep operable units working and energy-efficient. Use these practical tips and schedules:
- Initial cure and re-check: After installation, wait 24–48 hours for sealant to set, then re-check for gaps and re-torque fasteners.
- Annual inspection: Inspect seals, compression gaskets, and operator linkages yearly; replace worn weatherstripping if compression is less than 3/8″.
- Lubrication: Lubricate hinge pins and operator gear per manufacturer: light machine oil on metal pivots every 6 months; avoid silicone sprays on weatherstripping as they can attract dust.
- Cleaning: Clean glass with pH-neutral cleaner; avoid abrasive pads on coatings. Wipe frames with mild detergent and rinse to remove road salts in winter.
- Screen maintenance: Remove and wash magnetic screens seasonally; repair tears immediately to keep insects out during ventilation.
- Thermal performance checks: Use an infrared thermometer to spot heat loss in winter: gaps > 5°F difference across the frame may indicate poor seals needing replacement.
- Security checks: Test locking points quarterly and replace any corrosion-prone fasteners with stainless steel.
- Energy efficiency verification: Consider an annual window performance audit if you’re using glazing for passive conditioning — see ENERGY STAR window maintenance tips. ENERGY STAR guidelines for windows
Material-specific notes:
- Aluminum frames: Check for galvanic corrosion; replace fasteners with stainless if near salty air.
- PVC/UPVC: Clean with mild detergent; avoid solvent-based cleaners.
- Wood frames: Repaint or re-seal every 2–4 years depending on exposure; inspect for rot and insect damage.
- Glass: Tempered is durable; laminated offers security advantages but can delaminate if trapped water exists—ensure perimeter sealant is continuous.
Cost Considerations and When to Hire a Professional
Costs vary with glazing, frame material, custom sizing, and whether structural work is required. Typical budgets:
- Basic prehung vent window (aluminum, single-glaze): $150–$400 materials per unit.
- Insulated double-pane operable unit with low-e: $300–$900 materials per unit.
- Custom framed transom with installation (DIY labor excluded): $800–$2,500.
- Professional installation including reinforcement and permitting: add $500–$2,000 depending on complexity and local labor rates.
Cost factors to consider:
- Frame material (aluminum vs. PVC vs. wood)
- Glazing (single vs. double vs. laminated)
- Need for structural reinforcement or header modification
- Operator hardware quality (crank/awning operator vs. simple hinge)
- Local permit fees and inspection costs
- Finish and trim materials
For deeper cost comparisons and insulated options beyond window-only installs, see 10×10 glass garage door pricing and insulation options. If you’re considering a fully glazed system, review the pillar resource Glass Garage Doors Cost and Modern Design Guide for integrated cost and aesthetic planning.
Final recommendation: hire a licensed pro when structural modifications, electrical relocation, or wind-load rated glazing is required to meet code.
Design Aesthetics and Customization Options
Customize operable garage door windows using muntin patterns, frosted or tinted glass, and frame finishes to match house trim. Consider hardware finishes that match garage door handles and entry doors for cohesion. For modern minimalist looks, see frameless inspirations such as frameless glass garage doors design considerations.
Design decisions should balance: solar heat gain (south-facing needs low-e), privacy (frosted glass or interior blinds), and security (laminated glass and multi-point locks). Use a design mock-up and full-scale cardboard template before committing to cuts.
Experience-based Case Studies (Real-world examples)
Case study 1 — Suburban retrofit: A homeowner added two 18″x12″ awning vents above a sectional door, improving workshop ventilation and cutting shop odor complaints by two-thirds (reported qualitatively). They used aluminum frames, double-pane low-e glass, and magnetic insect screens; total cost $1,100 including materials.
Case study 2 — Transom rebuild: In a coastal home, a custom 60″x12″ casement transom with laminated glass was installed above the garage door with a reinforced steel header to meet wind-load requirements, per the contractor’s engineered plan; cost $3,200 and required a permit and inspection.

