Owning a home comes with a slew of responsibilities, and maintaining your roof is one of the most crucial tasks. Your roof not only protects your property from the elements but also adds to its overall aesthetic appeal and value. Whether you’re dealing with minor repairs or considering high-quality upgrades, it’s essential to approach roof maintenance with diligence and professionalism. In this guide, we’ll explore six pro tips tailored for serious homeowners looking to ensure the longevity and quality of their roofs.
Regular Inspections Are Key
Regular inspections are crucial for the longevity and functionality of your roof. By conducting inspections at least twice a year, ideally in the spring and fall, homeowners can proactively identify and address any issues before they worsen. During these inspections, it’s essential to be thorough and observant, checking for signs of wear and tear such as missing or damaged shingles, cracks in the flashing, and areas of sagging. While binoculars can be useful for a preliminary assessment from the ground, it’s advisable to enlist the expertise of a professional roofing contractor for a comprehensive evaluation, experts from roofrepairspecialist.com explain. These professionals have the experience and knowledge to detect hidden problems that may escape the untrained eye, ensuring that no issues go unnoticed. Moreover, they can offer expert recommendations for repairs or upgrades tailored to your roof’s specific needs, helping you maintain its structural integrity and prolong its lifespan. Ultimately, regular inspections serve as a proactive measure to safeguard your investment and prevent costly repairs in the future.
Invest in Quality Materials
When it comes to roof fixes and upgrades, quality materials are non-negotiable. Opting for high-grade shingles, underlayment, flashing, and other components may require a larger upfront investment, but it pays off in the long run. Quality materials offer superior durability, better protection against harsh weather conditions, and enhanced energy efficiency. Additionally, they contribute to the overall aesthetics of your home, elevating its curb appeal and resale value. Prioritize materials that come with warranties, as they provide added peace of mind and assurance of performance.
Prioritize Proper Ventilation
Proper ventilation is often overlooked but plays a crucial role in maintaining a healthy roof. Inadequate ventilation can lead to moisture buildup in the attic, promoting the growth of mold and mildew and causing premature deterioration of roofing materials. It can also result in temperature imbalances, leading to increased energy costs and discomfort indoors. Invest in ridge vents, soffit vents, or attic fans to ensure adequate airflow and ventilation throughout your attic space. Consult with a roofing professional to determine the optimal ventilation system for your home’s specific requirements.
Address Issues Promptly
Ignoring minor roofing issues can quickly escalate into major problems that require costly repairs or even a full roof replacement. Whether it’s a small leak, a few missing shingles, or damaged flashing, address issues promptly to prevent further damage. Regular maintenance, such as cleaning gutters, trimming overhanging branches, and removing debris from the roof surface, can also help prevent problems before they arise. Remember that proactive maintenance is far more cost-effective than reactive repairs, so don’t procrastinate when it comes to addressing roofing issues.
Consider Energy-Efficient Upgrades
In addition to enhancing the structural integrity of your roof, consider incorporating energy-efficient upgrades to reduce your home’s carbon footprint and utility expenses. Options such as cool roofs, which reflect sunlight and reduce heat absorption, can help lower cooling costs during the summer months. Solar panels are another popular choice for homeowners looking to harness renewable energy and decrease reliance on traditional power sources. While these upgrades may require a significant upfront investment, they offer long-term savings and environmental benefits.
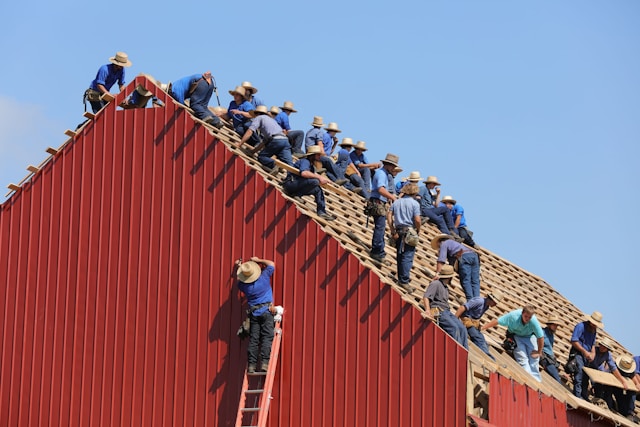
Hire Professional Contractors
Last but certainly not least, entrust roof fixes and upgrades to experienced and reputable roofing contractors. While DIY enthusiasts may be tempted to tackle roofing projects themselves, roofing work requires specialized knowledge, skills, and equipment. Professional contractors have the expertise to accurately assess your roof’s condition, recommend appropriate solutions, and execute repairs or installations safely and efficiently. When selecting a roofing contractor, look for credentials, such as licensing, insurance, and certifications from manufacturers. Additionally, seek referrals from trusted sources and read reviews to ensure you’re working with a reputable provider.
Maintaining a healthy roof is a fundamental aspect of homeownership that should not be overlooked. By following these six pro tips, serious homeowners can ensure their roofs remain in optimal condition for years to come. From regular inspections and quality materials to proper ventilation and energy-efficient upgrades, investing time and resources into your roof today can save you from costly repairs and headaches down the road. Remember, when it comes to roof fixes and upgrades, it pays to be proactive and prioritize professionalism every step of the way.