

By the end of this guide you will have mounted and torqued a full set of garage door struts or supports, verified panel alignment, and tested the door for safe operation. Total hands-on time: 2–4 hours for a standard 2-car sectional door; assumes intermediate DIY skills (basic rigging, drill use, and ladder safety).
Before you start
- Work area cleared, car removed from door path, good light (daylight preferred).
- Helper available for lifting heavy panels or holding the door during checks.
- Verify garage door springs are functional and NOT being adjusted during this project (spring work is a separate specialist task).
What Are Garage Door Struts and Why Are They Important?
Garage door struts are rigid metal supports that fasten to one or more outer panels of a sectional garage door to prevent panel bending, reduce sag, and resist wind load. Think of a strut as the door’s backbone: it spreads load across panels, reduces flex at the hinge lines, and increases the door’s structural integrity and operational life.
Primary functions and benefits:
- Reduce panel bending and panel-to-panel stress during lifting and lowering.
- Improve wind load resistance on doors in exposed or coastal locations.
- Limit fatigue on hinges, rollers, and tracks by stabilizing panel movement.
- Extend service life of the door and opener by lowering dynamic loads.
When combined with properly sized springs, struts help maintain door balance and reduce the chance of panel failure. For more on springs (which interact with struts for overall stability), see extension garage door springs replacement and garage door spring tension adjustment.
Common failure modes related to missing or inadequate struts: panel cracks at center stiles, elongated fastener holes from cyclic loading, and premature hinge failure. According to a 2024 industry report on residential door failures, reinforcement deficiencies were a leading contributor to panel collapse in high-wind incidents (source: 2024 industry report on residential door failures).
Transition: Now that you know what struts do and why they matter, next we’ll compare the available types so you can choose the right material and profile for your door.
Types of Garage Door Struts and Supports
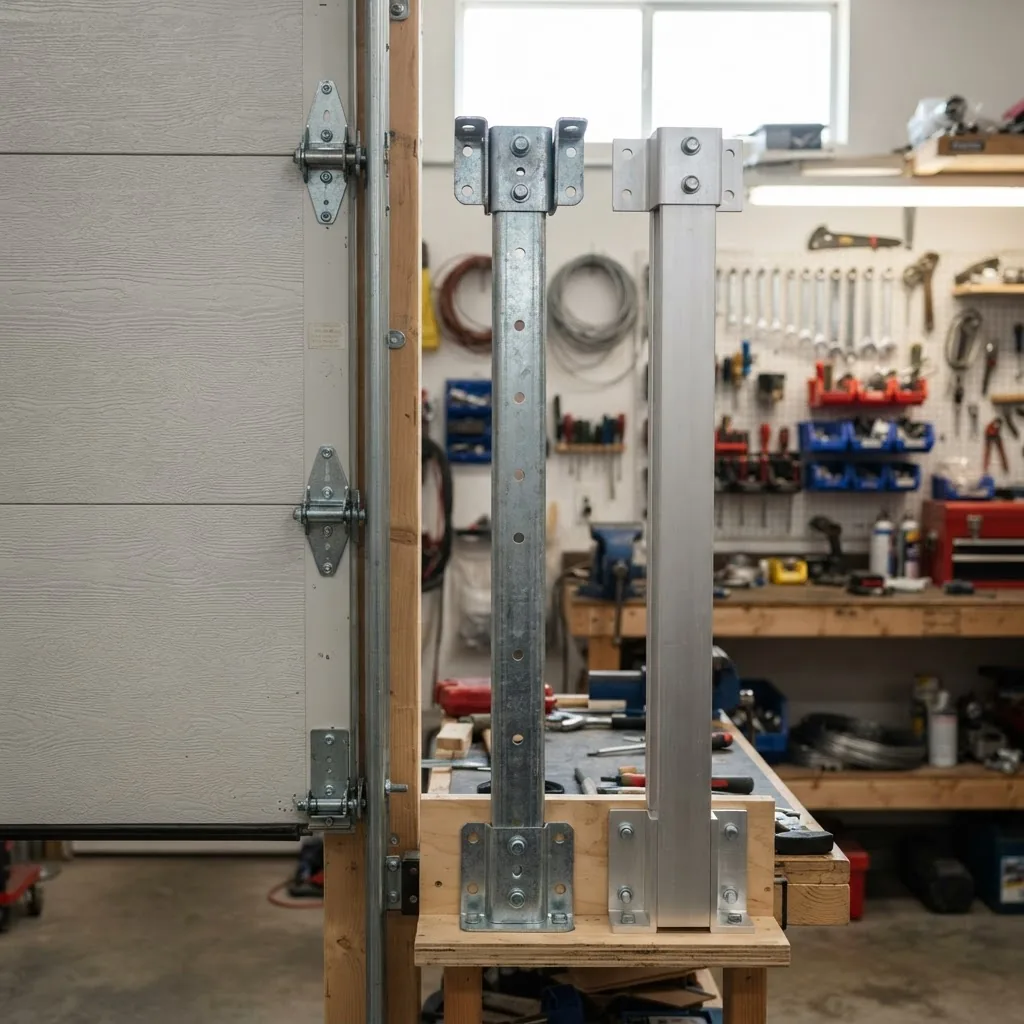
There are two common materials and several profile options. Choose by matching strength, weight, and corrosion resistance to your door size and environment.
| Type | Strength / Use | Weight & Corrosion | Typical hardware |
|---|---|---|---|
| Steel strut | Highest load-bearing; recommended for 2-car doors, heavy wood doors, or high-wind zones. | Heavier; galvanized or powder-coated options for corrosion resistance. | 3/8″ carriage bolts or 1/4″-20 hex bolts with lock nuts and flat washers. |
| Aluminum strut | Sufficient for single-car or lighter steel/composite doors; easier to handle. | Lightweight; naturally corrosion-resistant but softer than steel. | 1/4″-20 stainless or zinc-coated bolts, lock washers, nylon-insert nuts. |
| Stiffeners vs Struts | Stiffeners are short crosspieces fitted inside panels; struts run full width or multiple panels. | Both can be steel or aluminum; stiffeners add local rigidity, struts add span stiffness. | Welded or riveted brackets for internal stiffeners; through-bolts for external struts. |
Compatibility notes: ensure the strut profile matches the door panel depth and hinge location. For doors with insulated foam panels, check manufacturer guidance for through-bolt locations. For complementary knowledge on other components that influence the choice of strut, see types of garage door springs guide.
Transition: With material and compatibility chosen, next is a quick inspection checklist to confirm your door actually needs struts or further reinforcement.
How to Determine If Your Garage Door Needs Struts or Additional Support
Use this inspection checklist and decision flow to evaluate reinforcement necessity. If multiple “yes” answers appear, reinforcement is recommended.
- Visible panel bowing: center-to-edge gap > 3/16″ when door is closed indicates bending.
- Cracked or delaminating panels: surface cracks, splits at seams or stiles.
- Excessive vibration or rattle: door screams or shakes during travel, especially in openers under load.
- Door size: doors wider than 16 ft or taller than 8 ft commonly need struts.
- High-wind exposure: properties rated by local code as high-wind or coastal zone.
- Repeated hinge or roller failures: more than one hinge replacement in three years.
Checklist explanation: Measure sag along the vertical center seam and horizontally across the panel. Use a straightedge or a laser level; if the deviation is > 3/16″ (4.7 mm) across 3–4 feet, plan reinforcement. If the door shows both sag and insulation delamination, consider full-width steel struts rather than isolated stiffeners.
Transition: Once you’ve decided to proceed, gather the right tools and hardware—below is an exact list covering common kits and manufacturer specs.
Tools and Materials Needed for Garage Door Struts Installation
- Cordless drill/impact driver — 18V or higher; impact recommended for 3/8″ bolts.
- Drill bits: 3/16″, 1/4″, 27/64″ and 13/64″ (for pilot holes and through-bolts); use high-speed steel for metal.
- Socket set and torque wrench — 3/8″ drive torque wrench capable to 60 ft·lb; sockets 7/16″, 1/2″, 9/16″.
- Fasteners: specified by strut kit — typical: 1/4″-20 x 1″ hex bolts (3 per panel) or 3/8″ x 1-1/4″ carriage bolts for steel doors; use lock nuts and flat washers.
- Mounting brackets: supplied with kit or universal brackets sized to panel depth; match to hinge locations as instructed.
- Sockets, wrenches, and box-end wrench — to hold nuts while torquing bolts.
- Ladder or scaffolding — tall enough to reach the top-most strut mounting point safely.
- Marker and tape measure — measure and mark mounting points; 16″ spacing is common between bolts unless specified otherwise.
- Safety gear: eye protection, gloves, ear protection for impact use, and steel-toe shoes for heavy doors.
- Optional hardware: anti-seize lube for galvanized bolts; rust-inhibiting spray for galvanized/steel interfaces.
- For related hardware replacement tasks see garage door handle replacement and hardware and garage door cable replacement and installation.
Transition: With tools staged, follow the precise step-by-step installation below. Each step includes torque specs, drill sizes, and safety cautions derived from manufacturer practice and structural guidance.
Step-by-Step Guide to Installing Garage Door Struts and Supports
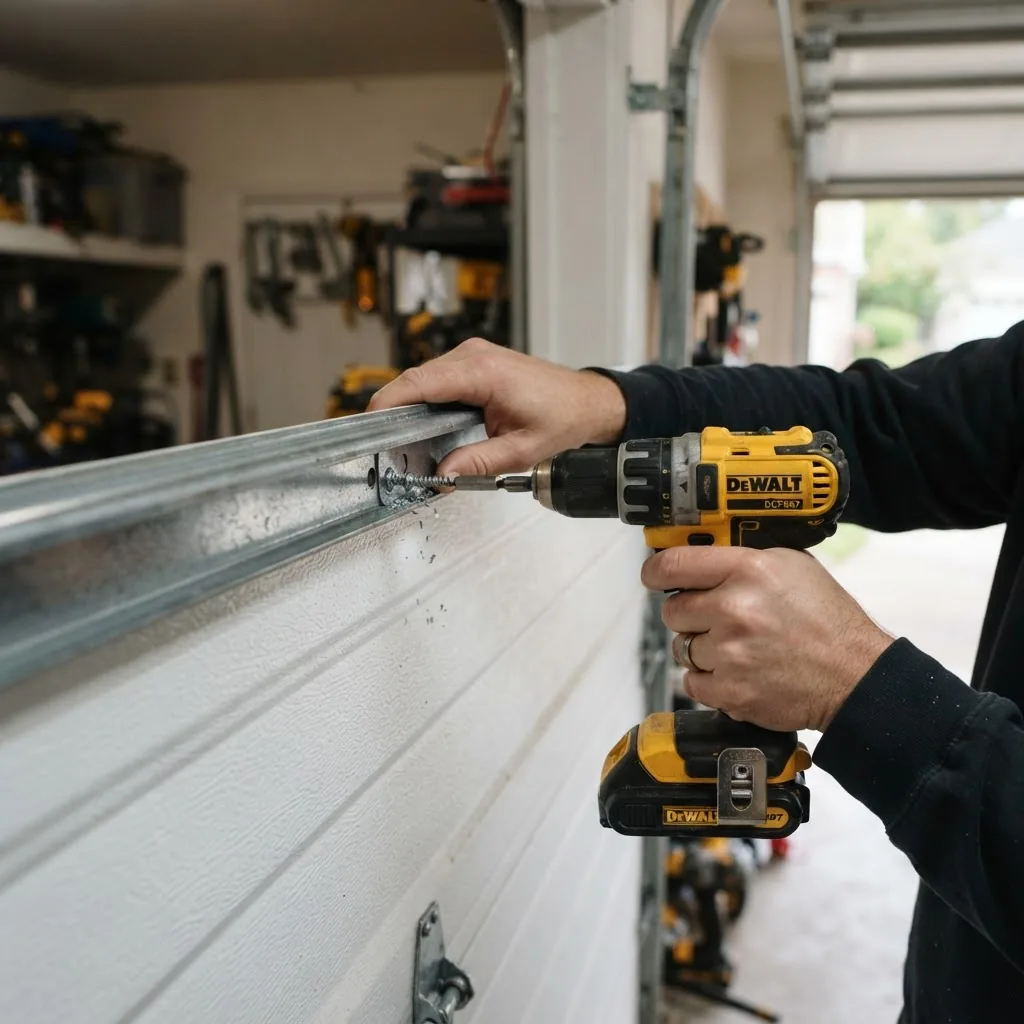
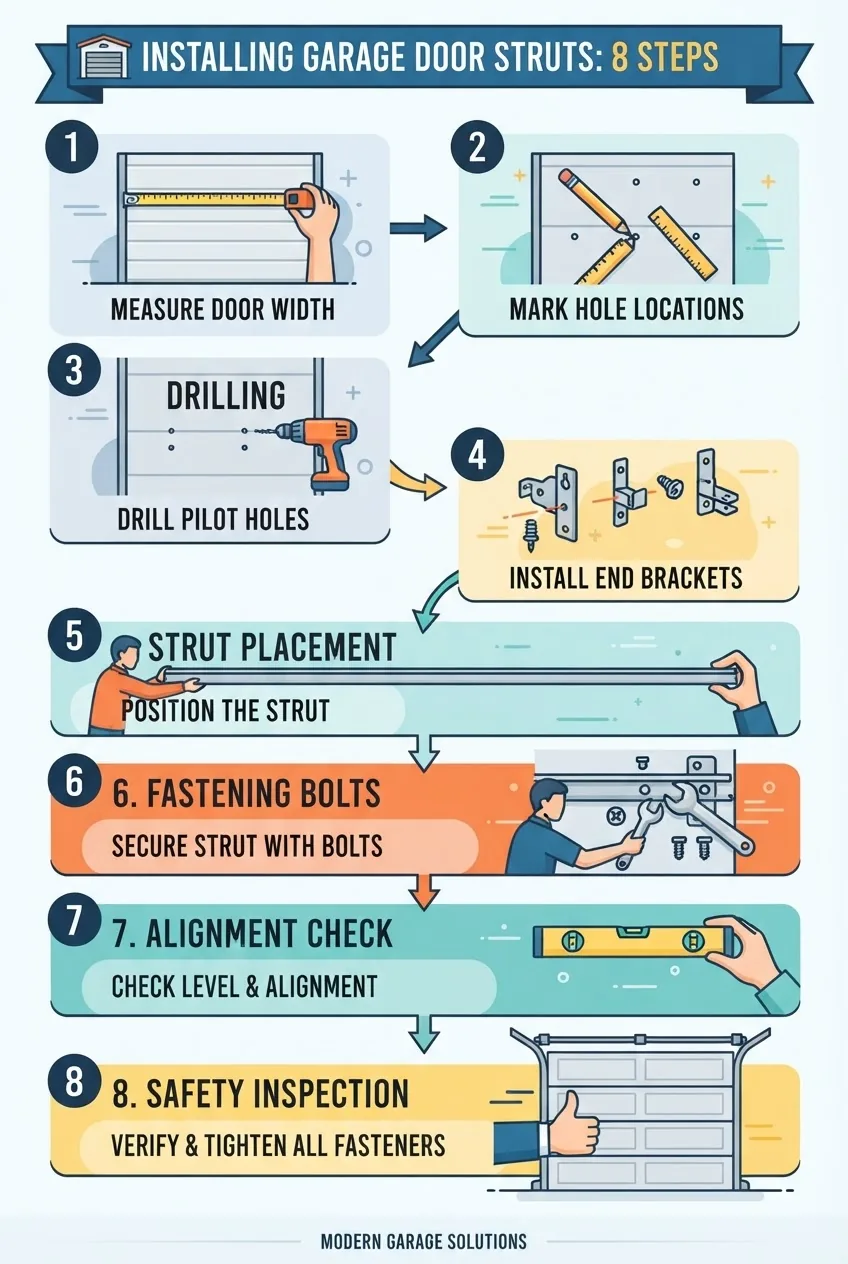
The following sequence is written as a hands-on checklist. Use the exact torque, drill bit, and fastener sizes listed for standard steel or aluminum struts. If your manufacturer specifies different values, always follow their specification.
-
Secure the door and verify spring state
Lower the door to the fully closed position. Disconnect the opener by pulling the release cord. Confirm springs are under normal tension and not being adjusted; do not attempt to alter spring tension here. Place wheel chocks or clamps on tracks to prevent accidental movement. If you observe any cable fray or severe spring damage, stop and call a pro.
Safety note: Spring work is hazardous. If you are uncomfortable or see damaged springs, hire a pro.
-
Measure and plan strut locations
Measure door width and panel heights. Standard practice for full-width struts on a 16 ft wide door: mount one strut across the top panel and one across the next panel down (top and second panel) for 2–3 strut systems. For lightweight doors, a single top-panel strut may suffice.
Mark bracket locations at hinge lines: place struts centered over vertical stiles, aligning with hinge bolts where possible. Typical spacing for through-bolts is 16″ on-center horizontally; vertically follow panel rib pattern to avoid insulating foam pockets.
-
Test-fit brackets and strut length
Hold the strut to the door and place mounting brackets to confirm fit. If struts require trimming, mark and cut with a chop saw using a metal-cut blade and de-burr the cut. When using full-width steel struts, anticipate lengths that span panel seams; ensure at least two bolts per panel to distribute load.
-
Drill pilot holes
Use a 3/16″ or 13/64″ pilot bit for 1/4″-20 bolts; use a 27/64″ or 7/16″ bit for 3/8″ bolts. Clamp a scrap block behind the panel when drilling to prevent breakout on the interior face. Drill slowly in metal to avoid heat build-up; back off often and clear chips.
Case note: On insulated doors, monitor for foam compression—drill perpendicular and avoid oversizing holes which can crush the insulation and reduce holding strength.
-
Install mounting brackets
Attach brackets with specified fasteners: for aluminum struts on hollow panels use 1/4″-20 stainless bolts with nylon-insert nuts; for steel struts on heavier doors use 3/8″ carriage bolts with hardened washers and lock nuts. Hand-start all bolts before torqueing.
Tightening sequence: snug all fasteners in the bracket, then torque to spec — typical torque for 1/4″-20 is 8–10 ft·lb; for 3/8″ hex bolts torque to 20–25 ft·lb for sheet metal applications; for structural-through-bolts in steel doors, up to 30–40 ft·lb per manufacturer. Use the torque wrench and avoid over-torquing which can crush the panel or strip threads.
-
Position and fasten the strut
Place the strut onto the brackets, aligning holes. Use flat washers under bolt heads and lock washers or nylon-lock nuts. For each fastener, tighten in an alternating pattern: tighten the two outer bolts to 50% torque, then the center bolt to full torque, and finally re-check all to final torque. This prevents localized bending of the strut during assembly.
Hardware specifics: use grade 5 zinc-plated bolts for steel struts; stainless for coastal installations. Apply anti-seize sparingly on stainless threads to prevent galling.
-
Verify alignment and door travel
Reconnect the opener and operate the door through a full cycle with a helper standing clear. Watch for rubbing at track, unusual noises, or binding through the strut area. If binding occurs, open the door and adjust the bracket position by loosening bolts and shifting the bracket 1/8″ increments.
Alignment target: strut should be parallel to panel face with no visible twist. When the door is closed, the panel seam should close within 1/8″ across the entire width.
-
Torque re-check and safety inspection
After 10 full open/close cycles, re-torque bolts to the specifications listed earlier. Inspect for elongated holes, which indicate slippage—replace fasteners and consider larger washers or backing plates if detected.
Record installation data: strut type, fastener sizes, torque values, and installation date. This helps future inspections and warranty claims.
-
Final functional test and load check
Run the door under normal and slowed opener speeds (if available). The door should start and stop smoothly with equal speed on both sides. If the opener strains or door is imbalanced, do not attempt spring adjustments; contact a professional technician.
Practical tip: I once tightened a set of top struts without confirming bracket alignment and introduced a 1/4″ twist across the panel; after two cycles the door pulled to one side. Repositioning the bracket fixed the issue. Always test-mount before final torque.
Transition: After installation, watch for these common mistakes and know how to troubleshoot them quickly.
Common Installation Mistakes and Troubleshooting Tips
- Loose fittings: symptom—rattling during travel. Fix: re-torque to manufacturer specs; replace lock washers or use nylon-lock nuts.
- Improper alignment: symptom—door drifts left or right. Fix: loosen brackets, realign strut to be parallel, re-torque in sequence.
- Inadequate support: symptom—strut buckling at high cycle loads. Fix: upgrade to thicker gauge steel or add an additional strut layer; evaluate whether through-bolting and backing plates are needed.
- Over-torqued bolts: symptom—deformed panel or stripped threads. Fix: replace damaged fasteners and follow specified torque values (see step 5).
- Corrosion and galvanic reaction: symptom—white powder or rust at joints. Fix: use compatible materials (stainless to stainless or galvanized to galvanized), and apply rust inhibitor sprays.
Troubleshooting scenarios:
- Door binds only after cold nights: aluminum struts can contract differently than steel; inspect fastener tightness and add shims to brackets for thermal clearance.
- One side drops slightly when opening: check spring balance; do not adjust springs yourself—contact professional services if balance is off. For urgent issues beyond strut scope, consider emergency garage door repair services.
- Struts pull through thin panel metal: retrofit with backing plates inside the panel or use larger-diameter bolts and washers to distribute load.
Transition: Regular maintenance prevents most of these problems—below are safety-focused maintenance practices and inspection intervals.
Maintenance and Safety Tips for Garage Door Struts and Supports
Routine checks and small interventions extend the life of struts and maintain door safety. Follow these recommendations and consult industry safety standards when in doubt.
Key maintenance points:
- Inspect fasteners every 3 months and re-torque to the recorded values.
- Check for corrosion annually; apply rust inhibitor or replace corroded hardware.
- After 500 full cycles (typical residential year-range), re-check alignment and tightness.
- Replace any bent or cracked strut immediately—do not attempt temporary repairs with tape or adhesives.
Safety references: For recommended work practices and ladder safety consult OSHA guidelines. For door manufacturing and reinforcement standards, see the Door and Access Systems Manufacturers Association at DASMA. For structural load guidance and wind-load considerations consult ASCE publications.
For broader tune-up routines that include strut inspections, see garage door maintenance tips and tune up costs. Regular maintenance complements strut upkeep by ensuring springs, cables, and rollers are not placing excess load on supports.
Maintenance checklist
- Quarterly: visual inspection of struts, brackets, and fasteners.
- Semi-annually: test door through 10 cycles and re-torque bolts.
- Annually: replace any corroded hardware and spray pivot points with light lubricant (avoid applying near strut fasteners to prevent lubricant attracting dirt).
- Record inspection dates, torque values, and any parts replaced.
Transition: Finally, weigh costs and complexity—decide when to DIY and when to hire a pro.
Cost Considerations and When to Hire a Professional
Typical DIY material costs:
- Aluminum full-width strut kit: $40–$120 per strut (depending on length and hardware).
- Steel heavy-duty full-width strut: $80–$250 per strut including heavy bolts and backing plates.
- Fasteners and brackets kit: $15–$60.
Typical professional labor:
- Installation labor for a standard 2-car door (one or two struts): $150–$400.
- Complex retrofits (backing plates, insulation penetration): $400–$900.
Decision guide — hire a professional if any of the following apply:
- Door springs are damaged or require adjustment during the job (spring work is high-risk).
- You observe severe panel damage, rusted track, or cable fraying that may affect safety.
- The installation requires working above 12 ft or on scaffolding.
- You prefer a warranty on parts and labor; many pros provide limited warranties covering installation torque and hardware for 12 months.
If you want detailed brand pricing and professional installation cost comparisons, consult the garage door prices guide for brands and installation cost.
Common mistakes and how to avoid them
From my installations over the years:
- I once used too-short bolts on a top strut; the outer nut stripped after two weeks. Take the time to verify bolt length — the nut must run fully onto the thread with at least two full threads showing past the nut.
- I initially mounted a strut off-center to avoid a hinge; the door developed a twist. Always align with the vertical stile and hinge rivet line.
- One retrofit used mixed metals (galvanized bolts into stainless brackets) causing white corrosion. Match metals or use isolation washers to prevent galvanic corrosion.
Final checklist before you finish
- All fasteners torqued and recorded.
- Door cycles smoothly with no unusual noises.
- No visible panel distortion; seams aligned within 1/8″.
- Inspection date logged and next inspection scheduled in 3 months.
When to call a professional
Call a licensed garage door technician if springs or cables are damaged, the door is severely out of balance, or structural repairs (backing plates, panel replacement) are required. Hiring pros protects you from spring hazards and may be necessary for warranty compliance.
Closing summary: Properly installed garage door support and struts significantly reduce panel stress, extend component life, and improve safety. Follow the exact drill bit sizes, bolt types, and torque specs above, inspect regularly, and call a professional for spring or structural work. Ready to get started? Gather the tools and schedule a 2–4 hour window to complete a standard 2-car door install.

