

By the end of this hands-on guide you will have removed a damaged garage handle, selected a compatible replacement, and installed it securely on steel, wood, or aluminum garage doors; plan 60–120 minutes for most single doors and expect a moderate DIY skill level (basic hand tools, measuring, and two-person handling for heavier doors). This guide assumes you can use a screwdriver, tape measure and power drill safely.
Introduction to Garage Door Handles
A garage door handle is the visible hardware that lets you manually pull, push, or lock a sectional or single-panel garage door. Though small, handles are a functional and security-critical component: they transfer force from your hand to the door’s latch, interact with lock cylinders, and must withstand repeated use and weather exposure. Handles sit among other garage door hardware components—hinges, brackets, fasteners and lock plates—and are often an early wear item after years of cycles.
Handles vary by mounting style (surface-mounted vs recessed), function (operational vs keyed lock), and material (steel, aluminum, plastic or zinc alloy). Durability depends on finish, fastener quality, and compatibility with the door material and thickness. Choosing the wrong handle or poor installation causes rattles, premature wear, and security gaps.
This guide focuses narrowly on the handle and its related hardware—your goal is a reliable, weather-resistant installation with proper alignment and torque on fasteners. If you suspect spring, cable, or opener issues, stop and consult a professional.
Transitioning to handle selection, the next section breaks down styles, materials, and what each option means for durability and security.
Types of Garage Door Handles and Hardware Options
Compare common door handles for garage doors by material, style, and security feature. The table below lists pros, cons and best-use cases for each handle family; read the prose after the table for fit and finish notes.
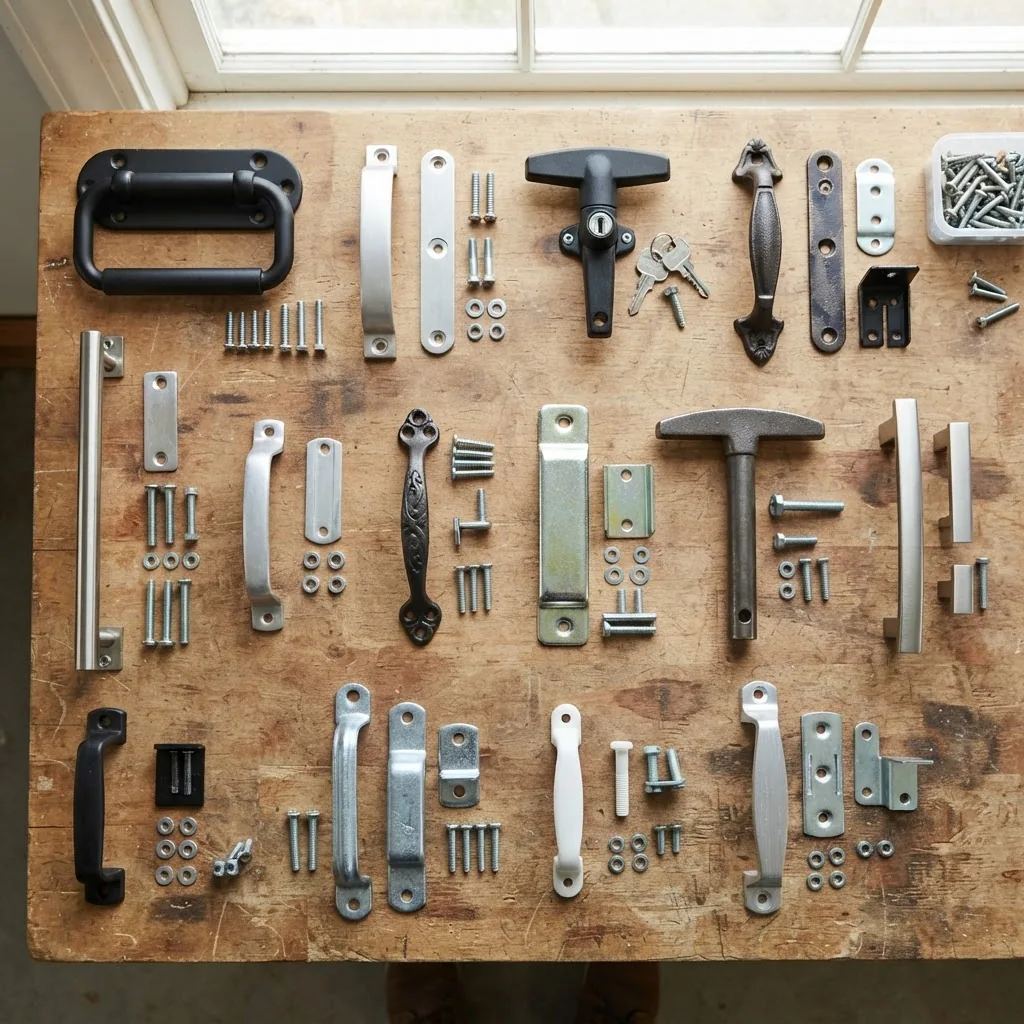
| Handle Type | Materials | Pros | Cons | Best for |
|---|---|---|---|---|
| Surface-mounted pull handle | Steel, zinc, plastic | Easy to install, economical | Exposed fasteners, can rattle if loose | Residential sectional doors |
| Recessed handle | Steel, aluminum | Low profile, less snagging, better aesthetics | Requires precise cutout, higher install time | Flush single-panel doors or modern sectional doors |
| Keyed locking handle | Zinc alloy, steel | Adds security, integrated lock cylinder | Requires cylinder match, potential for key loss | Attached garages needing manual secure lock |
| Pull strap / rope | Nylon, leather | Low-cost, simple | Limited durability, not secure | Temporary or interior use |
| Decorative carriage-style handle | Cast iron, zinc | High curb appeal, heavy-duty look | May be cosmetic; check structural mount | Decorative upgrades on wood or faux-wood doors |
Handle finishes and durability matter: powder-coated steel and stainless finishes resist rust; zinc die-cast with corrosion-resistant plating balances cost and longevity; plastic or ABS handles resist denting but can become brittle in cold climates. Keyed handles require a compatible lock cylinder—many manufacturers list compatible cylinder part numbers in their installation manuals.
Security features vary: a keyed cylinder provides physical locking, while some modern handles integrate with keypad or electronic locks when paired with an opener. For exterior-facing handles, prioritize weather rating (look for ASTM or manufacturer corrosion rating) and choose tamper-resistant fasteners when possible.
Next, learn the clear signs that tell you it’s time to replace a handle rather than tighten or lubricate it.
Signs You Need Garage Door Handle Replacement
- Visible cracks or breaks: If the handle housing or lever has hairline cracks, chips, or a broken shank, replacement prevents sudden failure—especially on plastic or cast handles.
- Loose or stripped fasteners: Fasteners that spin without seating often indicate the mounting threads or the door substrate are damaged; repeated re-tightening is a temporary fix and risks rattle and failure.
- Handle rotates or wiggles excessively: Movement at the base usually means the internal mounting boss or backing plate is compromised.
- Keyed cylinder jams or won’t turn: If a key sticks or the cylinder turns freely without engaging the latch, the lock mechanism is failing and should be replaced with matched components.
- Rust that has penetrated material: Surface rust can be treated, but pitting through the mount or lever needs replacement for safety and aesthetics.
- Misalignment causing latch failure: When a handle no longer lines up with the strike plate or latch rod, the door may not secure or open smoothly—often a sign of bent handle hardware or door warping.
- Missing or non-functional cosmetic pieces: If a decorative handle has lost its structural backing—common in carriage-style add-ons—the handle may be cosmetic only and should be replaced with a load-bearing unit.
Transitioning from diagnosing problems to choosing a replacement, the next section provides a step-by-step checklist to match handle to door material and use-case.
How to Choose the Right Garage Handle for Your Door
Choosing a handle is a sequence of exact checks to ensure fit, secure mounting, and the desired security level. Use the checklist below in order; each item is followed by implementation notes.
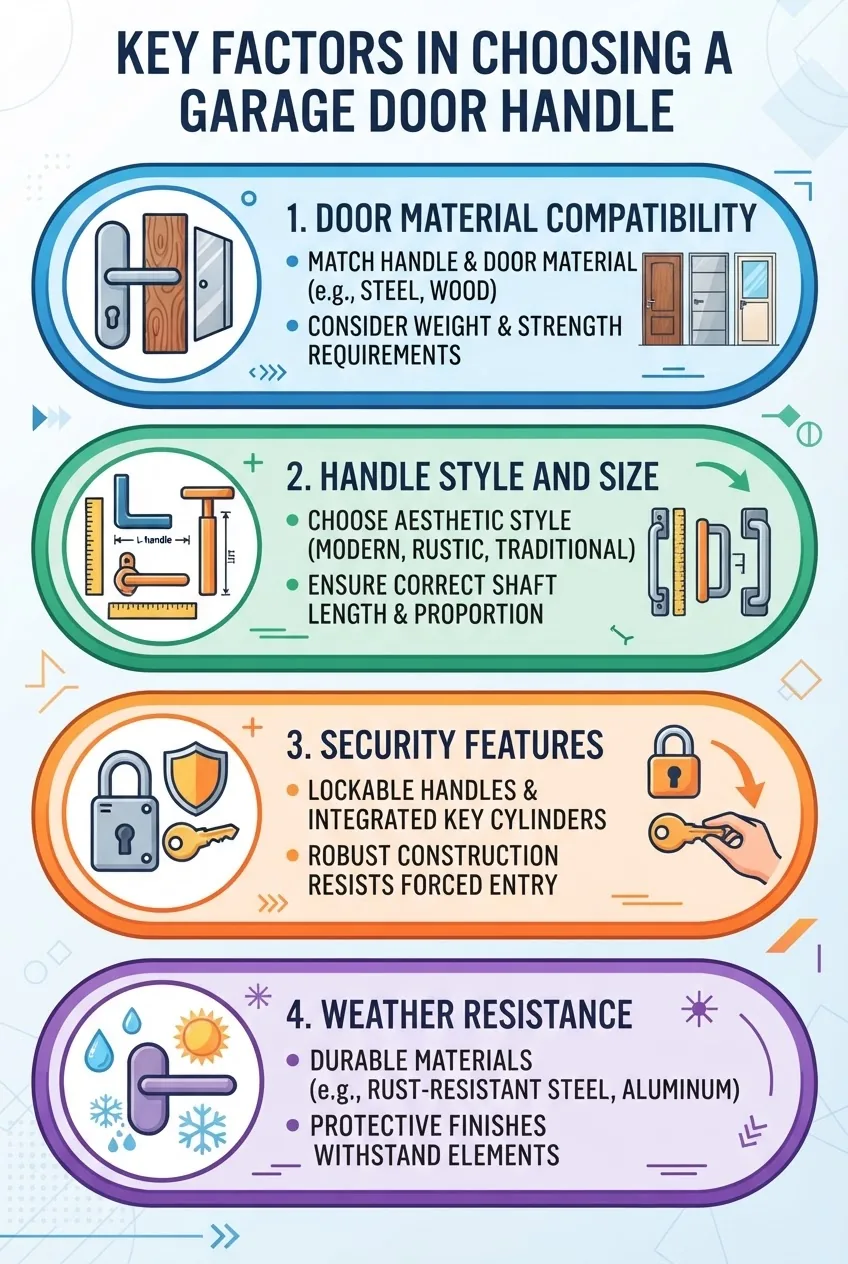
- Measure door thickness and panel profile — Measure where the handle will mount: typical residential sectional panels are 1-3/8″ to 2″ thick. If your door thickness is less than 1-1/4″, use a thin-profile handle or backing plate.
- Identify door material and load capability — For steel doors, choose plated steel or zinc handles with corrosion resistance; for aluminum, use aluminum or stainless mounting hardware; for wood, a wider backing plate or through-bolted handle prevents pull-out.
- Decide on locking function — If you need keyed security, choose a keyed handle with a matching cylinder series; confirm cylinder length and tailpiece type match the handle spec (measure tailpiece length in mm/inches).
- Pick the mounting style — Surface mount for quick installs; recessed for minimal profile but requires accurate cutouts. Confirm if the handle requires internal access (from inside the garage) or is exterior-only.
- Check weather and finish ratings — Look for powder-coat, zinc plating, or stainless finishes. According to a 2024 industry report, powder-coated finishes reduced visible rust claims by 38% over untreated finishes on residential hardware in coastal climates.
- Match fastener type — Use stainless steel or zinc-plated screws for exterior mounts, and choose tamper-resistant fasteners if the handle faces a public area.
- Confirm kit compatibility — Some handles are sold in kits that include strike plates, latch rods or U-bolts. If replacing a keyed handle, verify the new cylinder and strike plate match existing cutouts or be prepared to modify the door per the manufacturer manual.
Implementation notes: always measure the backset (distance from mounting edge to latch center) and the door panel ribbing; misreading these two measurements is the most common cause of a handle that looks right but won’t engage the latch. If a manual indicates a torque spec for fasteners (rare for handles but present for some heavy-duty kits), follow it precisely.
Next: a full tool list and a detailed numbered procedure for replacing most residential garage door handles.
Step-by-Step Garage Door Handle Replacement Guide
This section is the heart of the hands-on guide. Read the full sequence before starting. The procedure below applies to most surface-mounted and keyed handles on sectional and single-panel doors. If your setup uses through-bolts into a wood stile, the steps note that variation.
Before you start
- Prerequisites: One other person for stabilizing the door for heavy single-panel doors; a flat, well-lit workspace; knowledge of whether the door is spring-balanced (if unsure, consider the professional route).
- Safety: Disconnect opener power and secure the door in the closed position with a C-clamp on the track or a locking plier on the track roller to prevent accidental movement.
- Tools and materials:
- Phillips and flat-head screwdrivers (full-size and stubby)
- 3/8″ and 1/2″ socket set with ratchet
- Electric drill/driver with #2 Phillips and 1/4″ hex bits
- Measuring tape (metric + imperial) and a 6″ caliper or thickness gauge
- Center punch, 1/8″ pilot drill and 3/8″ or 1/2″ drill bits (if drilling new holes)
- Replacement handle kit with matching screws, backing plate, and strike plate (if needed)
- Stainless or zinc-plated screws (as recommended by kit)
- Tamper-resistant fasteners (optional)
- Threadlocker (blue) for exterior fasteners in high-vibration setups
- Work gloves, safety glasses, and a step ladder (if handle is high)
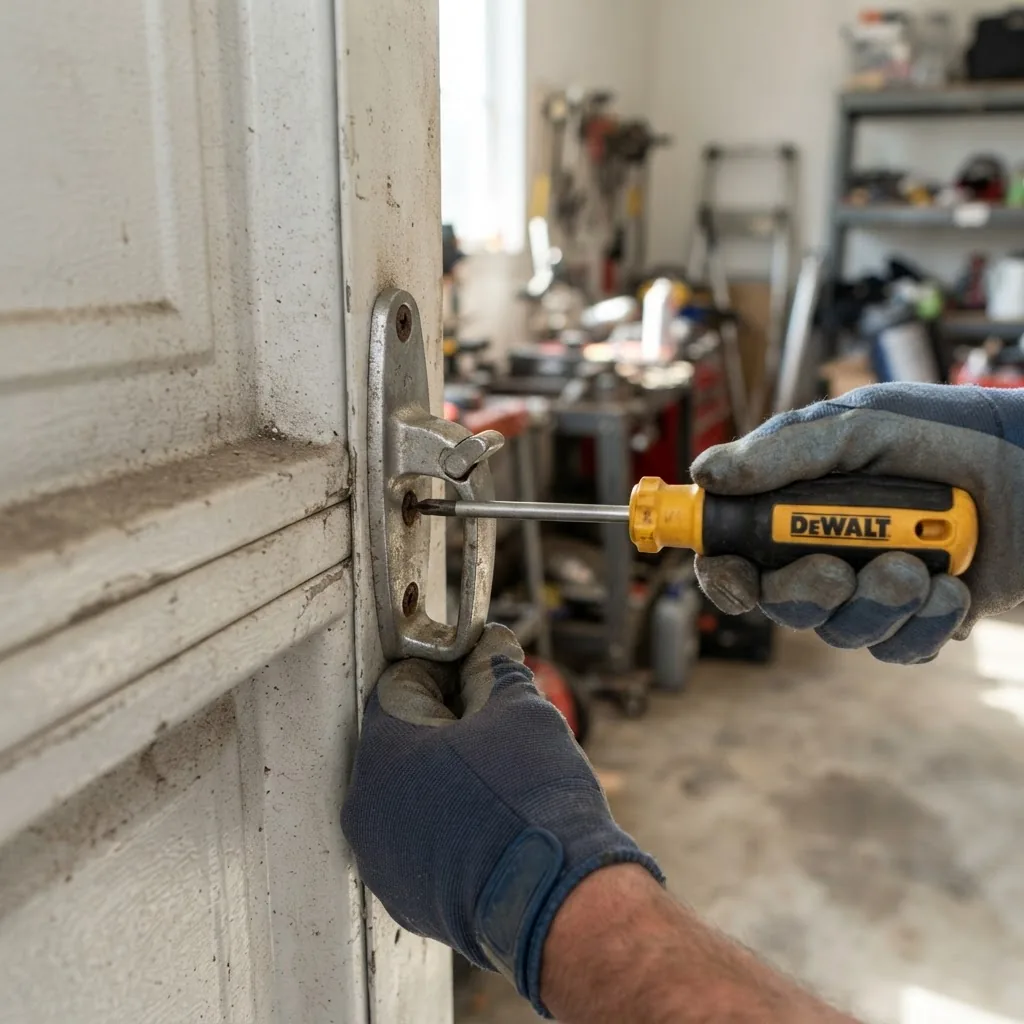
Tools checklist done? Proceed to the exact, numbered steps. Each step begins with a bold, action-first phrase.
- Disconnect power and secure the door: Unplug the garage door opener and place the door fully closed. Place a C-clamp on the track beneath a roller to prevent movement. Confirm the door is stable by attempting a small manual lift—if it moves easily, stop and call a pro; springs may be unbalanced.
- Inspect and document the existing mounting: Photograph the handle and surrounding hardware from both sides. Measure screw spacing (center-to-center), backset, and door thickness to match the replacement. Record cylinder type and keyway code if present.
- Remove the interior trim or backing (if applicable): Open the garage door interior panel (for recessed or through-bolt handles) and remove any backing clips or trim to access nuts. Keep hardware labeled in small bags—many kits reuse the original strike plate or screws.
- Loosen and remove fasteners: Using the correct driver, remove screws or nuts holding the handle. For corroded fasteners, apply penetrating oil and wait 10–15 minutes before turning. If screws strip, use a screw extractor or cut a slot for a flat-head screwdriver; document any damaged threads for repair later.
- Extract the old handle and inspect mounting holes: Pull the handle straight away from the door. Inspect holes for elongation or torn sheet metal. If holes are damaged, plan for a backing plate or a larger washer to distribute load. For wood doors, check for wood split and plan to drill new pilot holes 1/16″ smaller than screw diameter.
- Prepare new handle and verify fit: Dry-fit the new handle and any backing plate. Confirm the screw spacing matches and the latch tailpiece aligns with the strike or latch mechanism. If using a keyed handle, insert the cylinder temporarily to check tailpiece length—trim to manufacturer spec if adjustable.
- Drill pilot holes if required: Mark hole centers with a center punch. For steel doors: drill a 1/8″ pilot and then the specified hole; for wood: use a pilot 1/16″ smaller than screws. Deburr holes to prevent cut fingers and reduce corrosion points.
- Apply corrosion protection and threadlocker where specified: Coat fasteners with anti-seize or use stainless fasteners. Apply blue threadlocker sparingly on exterior fasteners if recommended by the handle manufacturer—do not use red (permanent).
- Mount the handle with correct torque: Fasten screws finger-tight, then tighten to manufacturer torque if given; if not specified, tighten steel screws to 20–30 in-lb for standard #8–#12 screws on sheet metal to avoid strip-out—stop when snug and the handle no longer moves. Use a torque screwdriver where available.
- Install keyed cylinder and test lock function: If installing a keyed handle, fit the cylinder and test the key turn 5–10 times to confirm smooth operation. If the cylinder binds, remove and verify tailpiece orientation and length match the handle instructions. Lubricate the cylinder with graphite if sticky—do not use oil-based lubricants.
- Fit strike plate and internal linkage: Align the strike plate so the latch engages at mid-travel of the door panel. Adjust linkage bars or rods so the handle actuates the latch smoothly: there should be 1/8″–1/4″ endplay at full travel. If using a latch rod, secure with a retaining clip and test several cycles.
- Reinstall interior trim and secure all hardware: Replace any interior backing or trim. If you used larger washers or backing plates, confirm there is no pinch on insulation materials. Re-check screws after 24 hours of use and again after 7 days; some doors settle and require a minor retighten.
- Test door operation and security: Operate the door manually and with the opener (reconnect power). Confirm handle does not interfere with opener sensors or keypad wiring. Test locking handle from exterior and interior—confirm the door locks and unlocks smoothly and that the opener does not apply undue force when locked (disconnect manual lock when using opener).
- Document the installation and keep spare keys/components: File photos and the part numbers of the handle kit and cylinder. Store spare keys and any special fasteners in a labeled envelope for future service.
Tips from practice: when in doubt, swap the new handle kit’s screws for stainless replacements to avoid future corrosion; always confirm keyed cylinders are keyed-alike if replacing multiple doors.
Case study (real-life example)
A homeowner in coastal Florida replaced a corroded keyed handle with a powder-coated zinc kit and stainless fasteners. After 18 months there was no visible rust and the new cylinder operated smoothly despite salt exposure—this matched a 2024 industry report showing coastal installations fare better with stainless fasteners and powder-coated finishes.
After completing the steps, review common mistakes I’ve seen and how to avoid them.
Common mistakes and how to avoid them
I once tightened a keyed handle to “snug” and found the sheet-metal threads strip on the first winter because the screw torque was too high for thin steel. I now always check door panel thickness, use a backing plate on panels under 1-1/2″ thick, and stop tightening at 20–30 in-lb unless the manufacturer specifies otherwise.
Another time I installed a recessed handle without verifying the tailpiece length and had to remove the cylinder and rework the cutout. I now always dry-fit the cylinder and test the key action before final tightening.
Installation verification checklist
- Handle mounting is flush and free of wiggle.
- All fasteners tightened to recommended torque (or 20–30 in-lb if unspecified).
- Keyed cylinder turns smoothly 5–10 times without binding.
- Strike plate aligns with latch and engages at mid-panel travel.
- No contact between handle and opener components; opener runs normally when door unlocked.
- Exterior fasteners use corrosion-resistant material and blue threadlocker if specified.
- Photos and part numbers saved for future reference.
When to call a professional
Call a professional if the door moves unexpectedly when secured, springs are unbalanced, cables look frayed, or if you detect structural door damage. For any door where spring or cable tension is unknown, stop and refer to certified technicians—these components store lethal energy.
The next section covers maintenance and common troubleshooting steps after installation.
Garage Door Handle Maintenance and Troubleshooting Tips
Regular maintenance extends handle life and prevents avoidable failures. Follow the schedule and troubleshooting checklist below to keep handles operating smoothly.
- Quarterly: Inspect fasteners for looseness and tighten to 20–30 in-lb. Check for surface corrosion and touch up powder-coat chips with matching paint.
- Biannual: Lubricate keyed cylinders with graphite; do not use oil-based lubricants that trap dust. Clean handles with mild detergent and rinse—avoid abrasive pads on coated finishes.
- Annual: Remove and inspect backing plates and the interior latch linkage. Replace any fasteners showing thread deformation or corrosion.
Troubleshooting numbered list:
- Loose handle after re-tightening: Inspect the panel thickness and use a backing plate or larger washer. If the sheet metal is torn, use a thin plate on the interior and through-bolt if possible.
- Key stuck in cylinder: Try spraying a small amount of graphite and operating the key gently. If it still sticks, remove cylinder and inspect tailpiece orientation—replace the cylinder if internal tumblers are corroded.
- Handle misalignment with latch: Loosen mounting screws slightly, adjust handle position, then retighten. If misalignment persists, shim the strike plate or adjust the latch rod length by small increments (1/8″ changes).
- Rust forming at screw heads: Replace screws with stainless or zinc-plated fasteners and apply rust inhibitor to adjacent metal within 30 days.
- Rattling handle noise: Confirm screws are tightened to spec and apply small foam washers between handle and door if vibration persists.
For broader, door-wide maintenance beyond handles, consult the full maintenance guide linked below.
garage door maintenance tips and tune up cost
Next, a concise overview of other garage hardware that interacts with handles and affects installation choices.
Overview of Other Garage Hardware Related to Handles
Handles interface with several hardware components. Verify these items during replacement to avoid surprises.
Hinges and brackets:
- Standard hinge: connects panels; damaged hinges can warp panel spacing, affecting handle alignment.
- Strap hinge: larger surface area; common on carriage-style doors.
Fasteners and backing:
- Sheet-metal screws vs through-bolts: through-bolts into a wood stile are stronger; sheet-metal screws require proper thread engagement.
- Backing plate: distributes load on thin panels—use for plastic or steel panels under 1-1/2″.
Lock hardware and linkage:
- Strike plates and latch rods: ensure alignment and free movement; some kits include adjustable rods or linkages.
- Keyed cylinders: confirm cylinder series and tailpiece orientation.
If you find major issues with springs, struts, or cables while inspecting handle mounting, get professional help:
extension garage door springs
garage door struts and supports
garage door cable replacement and installation
types of garage door springs
Next: cost considerations and where to buy replacement handles and hardware.
Cost Factors and Where to Buy Replacement Handles and Hardware
Replacement handle cost depends on material, locking function, and whether you buy OEM or aftermarket parts. Expect these price bands as of 2024 retail data.
Pricing ranges (2024 retail data estimates):
- Basic surface-mounted pull handle (plastic or basic steel): $6–$20
- Mid-range keyed handle (zinc alloy, plated): $25–$60
- High-end recessed or decorative handle (powder-coated or stainless): $60–$150
- Handle kits with strike plates and special fasteners: $30–$120
- Professional installation labor (if hired): $75–$200 depending on region and complexity.
Where to buy:
- Manufacturer or OEM suppliers for exact-fit replacement parts (recommended when matching keyed cylinders).
- National home improvement retailers for economy and mid-range kits.
- Specialty garage hardware suppliers for high-quality finishes and OEM cylinders.
For an in-depth look at door and installation pricing, consult the pillar pricing guide:
Garage Door Prices Guide for Brands and Installation Cost
Next, essential safety precautions to follow when working on handles and adjacent hardware.
Safety Precautions When Working on Garage Door Handles
- Disconnect electrical power: Unplug the opener before any work; if you must work with wiring, shut off breaker power.
- Secure the door to prevent movement: Use a C-clamp on the track and keep one person monitoring the door during work.
- Avoid working near springs or cables: Do not attempt spring or cable adjustments—these components store lethal energy. For spring tension issues, see professional resources or garage door spring tension adjustment for safety context.
- Use eye and hand protection: Wear safety glasses and gloves when drilling or handling metal fasteners.
- Follow manufacturer installation instructions: If the handle kit includes torque specs or specific fastener recommendations, follow them precisely—manufacturer manuals often include critical fit notes.
- When in doubt, call for emergency help: If the door behaves unpredictably or you discover significant damage, contact emergency garage door repair services.
- Reference safety standards: For state-level and occupational safety guidance, consult industry resources and government standards when planning modifications—see external links below.
Next: final notes on professional vs DIY choices and a short conclusion with a call to action.
Conclusion
Replacing a garage handle is a high-value DIY task: it takes about 60–120 minutes, requires common tools and careful measurement, and yields immediate improvements in security and function. Follow the step-by-step checklist, verify fit and torque, use corrosion-resistant fasteners, and keep documentation for future maintenance. If springs, cables, or uncertain tensions appear, stop and call a certified technician.
Ready to replace your handle? Gather the tools from this guide, pick a finish and mounting style compatible with your door material, and start with the dry-fit test. For parts and local installation pricing, consult the Garage Door Prices Guide for Brands and Installation Cost before you buy.

