

By the end of this hands-on guide you’ll have selected the right recessed panel, prepared the frame, and installed a full recessed panel garage door (single- or double-car) — a realistic 6–12 hour DIY project for an intermediate DIYer with one helper. This guide assumes basic carpentry, safe ladder use, and familiarity with power tools.
Introduction to Recessed Panel Garage Doors
A recessed panel garage door is defined by panels that sit slightly set back from the stiles and rails, creating shadow lines that read as classic, architectural detailing. This style enhances curb appeal and works across craftsman, colonial, modern farmhouse and contemporary facades because the recessed geometry “frames the face of your home” with subtle depth rather than bold relief.
Design appeal comes from panel layout, material finish and the optional integration of decorative windows. Recessed panel designs include short panel, long panel, and mixed-panel layouts; they also differ by material — steel, wood, or composite — affecting durability, maintenance and insulation. This introduction covers what recessed panels are, why homeowners choose them, and the trade-offs to consider when planning installation or replacement.
Quick definition: recessed panel — a door face where each rectangular panel is set back 3/8″–3/4″ from surrounding rails, creating modest shadow lines and a refined look.
Architectural styles: recessed panels complement both traditional and modern homes because they read as a framed composition rather than ornate molding. Recessed panels also adapt readily when you add features like a “recessed long panel garage door” with integrated glass, turning a basic door into a focal point.
Transition: With that overview in mind, next we’ll catalog the common recessed panel garage door styles, including the long panel options with decorative windows and material-specific notes to inform your selection and installation plan.
Common Recessed Panel Garage Door Styles
Below are the most common recessed panel options you’ll encounter. Each numbered style includes comparative notes on appearance, panel configuration, best-use cases, and installation considerations.
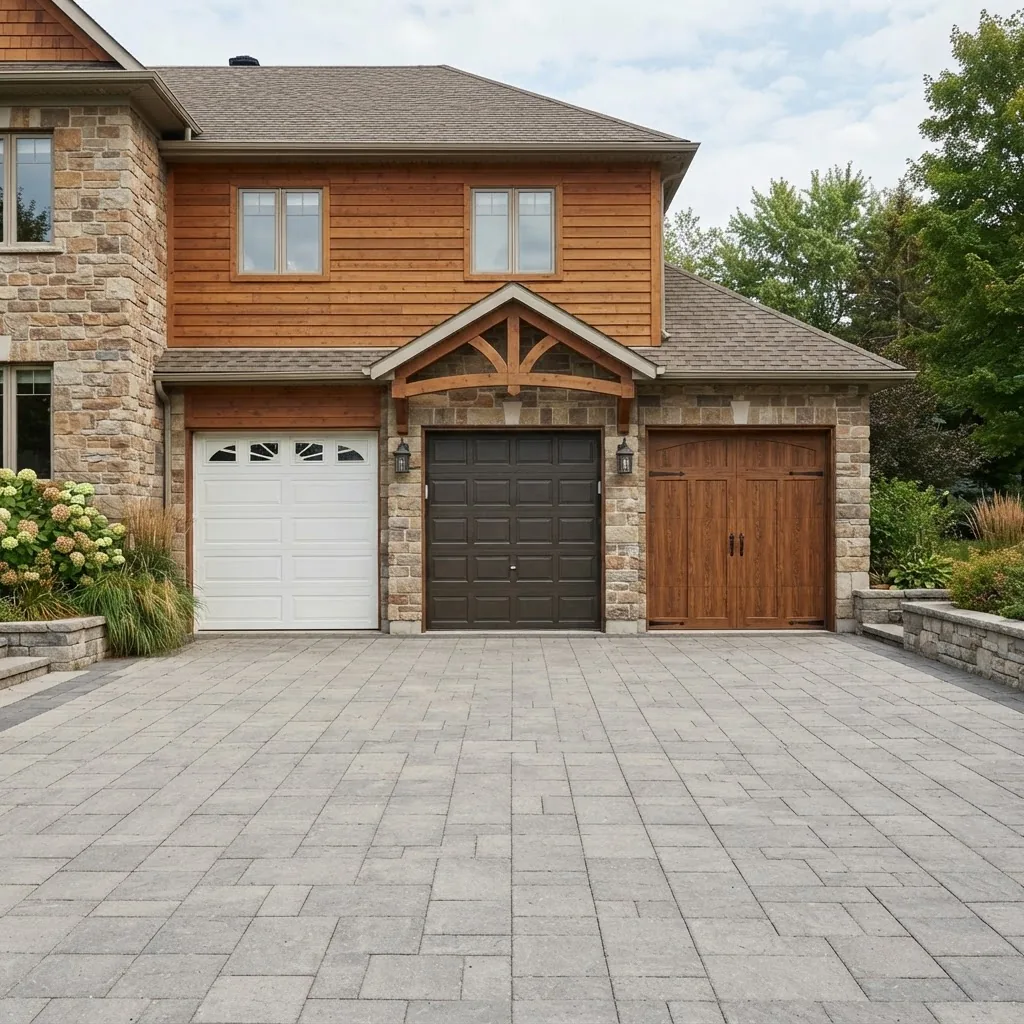
-
Short Recessed Panels (classic layout)
Description: Four- to six-panel rows (horizontal) with each panel approximately 18″–24″ tall. Short panels create a traditional, balanced façade.
Installation notes: Easier to handle single panels and common hardware sizes; replacement panels are widely available. Best for homes that want a “timeless” aesthetic and straightforward installation.
-
Long Recessed Panels
Description: Vertical panels run longer (typically 36″–48″ tall), often with fewer horizontal seams. A recessed long panel garage door emphasizes horizontal plane and suits modern ranch and contemporary homes.
Installation notes: Longer panels are heavier and require careful support during positioning. Track alignment is critical; misalignment causes binding. Expect mid-level installation complexity due to panel weight and fewer break points for handling.
-
Long Panel Garage Door with Windows
Description: Long vertical panels combined with a top row of decorative or full-view windows. This is often referenced as a long panel garage door with windows and balances natural light with privacy options (frosted or insulated glass).
Aesthetic and performance: Windows break up large expanses of material and can add R-value loss if single-pane — choose insulated glass units for energy performance. Consider the layout so window muntin lines match panel seams for a cohesive look.
-
Mixed Panel Layouts (custom composition)
Description: Combines short and long recessed panels or mixes panel sizes horizontally for a bespoke appearance. Often used when matching garage doors to complex home facades.
Installation notes: Mixed layouts require precise measurement and planning of panel dimensions; factory-cut panels or custom ordering may be necessary.
-
Carriage-Style Recessed Panels (applied hardware)
Description: Recessed panels combined with decorative strap hinges and faux handles to emulate swing-out doors. Panels remain recessed while hardware sits atop the face.
Installation notes: Hardware is cosmetic but needs secure anchoring into the panel and rail substrate; weight of applied hardware can change balance slightly.
-
Flush-Recessed Blends
Description: A near-flat face with very shallow recesses (3/8″ or less) for a modern clean look while keeping gentle shadow lines.
Installation notes: Requires precise paint or finishing to keep lines crisp; minor panel warpage becomes visible so choose stiffer substrates (steel or reinforced composite).
-
Material-specific variants
Steel: Durable, low maintenance, available insulated or non-insulated — popular for long panels due to stiffness.
Wood: Warm, authentic appearance but requires seasonal maintenance and humidity-controlled installations.
Composite: Blends wood aesthetics with low maintenance; resists rot and is dimensionally stable.Compare options like fiberglass garage door panels for light weight and corrosion resistance against steel and wood in terms of thermal performance and finish longevity.
-
Customization and Cover Panels
Description: Use of overlay or cover panels to change the appearance without full replacement. This is ideal for updating curb appeal without structural work.
Installation notes: Anchoring cover panels to existing panels is less invasive but demands compatible dimensions and ventilation to avoid trapped moisture. See decorative solutions for inspiration.
Transition: Now that you’ve seen the style options and how material choices change installation demands, we’ll compare the practical pros and cons to help you decide which recessed panel type suits your goals.
Pros and Cons of Recessed Panel Garage Doors
This comparison table weighs aesthetics, durability, maintenance, insulation efficiency and cost for recessed panel garage doors versus common alternatives like raised-panel and flush-panel doors.
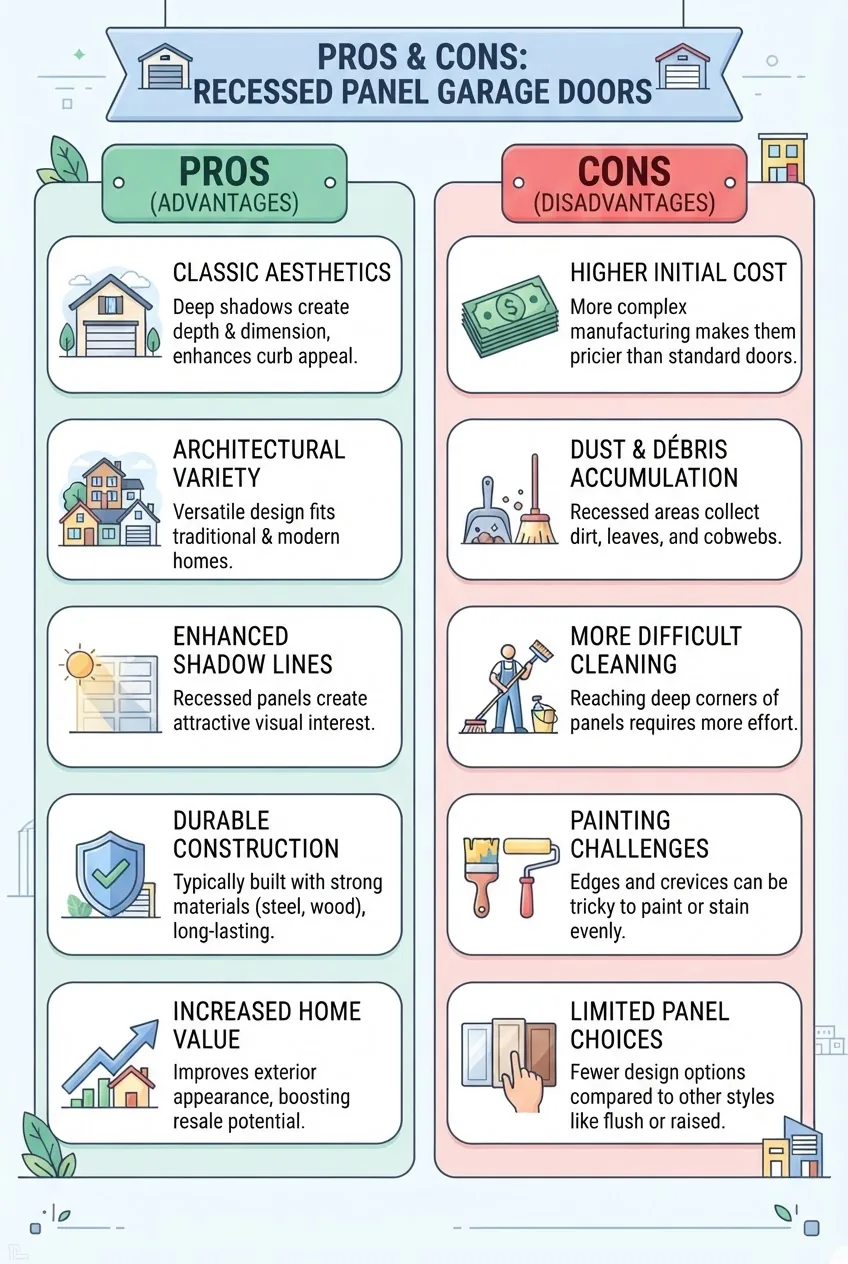
| Feature | Recessed Panel | Raised/Flush Panel |
|---|---|---|
| Aesthetics | Subtle depth that suits many architectural styles; flexible for windows and overlays. | Raised panels are bolder; flush is minimal and modern. Less versatile with applied hardware. |
| Durability | High with steel/composite; wood requires maintenance. Recesses can hide minor dents. | Similar; raised panels can be more impacted by bend due to higher profile. |
| Maintenance | Moderate — recessed seams collect grime; paint/finish upkeep required for wood. | Flush panels easier to wipe; raised panels may trap less debris in shallow profiles. |
| Insulation / Energy | Effective when paired with insulated cores (polyurethane) — window choices affect R-value. | Comparable with same core; design has less impact than material and core type. |
| Cost | Mid-range for steel; higher for wood or custom long panels with windows. | Flush often lower-cost for simple steel; raised-panel costs similar to recessed when finishes match. |
Authority note: According to a 2024 industry report on door energy performance, the R-value difference between panel styles is negligible compared with whether the door has an insulated core or not, and selecting insulated glass for windows preserves thermal performance — see ENERGY STAR guidance for residential door assemblies.
External references:
ENERGY STAR guidelines,
Door and Access Systems Manufacturers Association, and
ASTM/ANSI standards provide safety and performance standards relevant to installation and insulation choices.
Transition: If you’re ready to install a recessed panel garage door, gather the correct tools and materials next — the right kit reduces mistakes and improves safety.
Tools and Materials Needed for Installation
Below is an itemized list of tools, consumables and hardware with brief descriptions and recommended specs. If you lack any critical tool (torsion spring winding bars, for example), plan to hire a pro — springs are hazardous.
- Power drill — 18V brushless with clutch; use low clutch setting (2–4) for pilot screws, torque setting 20–30 in-lb for sheet metal screws.
- Impact driver — for lag screws into jambs (1/4″ hex, 3/8″ socket for 3/8″ lag bolts).
- Level — 48″ box beam level and a 4′ torpedo level for track plumb and header squareness.
- Measuring tape — 25′ / 7.5m, laser distance measure recommended for longer runs.
- Socket set & ratchet — up to 1/2″ sockets for bracket bolts and roller shafts.
- Winding bars — if replacing torsion springs; must match spring size per manufacturer (do not substitute).
- Clamps & sawhorses — for supporting door panels during staging (2–4 clamps, 2 sawhorses).
- Shim pack — plastic shims in 1/16″, 1/8″ thickness for squaring frame.
- Weatherstripping & threshold seal — vinyl bottom seal and jamb weatherstrips; consider closed-cell foam for head seal.
- Insulation — polyurethane or polystyrene panels if upgrading R-value; install per manufacturer’s instructions.
- Fasteners — sheet metal screws, carriage bolts, lag screws, panel-to-panel screws; follow hardware list from door manufacturer.
- Safety gear — eye protection, gloves, hearing protection, and a fall-rated ladder; use a second person for heavy lifting.
- Garage door hardware kit — rollers, hinges, cables, springs (torsion or extension), tracks and brackets as specified for door weight and size.
- Lubricants — silicone spray for weatherstrip; 30W general-purpose garage door lubricant for bearings and rollers.
- Parts diagrams — print the door manufacturer’s parts schema and compare to your hardware kit. For frame components review the parts of a garage door frame.
- Suppliers — pick reliable hardware suppliers; consult the garage door parts supplier guide for vetted sellers and part IDs.
Transition: With tools and materials staged, the following step-by-step installation guide walks you through removal, frame prep, panel mounting, track and hardware installation, and wiring the opener.
Step-by-Step Installation Guide for Recessed Panel Garage Doors
This section is the core hands-on procedure. Treat each numbered step as a stage you complete fully before moving on. Where safety or manufacturer-specific settings are required, I flag them explicitly. For any operation involving torsion springs, consider calling a pro unless you have spring-winding experience.
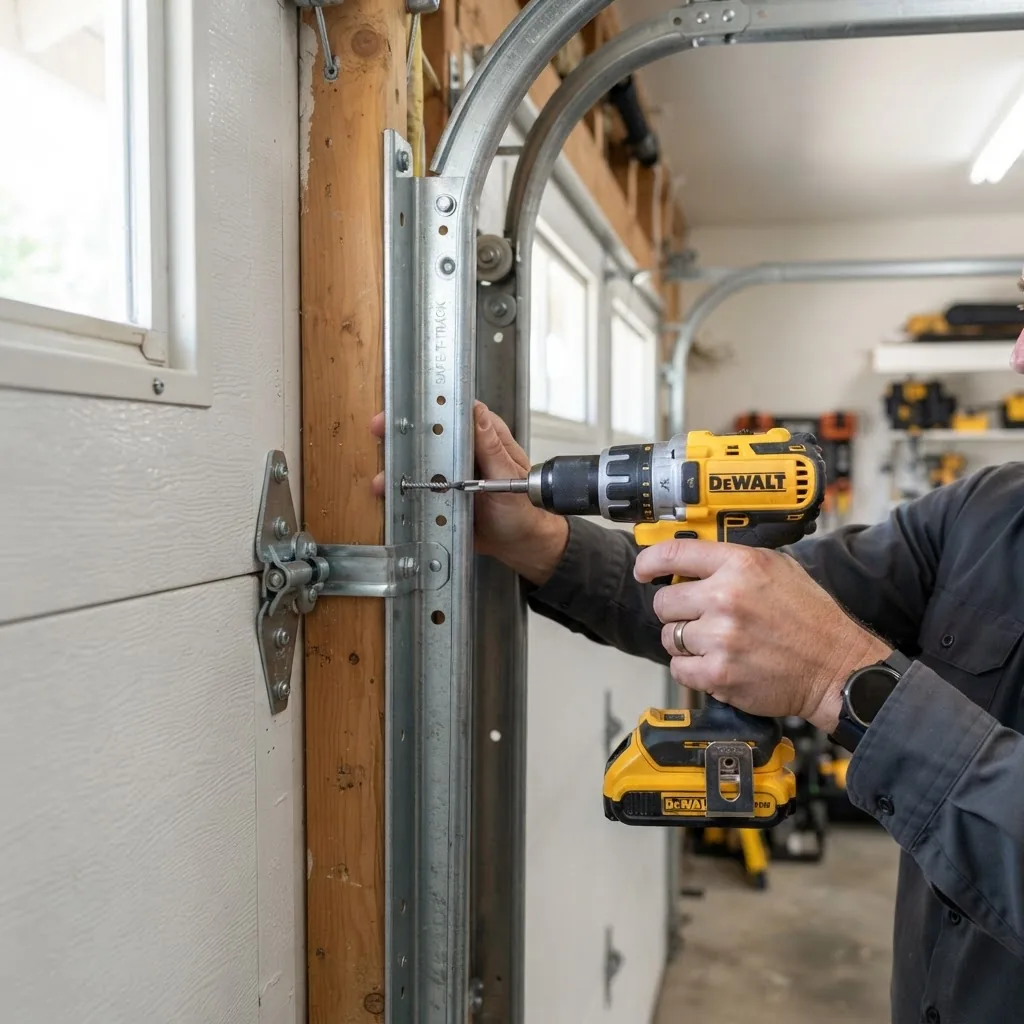
-
Prepare the workspace and confirm plan.
Time: 30–45 minutes. Clear the garage, park vehicles away, and place sawhorses for panels. Lay out each panel in order and match hardware kits to manufacturer part numbers. Verify the door size (single 8’×7′ or double 16’×7′ etc.) and door weight rating from the spec sheet.
-
Remove the old door (if replacing).
Action: Disconnect the opener per manufacturer instructions, secure panels with clamps to prevent fall, remove top section first if space allows. Carefully unbolt torsion spring assemblies only if you are qualified; otherwise secure springs and schedule a pro. Label panels 1–n to preserve order.
Time: 1–2 hours for a single-car door with helper.
-
Inspect and square the frame.
Action: Measure the opening width at three heights (top, middle, bottom). Differences greater than 1/8″ per foot signal an uneven frame needing correction. Use shims to plumb the jambs and a straight 4′ level across the header. Replace rotted or split jamb trim as needed — follow the garage door jamb trim and casing replacement procedures if trim is damaged.
Time: 30–90 minutes depending on repairs.
-
Install the bottom weather seal and threshold (if used).
Action: Mount vinyl bottom seal to the lower edge of the bottom panel using the manufacturer-recommended screws and torque (hand tight + 1/8 turn with 1/2″ socket). If installing a threshold, set with silicone adhesive and fasten every 12″ with stainless screws.
Time: 20–40 minutes.
-
Assemble and mount the bottom panel.
Action: With two helpers, lift the bottom panel into the opening and rest it on the threshold or floor. Ensure it is centered by measuring 1/2 the gap each side or using the manufacturer’s centering guide. Temporarily secure the bottom bracket at 3″ from corner with carriage bolts hand tight. Do not fully torque yet — leave adjustments.
-
Install vertical tracks and brackets.
Action: Attach vertical track sections to jamb brackets. Use the 48″ level to set the track perfectly plumb; secure with lag screws at top and bottom, spacing about 16″–24″ per manufacturer’s spec. Track must be plumb to within 1/8″ over its height to prevent roller binding.
Tip: If tracks aren’t plumb, use shims behind jamb bracket and re-tighten. Check operation by hand-lifting the bottom panel a couple inches to ensure rollers move freely.
-
Stack panels and attach hinges
Action: With panels on sawhorses, install inter-panel hinges per the hardware chart — usually two hinges per vertical seam for 7′ tall doors, three for taller doors. Use 1/4″ carriage bolts or supplied fasteners torqued to manufacturer specs (hand tight + 1/4 turn). Align corner hinge plates so the hinge pivot is centered on the joint to avoid binding.
-
Mount second and subsequent panels.
Action: Lift the next panel into position, interlock with lower hinges, insert roller into vertical track (use beveled roller on topmost) and secure. Continue for each panel, checking for full engagement of hinge pins and rollers.
Time: 1–3 hours depending on number of panels and helpers.
-
Install horizontal tracks and support brackets.
Action: Attach horizontal track to the head bracket and back into the ceiling strut supports. Align track angle per manufacturer (commonly 90° to vertical when the door is fully closed, but verify with your manual). Use blocking on ceiling if necessary to carry loads; mount supports every 4′ or per spec. Adjust track angle so rollers move smoothly into the horizontal when door is about 18″ open.
-
Install springs and counterbalance system.
Action: Follow manufacturer instructions for torsion or extension spring installation. Torsion springs require exact match of spring length and inside diameter to shaft and drum. If installing torsion springs, use properly sized winding bars and torque to manufacturer-specified turns; confirm balance by lifting door manually. If you are not experienced with spring winding, hire a professional — torsion springs store dangerous energy.
Safety note: According to a 2023 industry safety guideline, only trained persons should wind torsion springs because incorrect winding causes severe injury. See ASTM/ANSI standards for safety practices.
-
Attach lift cables and drums.
Action: Connect cables to bottom bracket and drum; tighten so there is 1/4″ tension at the bottom flange. Ensure cables wind evenly on drums with 2–3 wraps initially. Use pliers to secure cable clamp pins; torque bracket bolts to 25–35 ft-lb depending on bolt size (consult the hardware chart).
-
Install upper rollers, hinges and end stiles alignment.
Action: Check that roller shafts are fully seated and hinge pivot is free. Tighten hinge bolts but avoid over-torquing which can bind joints — torque to recommended value (usually 60–80 in-lb for 1/4″ bolts).
-
Mount the opener and connect drive assembly.
Action: Install opener header bracket and rail per manufacturer. Attach trolley to the top panel with gang-screw and position opener so the carriage engages when door is closed. Test the limit and force settings: opener dead-stop limit typically set so the door reverses if encountering a 20–30 lb obstruction near the floor (consult your opener manual for exact values).
-
Adjust balance and test manual operation.
Action: Disconnect opener and lift the door manually. A properly balanced door should stay at waist height when positioned halfway (for sectional doors). If it falls, increase spring tension slightly (1/4 turn increments for torsion springs) until balanced. For balance checks, always use winding bars and proper PPE.
-
Program opener and test safety reversal.
Action: Reconnect the opener, set travel limits so the door fully closes without crushing the floor seal. Test photo-eye sensor alignment (must be 6″–12″ above the floor), and the force settings so the door reverses when a 1.5″ obstruction is placed under the closing door (use a 2×4 test per opener manual).
Time: 20–45 minutes for programming and safety tests.
-
Seal and finish.
Action: Install jamb weatherstrips to the interior faces, install head strip, and apply silicone sealant to any small gaps greater than 1/8″. If door is steel, check paint touch-ups on drilled holes and fastener areas to avoid corrosion. For wood, apply primer and two finish coats within 48 hours of installation.
-
Final hardware torque and lubrication.
Action: Torque all fasteners to manufacturer specs (typically 20–35 ft-lb for 3/8″ bolts). Lubricate rollers, hinges, and bearings with 30W garage door lubricant and wipe excess. Apply silicone to weatherstrip and vinyl seals.
-
Inspect and document.
Action: Run 50 full cycles to seat components and watch for unusual noises or binding. Photograph serial numbers and hardware configuration for warranty and future maintenance.
-
Case example: Installing a recessed long panel with windows.
Experience note: In a recent double-car installation I replaced an old flush door with a long panel garage door with windows. The frame was out-of-square by 3/16″ at the top — I shimmed the side jambs using stacked 1/16″ shims (total 3/16″) and secured new jamb trim per the garage door jamb trim and casing replacement procedure; windows were prepped with 1/8″ closed-cell spacer for thermal break. The extra time for precision framing saved hours of rework later.
-
Optional: Add decorative hardware or cover panels.
Action: If applying cover panels or decorative hardware, mount cosmetic hardware to pre-drilled backing or into studs to avoid rattling. For applied straps, use at least two #10 stainless screws per anchor and back-up with a washer to prevent pull-through.
Time: 30–90 minutes depending on complexity.
-
Cleanup and client hand-off.
Action: Remove tools, fasteners and debris, and provide the homeowner (or your notes) with a maintenance checklist, photos, and emergency disconnection steps for the opener. Record suggested seasonal checks: visual inspection every 3 months, lubrication every 6 months, and full service annually.
Transition: After completing installation, watch for the common mistakes I’ve learned to avoid on-site and the practical tips that prevent them.
Installation Tips and Common Mistakes to Avoid
Below I share field-tested tips and mistakes I’ve actually made or corrected on projects. Read these carefully — they often save the most time and keep you safe.
Tips:
- Always pre-fit panels on sawhorses to confirm hinge holes and bolt lengths before lifting into place.
- Set your drill clutch low when driving small sheet metal screws to avoid stripping; apply final torque with a socket wrench when possible.
- When balancing the door, make measured adjustments — 1/4-turn on torsion springs is typical for a noticeable change; document each turn.
- Label everything: panel order, hinge orientation, and cable wrap direction. It simplifies reassembly and future service.
Common mistakes (first-person observations):
- I once rushed track alignment and ended up with a door that hung up 1″ at mid-travel — correcting the plumb of the vertical track by 1/8″ fixed it.
- I attempted to wind a mismatched torsion spring; the door was dangerously overbalanced. I stopped, ordered the correct spring, and hired a professional to complete the winding safely.
- I left decorative hardware loose which rattled — tightening to specified torque and adding nylon washers removed the noise.
Additional prevention checklist:
- Measure opening at three heights before ordering panels.
- Use shims in thin layers (1/16″) to avoid over-correcting jambs.
- Follow opener manufacturer force and limit guidelines and use a 2×4 obstruction test for reversal verification.
For panel-specific replacement techniques and troubleshooting see the how to change a garage door panel guide.
Transition: Regular maintenance preserves performance and reduces the risk of costly failures — below are the practical maintenance steps I follow after every install.
Maintenance and Longevity of Recessed Garage Doors
Routine maintenance keeps recessed garage doors operating smoothly and protects finishes. My maintenance approach focuses on lubrication, inspection, and minor repairs before they escalate.
Key maintenance points:
- Cleaning: Wash painted steel or composite faces with mild detergent and rinse twice yearly; for wood, clean and inspect every 3 months for finish failures.
- Lubrication: Apply garage door-grade lubricant to rollers, hinges and bearings every 6 months. Avoid grease on nylon rollers — use a light oil only.
- Weatherstrip: Inspect bottom seal and jamb weatherstrips every 6 months; replace seals showing >1/4″ compression loss.
- Fasteners: Check all visible fasteners and torque to spec annually — loose nuts at hinges can cause misalignment and wear.
- Insulation: If you used foam or polystyrene insulation, check for gaps at seams and re-seal with butyl tape if necessary to maintain R-value.
Quick seasonal checklist:
- Spring: Inspect paint/finish, clean tracks, lubricate hardware.
- Summer: Tighten hardware and check opener sensors after storms.
- Fall: Test balance and reversal; repair weatherstripping before winter.
- Winter: Keep threshold free of ice; verify opener force because cold weather stiffens seals.
For step-by-step repair tips and repair kits consult the garage door panel repair tips resource.
Transition: Below is a final checklist, guidance on when to engage professionals, and a short summary of purchasing options.
Conclusion and Where to Buy Recessed Panel Garage Door Panels
You now have the practical knowledge to select a recessed panel garage door style, plan the install, and perform the installation safely. Typical installation time: single-car 6–8 hours, double-car 8–12 hours with two people. Remember: spring work or major frame repairs are valid reasons to call a pro.
For purchasing, order panels and hardware from manufacturers or reputable suppliers who provide exact panel dimensions and matching hardware kits. If you need pricing and vendor options, review the detailed guide on garage door panel replacement cost and where to buy panels.
Final CTA: If you’re ready, create a materials checklist, confirm your helper, and book a weekend block for the install — measuring and prep determine success.
When to call a professional
Call a professional when: torsion spring replacement or winding is required; the frame is severely out of square (>3/16″ variation); or the opener requires complex wiring or integration with home automation systems.
Compact Verification Checklist
- Panels staged in order and hardware matched to part numbers.
- Frame squared to within 1/8″ per foot; jambs shimmed where needed.
- Tracks plumb and level; horizontal supports installed every 4′.
- Door balanced manually at halfway point.
- Opener limits and reversal tested with 2×4 obstruction test.
- Weatherstripping installed and sealed; lubrication applied.
- Photos and documentation saved for warranty.


