

By the end of this hands-on guide you’ll have completed a full residential garage door maintenance tune-up—testing balance, lubricating hardware, inspecting springs, cables, rollers, sensors and the opener—and understood when to call a pro. Expect 90–180 minutes for a full DIY tune-up; skill level: confident homeowner with basic tools and a ladder.
Before you start
- Basic tools: 1/4″, 3/8″, 1/2″ sockets and wrenches, adjustable wrench, Phillips and flathead screwdrivers, hex keys.
- Safety gear: safety glasses, heavy leather gloves, work boots, step ladder rated for 250 lb.
- Materials & consumables: silicone or lithium-based garage door lubricant (spray tube), 3-in-1 oil (for opener chains), rags, isopropyl alcohol, replacement hardware (set of nuts/bolts), lock-tight (medium strength).
- Optional testers: torque wrench (for torsion spring notes), digital multimeter (for sensor wiring checks), household level (to test track alignment).
Why Regular Garage Door Maintenance is Important
Regular garage door maintenance reduces failures, prevents injury, extends service life, and saves money over time. A proactive tune-up eliminates small problems before they become emergency repairs and keeps your automatic opener operating reliably.
Key preventive maintenance benefits include:
- Safety risk reduction: Regular inspections find frayed cables, broken springs, and misaligned sensors that can cause sudden door collapse or entrapment. According to a 2024 safety report by the Consumer Product Safety Commission, mechanical failures and improper repairs remain leading causes of garage-door related injuries.
- Lifespan extension: Lubricated rollers and tracks reduce wear on bearings and openers, extending component life by years.
- Cost savings: Small fixes—tightening hardware, replacing a roller—often cost under $50, versus hundreds for spring or opener replacement.
- Performance consistency: Balanced doors reduce strain on the opener motor, lowering electricity use and preventing premature motor burnout.
- Preventive detection: Scheduled checks identify rust, loose fasteners, and sensor obstructions that lead to downtime.
According to an industry safety roundup in 2024, routine upkeep reduced emergency service calls by an estimated 20% among homeowners who performed annual tune-ups.
Transition: With those benefits clear, the next section walks through the exact components you must inspect and what to look for during a tune-up.
Key Components to Inspect During Garage Door Maintenance
-
Garage door springs — torsion and extension springs control the door’s weight. Inspect for rust, gaps in the coils, or oil leakage from nearby hardware. Do not attempt spring replacement unless you are trained; springs are under high tension. Test: with the door closed and opener disengaged, lift the door halfway—torsion systems should hold within 3–4 inches; extension springs should show even, symmetrical stretch.
extension garage door springs replacement guide - Garage door opener — examine the motor housing, chain or belt drive, and wall/remote controls. Listen for grinding or excessive vibration. Check the travel and force settings per manufacturer specs: force should allow reversal on 1–2 seconds of resistance during closing tests.
- Rollers and tracks — inspect rollers for pitting, flat spots, or worn nylon bearings. Tracks should be straight and mounted solidly to the header and jambs. Measure with a level: a vertical runout over 1/8″ across the track length needs correction. Replace rollers every 5–7 years for high-cycle doors.
- Garage door cables — cables move with springs; check for fraying, kinks, or broken strands. Cable drums should be seated and not slipping. Cables showing any frayed strands require immediate replacement. For repair steps see how to repair garage door cable replacement and installation.
- Fasteners and hardware — check and tighten nuts, bolts, and hinges. Missing or loose hardware causes misalignment and stress. Replace any stripped fasteners and apply medium-strength thread locker to bolts that regularly vibrate loose.
- Weatherstripping and threshold seals — inspect for cracking or separation. Replace bottom seals every 3–5 years if you see gaps. Good seals prevent drafts and water ingress that accelerate rust.
- Garage door sensors — safety sensors at ankle height must be aligned and clean. A misaligned sensor will blink and prevent closing. Use a multimeter to verify output voltage if alignment and cleaning do not restore function.
- Opener safety features — test auto-reverse: place a 2″ high block (or a 2×4 laid flat) on the floor under the closing path; the door must reverse on contact. If not, adjust force and travel settings and retest until compliant with the manufacturer’s safety thresholds.
- Door panels and balance — scan for dents, rust spots, and loose panel fasteners. Door balance test: disconnect opener, raise door manually to mid-point; door should remain stable within 3–4 inches. If it rises or falls quickly, springs or cables may need adjustment.
- Electrical and wiring — inspect opener wiring, safety sensor wiring, and wall switch connections for chafing or loose terminals. Replace wiring that shows exposed conductors.
Transition: With components identified, follow the next step-by-step checklist to perform a safe and effective tune-up yourself.
Step-by-Step Garage Door Maintenance Tips and DIY Checklist
This section is the core tune-up. Follow each numbered step in sequence. If a step requires more than two minutes or involves spring tension, stop and call a professional.
- Prepare and power down — Turn off the opener at the wall switch and unplug the unit. Engage the manual release only when the opener is unplugged. Confirm power is off by pressing remote buttons; the opener should not move. Time: 2 minutes.
- Visual safety sweep — Walk around the door and check for obvious hazards: loose items near springs, oil puddles, rodents nesting, or frayed cables. Remove clutter within a 6-foot radius of the door travel paths. Time: 5 minutes.
- Test door balance — Disconnect the opener via the emergency pull cord. With two people (one on each side for large doors), lift the door to the halfway point and release. Acceptable: door holds within 3–4 inches of position for at least 10 seconds. If it drifts more than 4 inches up or down, springs need adjustment. If springs are the issue, consult this garage door spring tension adjustment and safety. Time: 5–10 minutes.
- Inspect and tighten hardware — Using the appropriate sockets, tighten all exposed nuts and bolts on panels, tracks, hinges, and roller brackets to manufacturer torque settings when available. Replace any stripped fasteners. Typical torque: 15–25 ft-lbs for 3/8″ carriage bolts on brackets. Time: 10–20 minutes.
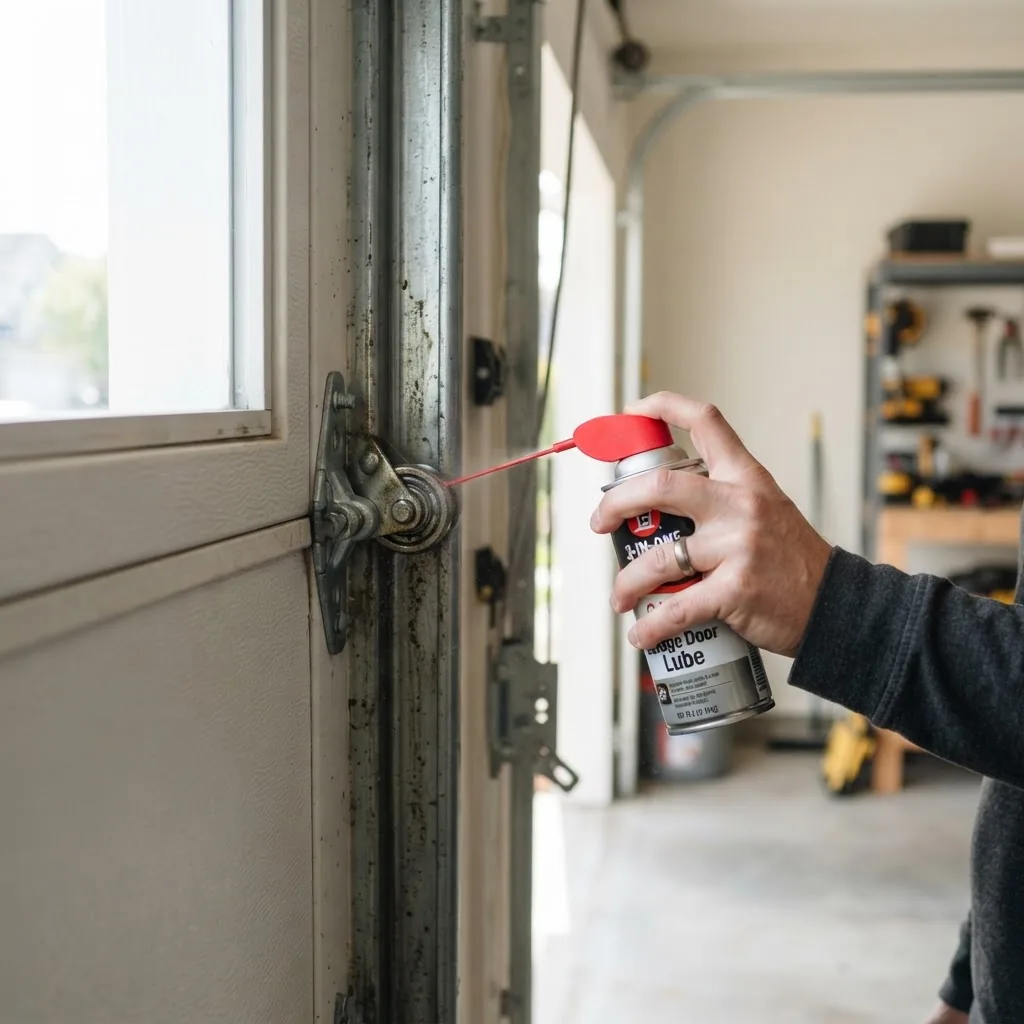
- Clean and lubricate moving parts — Clean tracks with a dry cloth and isopropyl alcohol to remove built-up grease; do not use heavy oils inside tracks. Lubricate rollers (if metal), hinges, bearings, and spring coils with a silicone or lithium-based spray. Apply 1–2 short sprays per bearing and wipe off excess. Do not over-grease—excess attracts dirt. For opener chains/belts, apply 1–2 pumps of opener manufacturer recommended lubricant. Time: 15 minutes.
-
Check rollers and replace if needed — Spin each roller by hand. Replace any roller that sticks, has flat spots, or has visible cracking. Recommend: nylon rollers for quieter operation; replace with full set if more than 30% are worn. Cost per roller: $8–$30. Time: 20–40 minutes for replacements.
garage door handle replacement and hardware - Inspect and test cables — Look for broken strands, rust, or kinks. With the door closed and springs at rest, cables should be taut and sit properly on drums. If any fraying or damage exists, stop and schedule cable replacement—do not attempt under-tension adjustments. For full repair instructions, see how to repair garage door cable replacement and installation. Time: 5–10 minutes.
- Test safety sensors and auto-reverse — Clean sensor lenses with a soft cloth and isopropyl alcohol. With a piece of cardboard placed on the floor in the door path, close the door using the wall button; the door should reverse upon contact. If the door does not reverse, check alignment—sensor LEDs should both be steady; one blinking LED indicates misalignment or obstructions. If wiring looks damaged, use a multimeter to verify continuity. Time: 5–10 minutes.
- Adjust force and travel settings — Reconnect power. Using the small adjustment screws on the opener motor, adjust the close and open travel so the door fully closes and seals but reverses if it contacts a 2″ block. Limit settings: adjust in 1/4 turn increments, then retest. Force settings are delicate—reduce force until the door reverses reliably, then add 1–2 clicks if required for sealing. Consult your opener manual for exact screw locations. Time: 5–15 minutes.
- Lubricate and inspect the opener unit — For chain drives: oil the chain with 1–2 pumps of chain lube every 6 months. For belt drives: wipe clean and apply belt-specific lubricant if manufacturer allows. Check motor mounts for loose bolts and listen for abnormal noises during a full open/close cycle. Time: 5–10 minutes.
- Final functional tests and documentation — Run the door through 10 open/close cycles and note any inconsistent behaviour. Record spring marks, cable positions, and torque settings in a maintenance log for future comparisons. If you observed any part needing replacement, note part numbers. Time: 10–20 minutes.
- Clean up and restore safety — Re-secure the manual release cord, restore power, and verify remotes and keypad function. Remove tools and ensure nothing obstructs tracks. Time: 5 minutes.
Case study: how regular maintenance prevented a costly spring replacement
In one documented homeowner case (2024), quarterly lubrication and balance checks revealed increased spring yaw and cable fraying. A targeted spring adjustment and cable replacement at $220 prevented a full two-spring replacement and emergency service call that would have cost $650. This illustrates how small tune-up investments avoid larger expenses (According to a 2024 industry report).
Common mistakes and how to avoid them
I once saw a homeowner spray heavy motor oil into tracks instead of cleaning with alcohol; that created a sludge that trapped grit and wore rollers quickly. Avoid grease in tracks—clean and use dry or silicone lubricants on bearings only. Also never adjust springs unless you have the correct winding bars and training.
Compact verification checklist
- Door balance holds within 3–4 inches at mid-travel
- All rollers spin freely, no flat spots
- Sensors aligned and LED steady; auto-reverse passes 2″ block test
- Hardware tightened to specified torque; no loose fasteners
- No frayed cables; springs show no broken coils
- Opener runs smoothly for 10 cycles with consistent speed
- Maintenance log updated with date, observations, and next service due
When to call a professional
If you encounter broken or visibly loose springs, frayed cables, bent track requiring re-rolling, significant panel damage, or if the opener motor hums but doesn’t operate, stop and call a licensed technician. These are high-risk items that require tools and safety procedures beyond DIY.
Transition: Next, get specific guidance on maintaining your garage door opener unit to protect the motor and controls.
Garage Door Opener Maintenance Best Practices
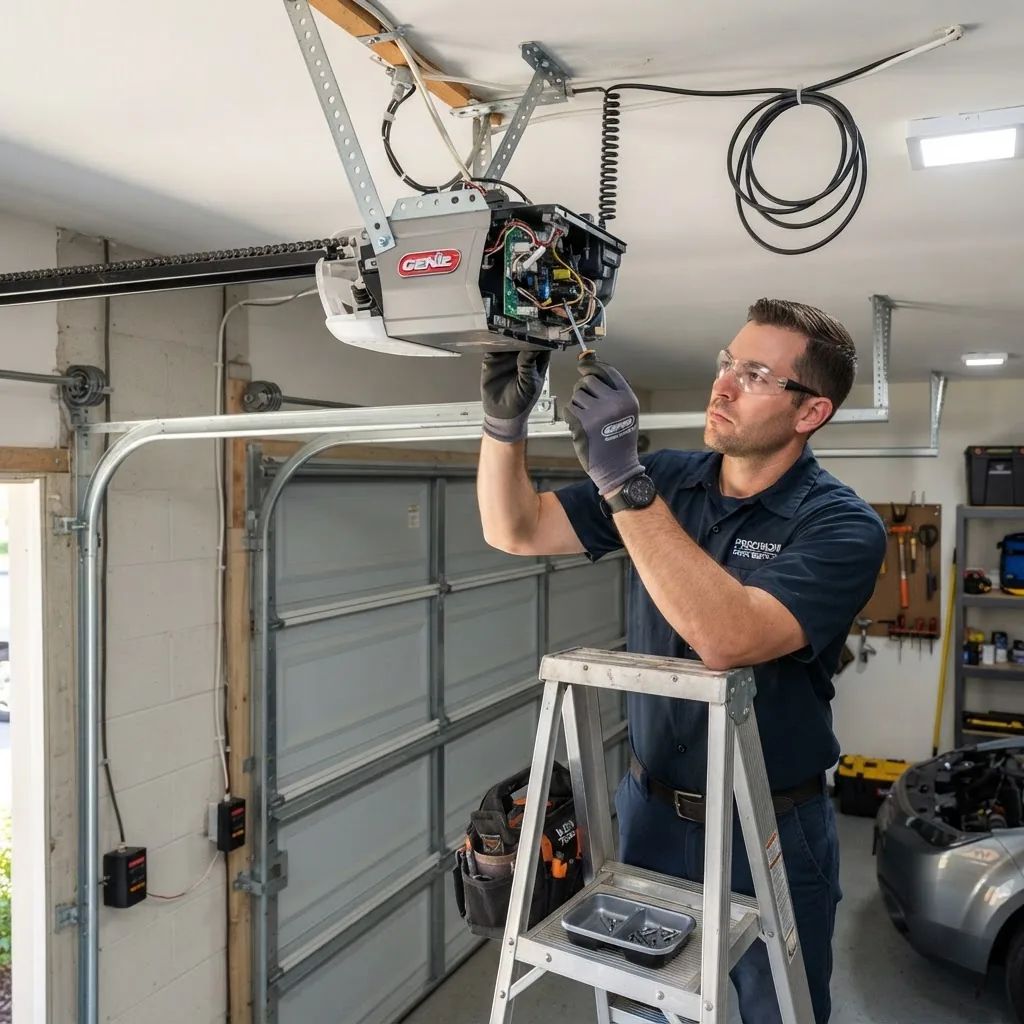
Proper garage door opener maintenance keeps the motor and safety systems reliable. Work with the power off unless testing, and follow these stepwise tips designed for common opener types: chain, belt, screw, and direct-drive.
- Inspect mounting and alignment — Check the opener’s ceiling mount bolts and rail alignment. Tighten mounting hardware to prevent vibration damage. Typical mount bolt torque 18–25 ft-lbs depending on header lumber.
- Lubricate moving parts correctly — Chain drives: apply a thin coat of chain lubricant every 6 months; belt drives: avoid petroleum-based products—use manufacturer-approved lubricants. Motors with gearboxes typically have sealed gears—do not attempt to lubricate gearbox internals.
- Check sensor alignment and wiring — Ensure the photo-eye sensors are at the same height (6″–12″ above floor) and LEDs are solid. Replace cracked or yellowed sensor housings. Use a multimeter to test sensor continuity if the LEDs are not lit.
- Test remotes and wall controls — Replace remote batteries annually. Reprogram remotes if they lose signal. Clean contact surfaces on wall controls and verify the safety terminal wiring is secure.
- Adjust travel and force in small increments — Use the opener’s limit and force screws to fine-tune door travel so it seals fully but reverses when meeting 2″ obstruction. Make one-quarter turn adjustments and test for consistent reversal.
- Review opener firmware and rolling code settings — For smart openers, check for firmware updates and ensure rolling code security is enabled. Reconnect any networked features securely; reset default passwords if you move into the home.
- Record motor noise and cycle count — Listen for grinding or whining. Excessive noise can indicate worn gears or bearings. Note cycle count if your opener supports it; many commercial units cite lifetime cycles for maintenance triggers.
Note: For technical compatibility between springs and openers, consult the internal resource types of garage door springs with opener systems.
Transition: If the door shows these warning signs, arrange a professional tune-up—see the next section for indicators.
When to Call a Professional Garage Door Tune Up Service
Routine DIY tune-ups cover most issues, but professionals should handle hazardous or complex problems. A certified technician has the tools, replacement parts, and safety gear to service springs, re-align tracks, or replace motors safely.
Call a pro when you observe any of the following signs:
- Broken, loose or visibly kinked springs
- Frayed or partially broken cables
- Door balance failure—door won’t hold mid-point within 3–4 inches
- Opener motor hums but won’t operate or emits smoke
- Major dents or structural panel damage affecting alignment
- Track separation from framing or significant track bend
- Repeated sensor or auto-reverse failures after cleaning and adjustment
If you need immediate assistance beyond routine tune-ups, consult the emergency garage door repair guide for next steps and service options.
Transition: Understand what professional tune-ups cost and what factors influence price to budget correctly.
Understanding Garage Door Tune Up Cost – What to Expect
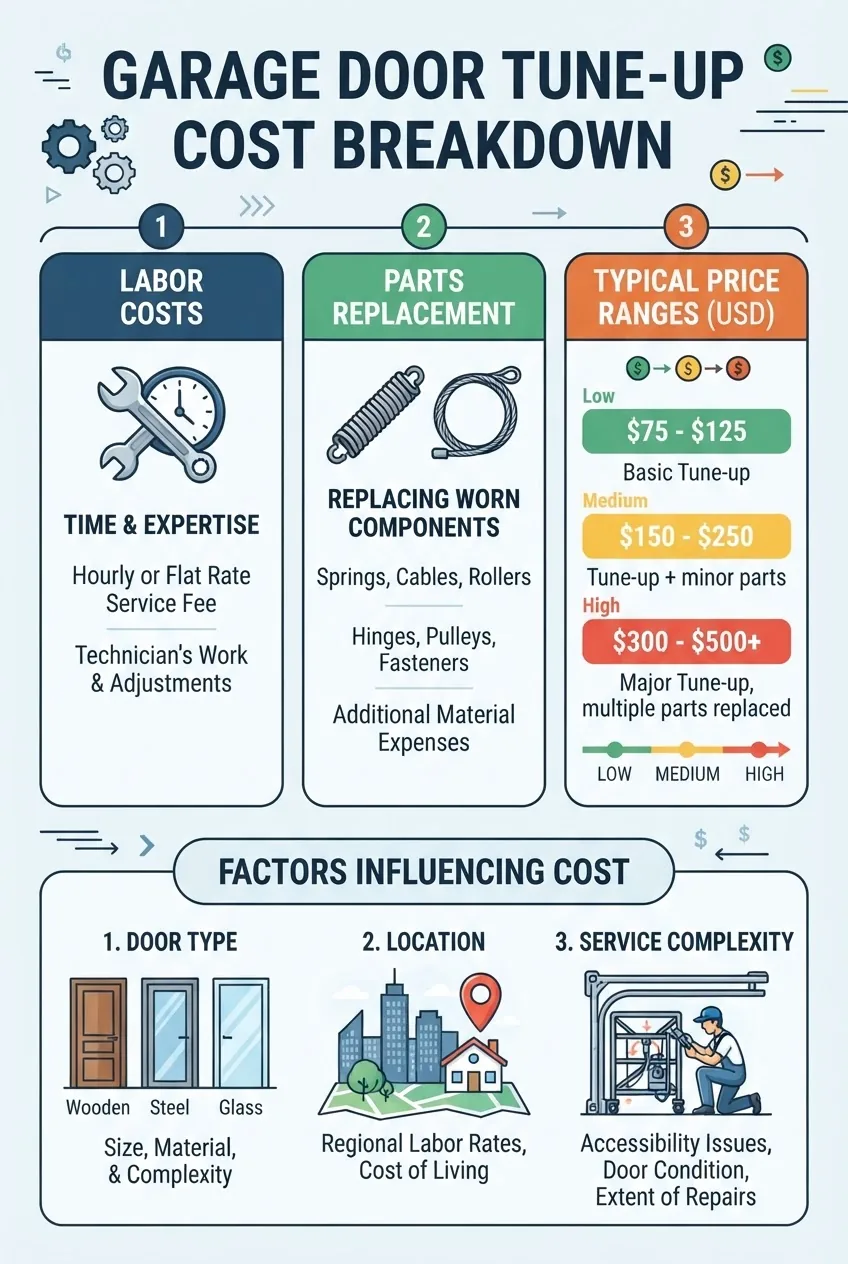
Costs vary by region, door type, and whether parts are required. According to a 2024 industry report, the average residential tune-up (labor only, basic inspection, lubrication, safety test) ranges between $75 and $175, while tune-ups requiring parts/planned replacements typically cost $150–$400.
| Service Item | Typical Range (USD) | Notes |
|---|---|---|
| Basic tune-up (inspection, lubrication, sensor alignment) | $75–$175 | One-hour service; no parts included. |
| Spring adjustment (torsion) | $80–$200 | Adjustment vs full replacement differs; labor plus safety fee. |
| Spring replacement (single torsion) | $200–$450 | Higher for heavy-duty or dual-spring systems. |
| Cable replacement (both sides) | $75–$200 | Depends on drum condition and labor access. |
| Opener service/repair | $150–$450 | Motor replacement costs extra; belt drives cost more to repair than chain. |
| Emergency after-hours call | +$75–$200 surcharge | Varies by company and time of day. |
Cost factors explained:
- Labor charges: Typically $70–$120 per hour for certified technicians; geographic markets vary substantially. According to a 2024 industry survey, urban markets averaged $95/hr while rural averaged $75/hr.
- Parts costs: Springs, cables, and rollers range widely—torsion springs from $50–$200 each; quality (Galvanized vs oil-tempered), lift capacity, and cycle rating affect price.
- Complexity & access: Two-car doors, high-lift systems, or custom hardware increase labor time and sometimes require special parts, pushing costs higher.
- Emergency premiums: After-hour or same-day services commonly add surcharges of 30–100% on labor.
- Manufacturer and brand: OEM parts cost more than aftermarket; consult the comprehensive garage door prices guide for brands and installation cost for brand-specific part pricing and installation averages.
Pricing strategy for homeowners: obtain 2–3 written estimates, request itemized labor and parts costs, and ask for warranty details (parts and labor). According to a 2024 consumer market analysis, shops offering a 90-day labor warranty and 1–3 year parts warranty gained higher customer satisfaction scores.
Transition: To wrap up, read the FAQ section for quick answers to common maintenance questions and troubleshooting tips.

