A boundary wall is an important element of any property as it provides privacy, and security and defines the limits of the property. A well-designed boundary wall can enhance the aesthetics of a property, and also add value to it. In this blog post, we will explore the various aspects of boundary wall design and provide you with tips and ideas to help you create a boundary wall that is both functional and attractive.
Importance of having a well-designed boundary wall
A well-designed boundary wall serves multiple purposes, making it an essential component of any property. Here are some of the reasons why having a well-designed boundary wall is important:
- Security: One of the primary functions of a boundary wall is to provide security and privacy to the property. A well-designed boundary wall can deter trespassers, burglars, and unwanted visitors from entering the property.
- Safety: A boundary wall can help prevent accidents and protect children and pets from wandering outside the property. It can also provide a barrier between the property and nearby roads or highways, reducing noise pollution and the risk of vehicle accidents.
- Aesthetics: A boundary wall can enhance the curb appeal of the property and improve its overall aesthetic appeal. A well-designed boundary wall can add to the value of the property by creating a more attractive and cohesive look.
- Property demarcation: A boundary wall clearly defines the boundary of the property, preventing disputes with neighboring properties or encroachment on the property.
- Environmental benefits: A boundary wall can provide a windbreak and reduce soil erosion, helping to create a more sustainable and eco-friendly environment.
Overall, a well-designed boundary wall can provide multiple benefits to a property, from security and privacy to aesthetics and property demarcation. Therefore, it is important to invest in a well-designed boundary wall to enhance the value and functionality of the property.
Factors to Consider Before Designing a Boundary Wall
Before designing a boundary wall, it is important to consider several factors. These include:
- Purpose: What is the main purpose of the boundary wall? Is it to provide privacy, and security or simply to demarcate the boundaries of the property?
- Location: The location of the boundary wall is an important consideration. Is it located in a rural or urban area? What is the surrounding environment like? Are there any natural or man-made structures nearby?
- Budget: The budget allocated for the boundary wall is also an important consideration. The cost of materials, labor, and construction will depend on the size and design of the boundary wall.
- Style: The style of the boundary wall should complement the architecture of the property. The design should also be in line with the local building codes and regulations.
How do you build a boundary wall?
Building a boundary wall typically involves several steps, including planning, preparation, and construction. Here are some general steps you can follow to build a boundary wall:
- Determine the purpose and location of the wall: The first step is to decide why you want to build the wall and where it should be located. Consider factors such as privacy, security, noise reduction, and aesthetic appeal.
- Obtain necessary permits and permissions: Before starting any construction, make sure to obtain any necessary permits and permissions from your local government or homeowner’s association.
- Prepare the site: Clear the area where the wall will be built and level the ground. Mark the location of the wall with stakes and string.
- Set the foundation: Dig a trench along the marked line and pour concrete into it to create the foundation for the wall. Make sure the foundation is level and at least as wide as the wall itself.
- Lay the first course: Lay the first row of bricks or blocks on top of the foundation, making sure they are level and plumb. Use mortar to secure them in place.
- Continue building the wall: Continue laying courses of bricks or blocks, making sure each one is level and plumb. Use mortar to join the blocks together, and stagger the joints to add strength to the wall.
- Install reinforcements: Depending on the height and length of the wall, you may need to install reinforcement, such as steel rods or wire mesh, to add strength and stability.
- Finish the wall: Once the wall is built, add finishing touches such as a decorative cap or paint.
It’s important to note that building a boundary wall can be a complex and time-consuming process. It may be best to consult with a professional contractor who has experience building walls to ensure that the wall is built safely and meets any local regulations or codes.
Boundary Wall Design Ideas
Here are some ideas to help you design a boundary wall that is both functional and attractive:
1. Use Natural Materials
Using natural materials such as stone, brick or wood can give your boundary wall a rustic and organic look. These materials are durable, and they age well with time, which means that your boundary wall will look better as it ages.
2. Add a Water Feature
If your property has a water feature such as a pond or a pool, you can incorporate it into the boundary wall design. A water feature can add an element of tranquillity and serenity to the overall design.
3. Incorporate Lighting
Adding lighting to your boundary wall design can enhance the aesthetics of your property, while also providing additional security. You can use solar-powered lights to save on energy costs.
4. Add Plants
Adding plants such as climbers or creepers to your boundary wall can soften the overall look of the wall. It can also provide additional privacy and create a more natural environment.
5. Create a Focal Point
Creating a focal point on your boundary wall can draw attention to it and make it stand out. This can be done by adding unique design elements such as a mural or a sculpture.
6. Consider the Height
The height of your boundary wall will depend on the purpose of the wall. If the main purpose is to provide security, the wall should be high enough to deter intruders. However, if the purpose is to demarcate the boundaries of the property, a shorter wall may be sufficient.
7. Choose the Right Colour
Choosing the right color for your boundary wall can make a significant difference in the overall look of your property. Lighter colors can make the property look larger, while darker colors can create a more intimate and cozy feel.
8. Use Different Textures
Using different textures on your boundary wall can create a visually interesting design. For example, you can use a combination of smooth and rough textures to create a unique look.
What is a unique boundary wall?
A unique boundary wall refers to a wall that stands out from typical boundary walls due to its design, materials used, or construction techniques. It could be a wall with intricate designs or patterns, an unusual choice of materials such as glass or metal, or a wall that incorporates art or sculptures.
A unique boundary wall can serve several purposes, including providing security, privacy, and aesthetic value. It can enhance the overall appearance of a property, add value, and make a statement about the owner’s taste and style. A unique boundary wall can also serve as a landmark or a point of reference in a neighborhood or community.
Types of Compound Wall
Compound walls, also known as boundary walls, are used to mark the boundary of a property and to provide security and privacy. There are several types of compound walls, including:
Simple Compound Wall Design: Masonry Compound Wall
A masonry compound wall is a simple and commonly used design pattern for boundary walls. It is made up of masonry materials such as concrete blocks, bricks, or stones, and it provides a sturdy and durable barrier to enclose the property. Here are the steps involved in constructing a masonry compound wall:
- Layout the plan of the wall and mark the positions of the corners and the gate.
- Dig a trench along the planned route of the wall, making sure it is at least 1.5 times the width of the wall and deep enough to support the foundation.
- Build the foundation by pouring concrete into the trench and laying a row of concrete blocks or bricks on top of it.
- Continue building the wall by placing the blocks or bricks in a staggered pattern, making sure to use mortar to bond them together.
- Leave gaps for windows, ventilation, or decorative purposes as desired.
- Install the gateposts and the gate, making sure they are aligned with the wall and securely attached.
- Finish the wall by adding a coping or capping to the top for protection against weather and moisture.
- Finally, apply a coat of paint or decorative finish to enhance the aesthetic appeal of the wall.
Overall, a masonry compound wall is a simple and cost-effective design pattern that provides security and privacy while adding value to a property.
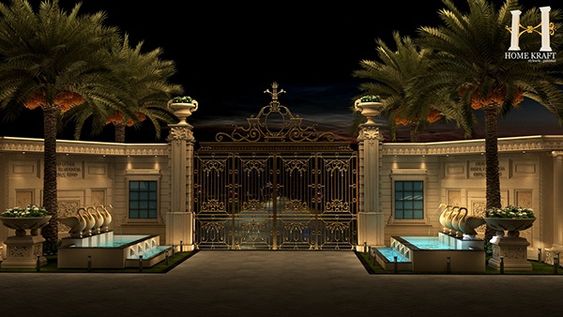
Ornamental Unique Boundary Wall Design
An ornamental unique boundary wall design is a decorative and visually striking wall that serves as a boundary for a property. Here are some elements that can be incorporated into an ornamental unique boundary wall design:
- Intricate designs: The wall can feature intricate designs, patterns, or motifs, either carved or cast into the wall itself or created by applying decorative elements like tiles, metalwork, or glasswork.
- Sculptures or art: Sculptures, murals, or other art installations can be incorporated into the wall, adding an artistic touch and creating a unique focal point.
- Landscaping: Landscaping elements such as greenery, flowers, and shrubs can be integrated into the wall design to create a living boundary that is both aesthetically pleasing and functional.
- Lighting: Lighting elements can be added to highlight the design of the wall and make it more visible and attractive at night.
- Unique materials: Unique materials such as glass, metal, or even recycled materials can be used to create a unique and interesting wall design.
- Water features: Water features like fountains or waterfalls can be incorporated into the wall design, adding a calming and relaxing element to the space.
Overall, an ornamental unique boundary wall design is a way to create a distinctive and visually appealing boundary for a property that enhances its overall aesthetic appeal. It can be designed to reflect the personality and style of the property owner while providing security and privacy.
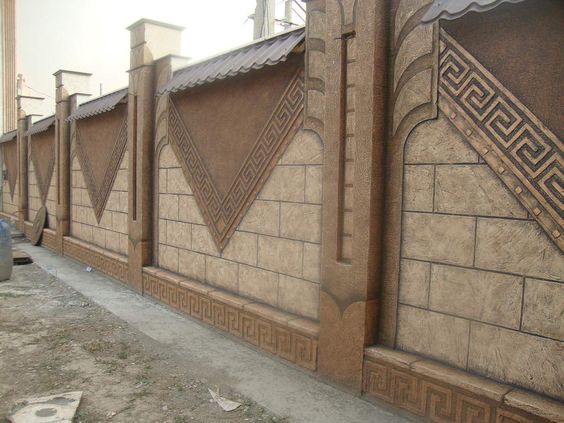
Compound Wall Design With Cladding
A compound wall design pattern with cladding involves using decorative materials to cover the surface of the wall, creating an aesthetically pleasing boundary for a property. Here are the steps involved in constructing a compound wall with cladding:
- Construct the foundation and wall structure using masonry materials like bricks, concrete blocks, or stones.
- Choose a cladding material such as natural stone, brick slips, or decorative tiles.
- Prepare the wall surface by cleaning it and ensuring that it is level and free from any obstructions.
- Apply a layer of adhesive or mortar to the wall surface.
- Carefully apply the cladding material to the wall, making sure to follow the manufacturer’s instructions.
- Cut and shape the cladding material to fit around windows, doors, and other features.
- Allow the adhesive or mortar to dry according to the manufacturer’s instructions.
- Finish the wall by applying a sealer or waterproofing agent to protect the cladding material and extend its lifespan.
A compound wall with cladding can provide a unique and elegant look to a property boundary while also offering practical benefits such as protection from weather and noise. Cladding materials are available in a wide variety of colors, textures, and patterns, allowing homeowners to choose a design that reflects their personal style and taste. Cladding can also be used to highlight specific areas of the wall or to create a contrasting effect that adds depth and interest to the overall design.
Precast Compound Wall Design Pattern
A precast compound wall is a popular design pattern that involves using precast concrete panels to construct the boundary wall for a property. Here are the steps involved in constructing a precast compound wall:
- Determine the layout of the wall and mark the position of the corners and the gate.
- Dig a trench along the planned route of the wall, making sure it is at least 1.5 times the width of the wall and deep enough to support the foundation.
- Pour the foundation by filling the trench with concrete and reinforcing steel bars.
- Allow the foundation to cure for at least 7 days.
- Install the precast panels along the foundation, making sure they are securely anchored to the foundation and each other.
- Use a crane or other lifting equipment to place the precast panels onto the foundation.
- Connect the panels together using specialized connectors or bolts.
- Finish the wall by applying a coating of paint or texture to the surface of the panels.
One of the main advantages of using precast concrete panels for a compound wall is that it can significantly reduce the construction time and costs associated with traditional masonry walls. Precast panels are also available in a variety of designs and colors, making it easy to customize the appearance of the wall to fit the property owner’s preferences. Additionally, precast walls are durable and require minimal maintenance, providing long-lasting protection and security for the property.
Compound Wall Design Pattern: For Better Security
A compound wall that is designed for better security typically involves elements that increase the level of protection and safety for the property. Here are some design patterns that can be incorporated into a compound wall to improve security:
- Height: The height of the wall is one of the most important factors in ensuring security. A wall that is high enough to prevent unauthorized access can deter potential intruders.
- Thickness: A thick wall made of durable materials such as concrete or brick can provide additional protection against vandalism or break-ins.
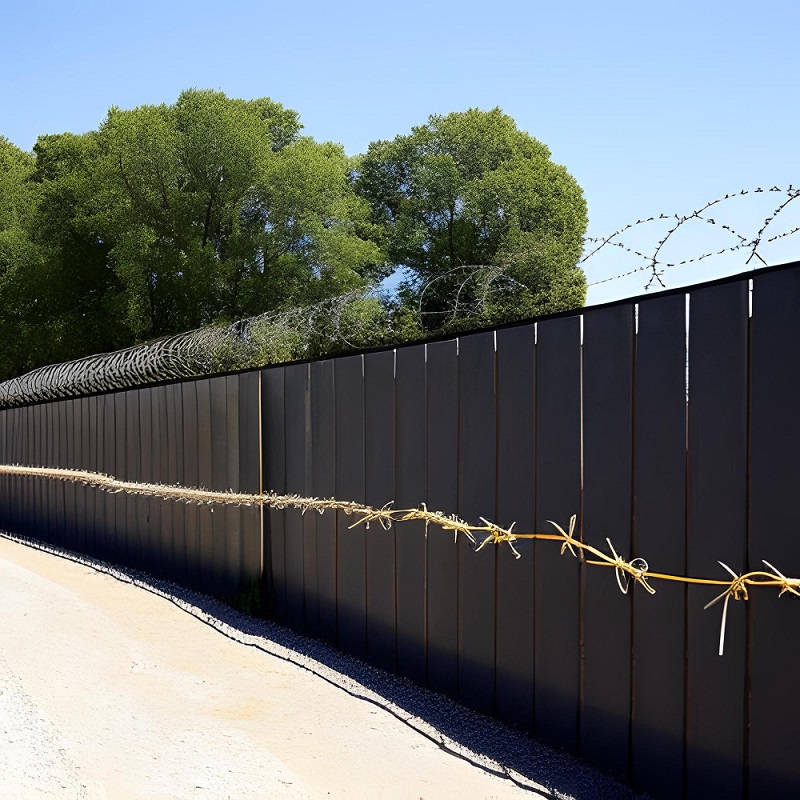
- Barbed wire or electric fencing: Adding barbed wire or electric fencing to the top of the wall can prevent unauthorized access over the wall.
- Security cameras: Installing security cameras along the wall can provide surveillance and monitoring of the property.
- Lighting: Adequate lighting along the wall can improve visibility and make it harder for intruders to approach the property undetected.
- Automated gates: Installing an automated gate can increase the level of security and control over who enters the property.
- Landscaping: Landscaping elements such as thorny bushes or prickly hedges can be planted along the wall to deter intruders.
By incorporating these design patterns, a compound wall can provide better security for the property, occupants, and valuable assets. The design of the wall should be planned carefully and customized to fit the specific needs and requirements of the property owner, taking into consideration the location, neighborhood, and potential threats.
Some Compound Wall Design Photos
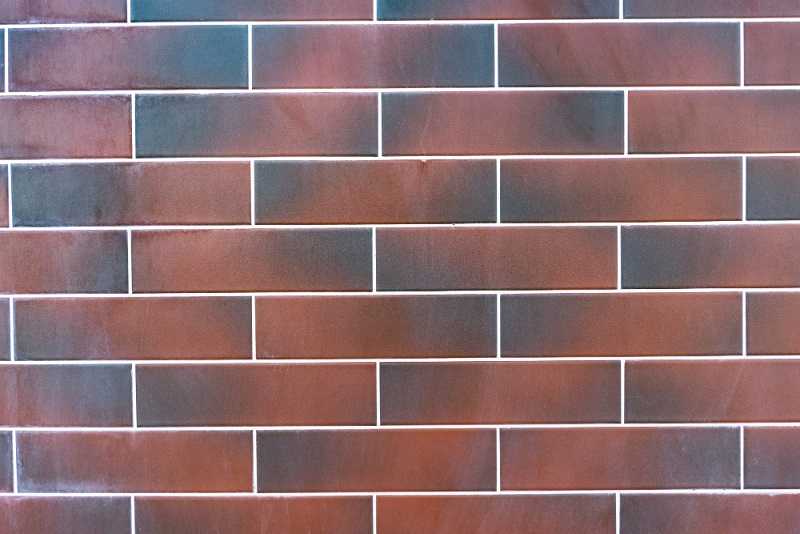
Compound Wall Design Bricks Pattern
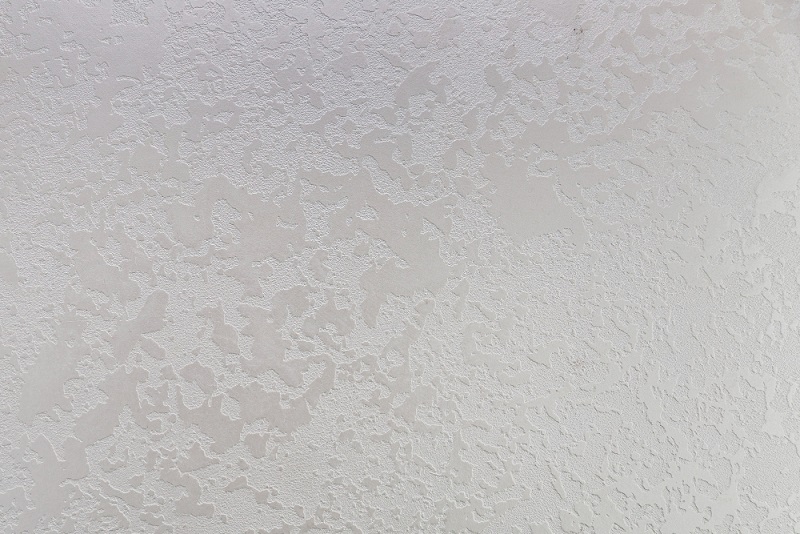
Compound Wall Design: Cement Plaster
Compound Wall Design PVC Boards Pattern
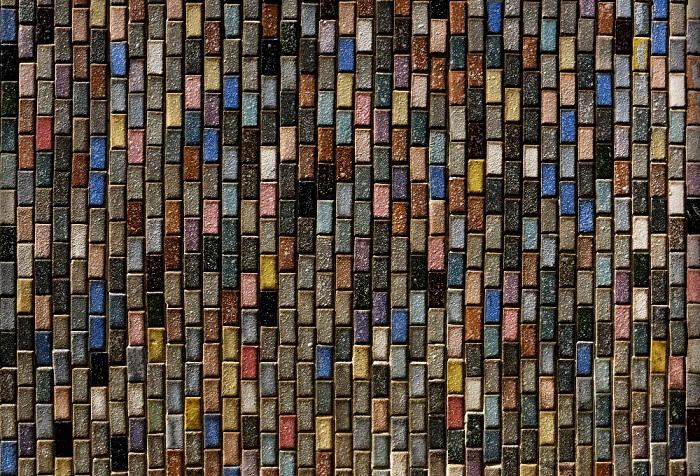
Compound Wall Design: Stone Tiles
Compound Wall Design Stonewall
Compound Wall Design Vertical Garden
Compound Wall Design: Light Approach
Compound Wall Design PVC Panel
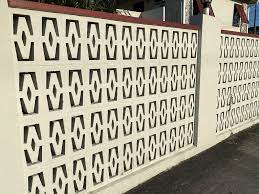
Compound Wall Design Jaali Wall
Compound Wall Design: Stylish Bamboo Fencing
Compound Wall Design: Perfect Mix
Compound Wall Design: The Indian Way
Get Inspired By Your Heritage
Compound Wall Design: Something Quirky
When Charming Meets Safety!
Go Old School!
Rugged Charm
Compound Wall Design : Concrete Block Wall
Unique Boundary Wall: Old Is Gold!
When History Meets Present
Go Natural With Stone Cladding
FAQ Section:
How much depth is required for the boundary wall? The depth required for a boundary wall depends on various factors such as the type of soil, the height of the wall, the width of the wall, and the load-bearing capacity of the foundation. In general, a minimum depth of 60cm (2 feet) is recommended for a boundary wall foundation. However, this depth can vary based on the above-mentioned factors.
For example, if the soil is loose or sandy, a deeper foundation may be required to prevent the wall from sinking or tilting. Similarly, if the wall is taller or wider, a deeper foundation with more reinforcement may be necessary to withstand the weight of the wall.
It’s important to consult with a structural engineer or a qualified contractor who can assess the specific requirements for your boundary wall based on the soil conditions and the design of the wall.
What is the difference between a party wall and a boundary wall? A party wall is a wall that separates two adjoining buildings that are owned by different people. It can be a wall that sits on the boundary line between the two properties or a wall that is entirely on one property but is used by both parties. Party walls are often found in semi-detached or terraced houses and can be structural or non-structural.
A boundary wall, on the other hand, is a wall that defines the boundary between two properties. It is usually built to mark the boundary between two properties and is owned by the person who built it. A boundary wall can be used as a party wall if it meets the criteria, but not all boundary walls are party walls.
In summary, the main difference between a party wall and a boundary wall is that a party wall separates two buildings that are owned by different people, whereas a boundary wall simply marks the boundary between two properties.
Which is the safest boundary wall? The safety of a boundary wall depends on various factors, such as height, material, design, and location. Generally, a boundary wall should be strong and sturdy enough to withstand harsh weather conditions and potential intruders. Here are some characteristics of a safe boundary wall:
1. Height: The height of a boundary wall is an essential factor in determining its safety. A higher wall can deter intruders and provide privacy. However, the height should comply with local regulations and not obstruct the view of traffic or pedestrians.
2. Material: The material used for a boundary wall should be sturdy, durable, and resistant to weather and environmental factors. Brick, concrete, and stone are some of the materials that can provide the required strength and durability.
3. Design: The design of a boundary wall should incorporate features that enhance its safety, such as anti-climb measures, spikes, or security cameras. The wall should also have a solid foundation and be free of cracks or other signs of weakness.
4. Location: The location of a boundary wall can affect its safety. If the wall is in a high-crime area, it may require additional security measures, such as lighting or alarm systems.
In summary, the safest boundary wall is one that is high enough to deter intruders, made of sturdy and durable materials, designed with safety features, and located in a secure area. It is advisable to consult with a professional builder or security expert to determine the most suitable design and materials for a safe boundary wall.
What is the standard size of a boundary wall? There is no standard size for boundary walls as it can vary depending on several factors such as the location, purpose, and personal preferences of the property owner.
However, in most residential areas, boundary walls are typically between 6 and 8 feet tall, while in commercial areas, they can range from 10 to 12 feet in height. The thickness of the wall can also vary depending on factors like the material used and the purpose of the wall.
It is important to check with local zoning laws and building codes to ensure that the height and thickness of the boundary wall comply with the regulations in your area.
What is the width of a boundary wall? The width of a boundary wall can also vary depending on several factors, including the purpose of the wall, the materials used, and the local building codes.
In general, the width of a boundary wall should be sufficient to provide stability and strength to the wall. The minimum width of a boundary wall is usually around 6 inches (15 cm), but it can be thicker for added strength and durability.
The width of the wall may also vary depending on the type of material used. For example, a concrete wall may be thicker than a brick wall.
It is important to consult with a professional builder or architect to determine the appropriate width for your boundary wall based on your specific requirements and local building codes.
How do you calculate the length of a boundary wall? To calculate the length of a boundary wall, you will need to measure the perimeter of the area that the wall will enclose. Here are the steps you can follow:
1. Measure the length of each side of the area where you want to build the boundary wall. This can be done using a measuring tape or a measuring wheel.
2. Add up the measurements of all the sides to get the total perimeter of the area.
3. Once you have the total perimeter, you can calculate the length of the boundary wall by multiplying the perimeter by the height of the wall.
For example, if you want to build a boundary wall around a rectangular area that measures 50 feet by 100 feet with a height of 8 feet, you would:
1. Measure the length of each side of the rectangle: 50 feet + 50 feet + 100 feet + 100 feet = 300 feet.
2. Calculate the perimeter of the rectangle, which is 300 feet.
3. Multiply the perimeter by the height of the wall: 300 feet x 8 feet = 2400 feet.
Therefore, the length of the boundary wall needed to enclose the rectangular area with a height of 8 feet is 2400 feet.
What is the benefit of a boundary wall? Boundary walls can provide several benefits, including:
1. Security: One of the main benefits of a boundary wall is that it can provide security and privacy for your property. It can help prevent trespassing, theft, and vandalism, and can also deter unwanted visitors.
2. Safety: A boundary wall can help protect children and pets by keeping them within the confines of the property and away from busy streets and other hazards.
3. Noise reduction: A boundary wall can help reduce noise from nearby traffic, construction, or other sources, making your property quieter and more peaceful.
4. Property value: A well-built and well-maintained boundary wall can enhance the value of your property, making it more attractive to potential buyers or renters.
5. Aesthetics: A boundary wall can also enhance the visual appeal of your property by providing a clear boundary and adding a sense of definition to the landscape.
Overall, a boundary wall can provide many benefits for property owners, including security, safety, noise reduction, property value, and aesthetics.
What are the running feet of the boundary wall? Running feet is a term used to measure the length of a straight line. In the case of a boundary wall, the running feet refers to the length of the wall along its base.
To calculate the running feet of a boundary wall, you need to measure the length of each straight section of the wall, add them up, and then convert the total into feet.
For example, if a boundary wall has two straight sections, one measuring 20 feet and the other measuring 30 feet, the total running feet of the wall would be:
20 feet + 30 feet = 50 feet
So, the running feet of the boundary wall would be 50 feet.
It’s important to note that the running feet measurement only accounts for the length of the wall, and does not take into account the height or width of the wall.
How do you calculate boundary wall cost? The cost of a boundary wall can vary widely depending on several factors, such as the type of material used, the height and length of the wall, and the complexity of the design. Here are the general steps to estimate the cost of a boundary wall:
1. Determine the length and height of the wall: Measure the length and height of the wall in running feet and feet, respectively. Multiply these measurements to get the total square feet of the wall.
2. Select the type of material: Choose the type of material you want to use for the wall, such as concrete, brick, stone, or wood.
3. Determine the cost of the material: Contact suppliers or check online to get an idea of the cost of the chosen material per square foot.
4. Estimate the labor cost: Calculate the labor cost of constructing the wall, which can depend on factors such as the complexity of the design and the experience of the laborers. You can obtain quotes from professional builders or contractors in your area to get an idea of labor costs.
5. Add the material and labor costs: Add the material and labor costs to get the total cost of constructing the boundary wall.
It’s important to note that the above steps provide a rough estimate and actual costs can vary depending on factors such as location, labor rates, and market fluctuations.
What is best for the boundary wall? The best material for a boundary wall would depend on several factors, such as the purpose of the wall, the location, and the budget. Here are some commonly used materials for boundary walls:
Concrete: Concrete is a durable and long-lasting material that can withstand harsh weather conditions. It also provides a high level of security and privacy.
Brick: Brick is a classic and traditional material that can give your boundary wall an attractive and rustic appearance. It is also strong and durable.
Stone: Stone is another natural material that can add an elegant and sophisticated look to your boundary wall. It is also sturdy and can last a long time.
Wood: Wood is a warm and natural material that can give your boundary wall a natural look. It is also affordable and can be easily installed.
Ultimately, the best material for your boundary wall will depend on your specific needs and preferences. It is important to consider factors such as cost, durability, maintenance requirements, and aesthetic appeal when making your decision. Additionally, local building codes and regulations may dictate which materials can be used in your area.
What is the cheapest boundary wall? The cheapest boundary wall would depend on various factors, such as the location, the purpose of the wall, and the materials available. In general, some of the most affordable materials for boundary walls include:
1. Chain link fencing: Chain link fencing is one of the most affordable options for a boundary wall. It is easy to install, low-maintenance and provides some level of security.
2. Barbed wire fencing: Barbed wire fencing is another low-cost option for a boundary wall. It is typically used in rural areas or for agricultural purposes.
3. Hedges: Planting hedges can be an affordable way to create a natural boundary wall. While they may take time to grow, they can provide a green and attractive boundary.
4. Bamboo fencing: Bamboo fencing can be an affordable and eco-friendly option for a boundary wall. It is easy to install, lightweight, and durable.
It is important to keep in mind that while these options may be affordable, they may not provide the same level of security and privacy as more expensive materials like concrete or brick. Additionally, local building codes and regulations may impact which materials are allowed for boundary walls in your area.
Conclusion:
Designing a boundary wall is an important aspect of property development. It provides privacy, and security and defines the limits of the property. A well-designed boundary wall can enhance the aesthetics of a property, and also add value to it. When designing a boundary wall, it is important to consider the purpose, location, budget and style. Using natural materials, incorporating lighting, adding plants and creating a focal point are just some of the many ideas you can use to design a boundary wall that is both functional and attractive.


")