If you are someone who loves to paint the inside of kitchen drawers, then this article is for you. This is a question that many people ask themselves when they are in the kitchen and they find a drawer that needs painting. They might be wondering: Do you paint the inside of kitchen drawers?
The answer is yes, but there are some things to consider before you decide. First, if you have children or pets at home, make sure that you don’t get any paint on them. Second, if your drawer has been painted before and has been exposed to heat and humidity for a long time, it might not be worth painting over again.
The inside of kitchen drawers is a great place for storing all those little things that end up getting lost in the bottom of the drawer – like your keys, utensils and spatulas. If you have painted the inside of your kitchen drawers, it is time to start painting them again.
If you paint the inside of your kitchen drawers, you will need to repaint them every few years or so as they get dirty from food particles and other substances. This can be a difficult task if you don’t have an extra set of hands to help out with these tasks.
How to Paint the Inside of Kitchen Drawers- 7 Steps
Painting the inside of kitchen drawers is a task that can be quite challenging. However, it can also be rewarding because you are able to transform an old drawer into something new and fresh.
1. Remove all items from the drawer
2. Clean the drawer thoroughly with soap and water
3. Apply primer to the inside of the drawer
4. Paint a base coat of your chosen color
5. Apply a second coat of paint on top of the first coat
6. Allow the paint to dry for at least 24 hours before adding your stencils
7. Once the paint has dried, add decorative items and enjoy your new kitchen drawer
The Benefits of Painting Your Kitchen Drawers. What are They?
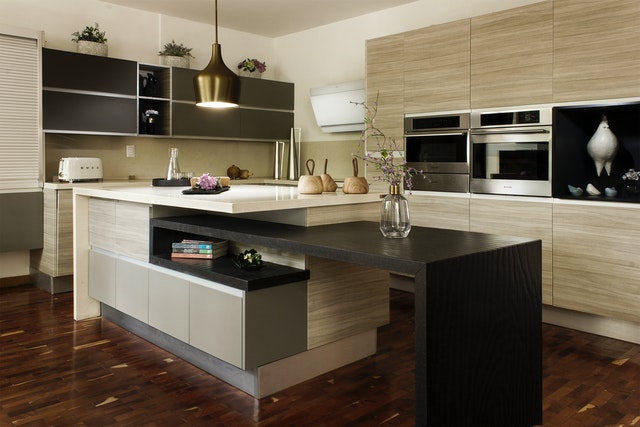
Have you ever seen a home with a colorful kitchen? If not, then you should because the colors add to the overall feel of the room. But, there is a downside to painting your kitchen drawers. So, if you are thinking about painting your kitchen drawers but are hesitant because of the work involved, here are some benefits of painting them.
The benefits of painting your kitchen drawers include:
– It’s easier to clean up spills and stains on paint than on wood or other materials.
– It’s more durable and will last for many years.
– The paint will help protect against moisture and humidity that could cause wood or other materials to rot over time.

How Much Does It Cost to Paint Your Kitchen Drawers? A Cost Comparison.
The cost of painting your kitchen drawers can vary depending on the size, quality, and location of the project. For example, a professional painter can charge up to $500 for a small-sized kitchen. However, if you are looking for a more affordable option, you may consider hiring a local handyman to paint your drawers for as low as $50.
If you are looking for an affordable option that will still produce great results and last long-term, then painting your kitchen drawer with oil paint is one of the best options out there. Oil paints are known to be easy on the environment and easy on the budget too.
Painting Inside Cabinets and Drawers with Exterior Primer Paints
Painting inside cabinets and drawers can be a difficult task. There are many areas that need to be covered quickly in order to avoid any damage.
The best way to paint inside cabinets and drawers is by using exterior primer paint. This type of paint is designed for painting outside surfaces, so it will dry very fast, which makes painting inside cabinets and drawers much easier than if you were using traditional paints.
It also means that you won’t have any problems with your paint getting stuck or smearing when you’re trying to get into the tight spaces of your cabinet or drawer.
FAQs about paint the inside of kitchen drawers
Paint colors in the kitchen are important because they can help you organize your space and create a vibe that is unique to you.
Paint colors for kitchen drawers can be used to create a mood or set the tone of the room. A color scheme with earthy tones like green, brown, and yellow can make a room seem cozy while warm colors like red, orange, and yellow make it feel welcoming.
Interesting paint colors for a room in a house can add personality to your space. For example, if you have an office in your living room, try painting the walls with bright white paint. It will brighten up that area of your home without taking away from the rest of the decor.
Preparing to paint a room can be a daunting task. There are many things that need to be done before you can start painting.
The first step when painting a kitchen is preparing the area for painting. This includes cleaning the surfaces, removing any old paint, and prepping any items that need to be moved out of the area.
The first step when painting a kitchen is preparing to paint inside cabinets. This includes taking off hinges, moving appliances out of cabinet doors and securing them in place, and installing new hinges or handles on cabinets with no hinges or handles installed.
There are a lot of different types of paint that you can use to paint your kitchen drawers. However, the type of paint that you choose depends on what color scheme you have.
There are some paints which are better than others for painting your kitchen drawers. The best type of paint to use is one that is water-based. These paints dry quickly and are easy to clean up after they dry.
The best type of paint to use for painting your kitchen drawers is one that is water-based. These paints dry quickly and are easy to clean up after they dry.
Paint is a versatile material that can be used in many ways. It is a good idea to use paint to paint the inside of kitchen drawers because it can prevent the growth of mold and bacteria.
Paint has been used in many different ways, one of which is painting your kitchen drawers. Paint has been proven to prevent the growth of mold and bacteria inside your kitchen drawer because paint contains antimicrobial properties that inhibit the growth of microorganisms.
In addition, if you want to be sure that you are getting rid of any residual food particles, it’s best to use a degreaser like bleach or vinegar before painting over them with paint.
With the introduction of new technologies and products, new uses for old items can be found. In this case, we will discuss some of the possible uses for paint that you may have in your kitchen drawers.
Possible uses for paint:
– Use it as a non-toxic cleaner to clean surfaces like countertops, appliances, and floors.
– Use it as an alternative to toxic cleaners to clean surfaces.
– Get creative and use it as wallpaper or stencil material.
The answer is yes. There are risks involved with painting the inside of your kitchen drawers.
If you are planning to paint the inside of your kitchen drawers, make sure to use paint that is non-toxic and safe for children and pets.
This article will discuss some important things to consider when painting the inside of kitchen drawers. It will also provide some tips on the best paint for the job and how to clean up afterward.
The first thing you should do when painting your kitchen drawers is to prepare the surface. You can use a primer before painting, but this is not necessary if you want a more natural look. If you are going for a glossy finish, then you should use a primer as well as a top coat of paint.
Paint: One of the most important considerations when it comes to painting your kitchen drawers is what type of paint to use. Some paints are better suited for certain surfaces than others, so be sure to read up on what type of paint would work best in your situation.
This is a question that many homeowners ask themselves when they’re looking to paint their kitchen. It can take as long as two hours to paint the inside of one drawer, so it’s important to find a way to speed up the process.
One way is by using a sprayer. This will allow you to paint your drawers in just minutes. Another option would be using wallpaper paste and other tools.
Painting the inside of kitchen drawers can be a difficult task. It is not only hard to keep the paint from dripping outside of the drawer, but also to keep it from dripping on other items in the drawer. For this reason, it might take you a lot longer than you think to paint your kitchen drawers.
If you want to paint your kitchen drawers without worrying about any mess, then using a roller and brush might be an option for you. You can also use a spray bottle with water and acrylic paint for a more controlled and consistent finish.
The tools that you should use for painting the inside of your kitchen drawers are dependent on what type of surface or finish you are trying to achieve.
Paint the inside of your kitchen drawers with a sponge and some paint. Use a small roller to paint the upper portion of the drawer.
Apply a thin layer of paint to the inside of your kitchen drawers. Apply a second coat if needed, but make sure you let it dry out completely before adding another coat.
In general, you should paint the inside of your kitchen drawers when you want to make them look more attractive. You can also use this technique to brighten up a dark room. However, if you have a lot of kids or pets in your home, it’s best to avoid painting the inside of your kitchen drawers.
Conclusion-
It is important to keep your kitchen drawers looking like new. This is because they are the only place where you will find all your cooking utensils.
The best way to keep your kitchen drawer looking like new forever is by using a drawer liner. These liners can be found in stores and online, and they are easy to install.
If you want to try something different, then you can use a clear plastic bag inside your drawer instead of a liner. This will prevent scratching from utensils and other objects in the drawer.